Introduction
The beauty industry has seen a massive shift towards personalization in recent years. More people are taking control of what they put on their skin. Consequently, the search for how to make lip gloss at home has surged in popularity. This trend is not just about saving money. It is about knowing every single ingredient in your beauty products. Store-bought glosses often contain preservatives and chemicals. However, homemade versions allow for complete transparency. You can choose natural, organic, and cruelty-free components. Therefore, you ensure that your lip care routine is safe and healthy. Additionally, making your own cosmetics is a fun and creative process.
You can customize colors, scents, and textures to match your mood. As we move into 2026, this DIY spirit is stronger than ever. Technology and new natural ingredients have made the process even easier. You no longer need a professional lab to create high-quality gloss. Your kitchen can become your personal beauty studio. This guide will walk you through everything you need to know. We will cover ingredients, recipes, and expert tips. Ultimately, you will gain the skills to craft the perfect pout every time.
Essential Ingredients for a Perfect Pout
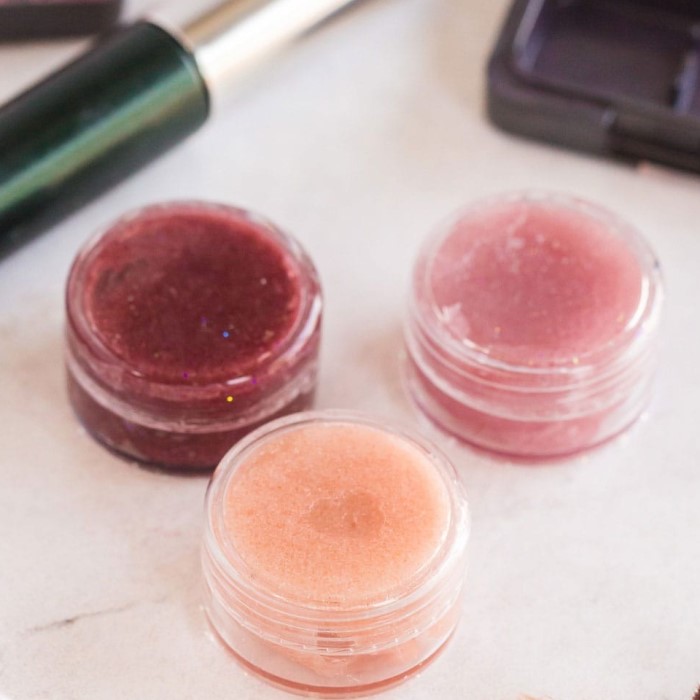
To create a high-quality product, you must start with the right building blocks. The base of any good gloss is a carrier oil or butter. For instance, coconut oil and shea butter are popular choices. They provide moisture and a smooth texture. Furthermore, you will need a thickening agent. Beeswax or candelilla wax is essential for structure. These waxes help the gloss stay on your lips longer. If you want a glossy finish, you should consider adding a small amount of Vitamin E oil. This acts as a preservative and an antioxidant. Additionally, color is a vital component. You can use natural powders like beetroot or cocoa powder. Mica powders are also excellent for adding shimmer.
When learning how to make lip gloss at home, sourcing quality ingredients is key. You should look for cosmetic-grade supplies. Consequently, your final product will look professional. Avoid using food coloring as it may stain the lips unevenly. Instead, opt for oil-soluble dyes. These mix well with the wax and oil base. Finally, consider adding a flavor oil. Peppermint or vanilla adds a nice touch. However, ensure the flavor oil is lip-safe. By selecting high-quality ingredients, you guarantee a superior result.
Tools You Need for Your DIY Project
Before you begin the mixing process, you must gather the necessary equipment. Having the right tools makes the process seamless and safe. First, you need a heat-resistant bowl or a double boiler. You will use this to melt your waxes and oils safely. Direct heat can burn the ingredients. Therefore, a double boiler is the best option for gentle melting. Next, you require a set of measuring spoons and cups. Precision is important in cosmetic formulation. If your ratios are off, the texture might become too hard or too soft. Additionally, you will need a whisk or a glass stirring rod. This helps you mix the ingredients thoroughly. When researching how to make lip gloss at home, many people forget about storage.
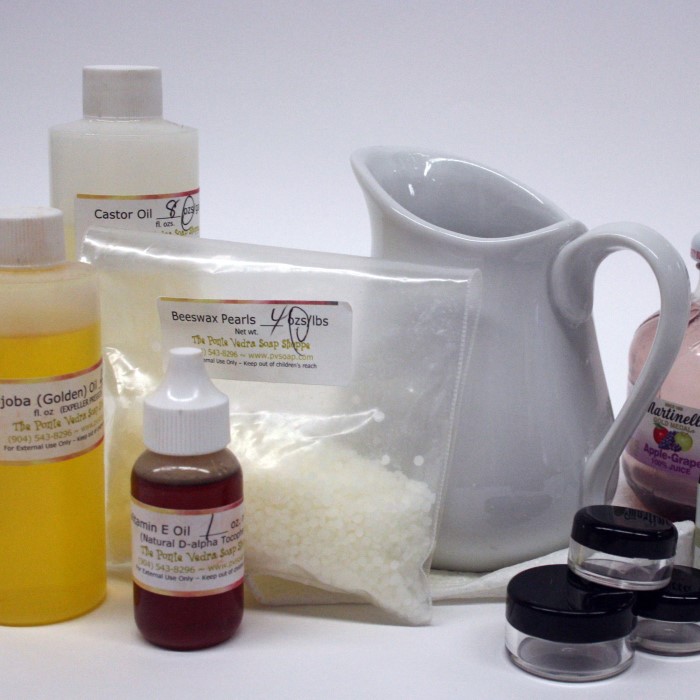
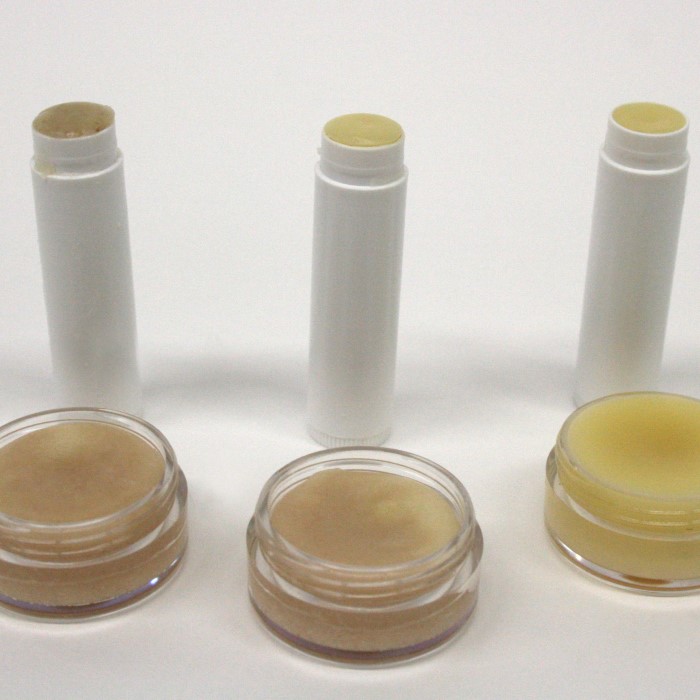
You need clean, sterilized containers. Lip gloss tubes, pots, or tins are perfect options. You must clean them with rubbing alcohol before use. This prevents bacteria from growing in your product. Furthermore, you will need a funnel. A funnel helps you pour the hot liquid into small tubes without spilling. Finally, keep some paper towels nearby. Crafting can get messy. Being prepared ensures that you enjoy the process without interruptions.
Step-by-Step Guide to a Basic Recipe
Now that you have your ingredients and tools ready, it is time to start. This basic recipe is perfect for beginners. First, take a heat-resistant bowl. Add two tablespoons of coconut oil. Then, add one tablespoon of beeswax pellets. If you prefer a vegan option, use candelilla wax instead. Place the bowl over a pot of simmering water. This creates a double boiler effect. Stir the mixture gently until everything melts completely. Consequently, you will have a clear, liquid base. Next, remove the bowl from the heat.
This is the moment to add your extras. For example, you can add a few drops of Vitamin E oil. Then, add your chosen color or mica powder. Whisk the mixture rapidly. You must ensure the color is distributed evenly. Afterward, add your flavor or essential oil. Pour the liquid into your containers immediately. Work quickly because the wax starts to harden as it cools. Let the gloss sit for at least an hour. Once it solidifies, it is ready to use. This simple method answers the question of how to make lip gloss at home effectively.
Creative Variations and Flavors for 2026
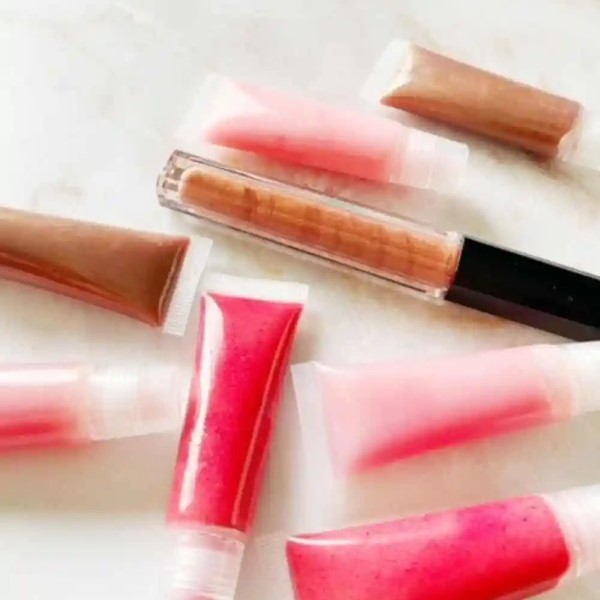
The beauty of DIY cosmetics lies in the endless possibilities for customization. Once you master the basic recipe, you can experiment with variations. For instance, the “glazed donut” look is very trendy in 2026. To achieve this, increase the ratio of oil to wax. This creates a thinner, more translucent gloss. On the other hand, you might prefer a tinted lip balm. In this case, add more beeswax and pigment. This results in a solid stick that provides bold color. Furthermore, you can play with exciting flavors.
Coffee-infused oil is a great option for the morning. Simply steep coffee beans in your carrier oil before using it. Alternatively, fruit flavors are always popular. Strawberry, raspberry, and peach oils smell delicious. You can also create a plumping gloss. Add a tiny drop of peppermint oil or cinnamon oil. These ingredients stimulate blood flow to the lips. Consequently, your lips appear fuller and rosier. Another fun idea is to create a color-changing gloss. You can use special pigments that react to your body’s pH level. Therefore, the gloss looks different on everyone. Exploring these variations makes the process exciting.
Troubleshooting Common Lip Gloss Issues
Sometimes, your DIY project might not go exactly as planned. Do not worry, as this is part of the learning process. One common issue is a grainy texture. This often happens when using shea butter. If the butter cools unevenly, it can form crystals. To fix this, you can remelt the mixture. Then, cool it down rapidly in the refrigerator. Stirring it as it cools also helps. Another problem is separation. If your gloss looks oily on top and waxy on the bottom, you need to mix it longer.
You must whisk the mixture while it cools. This emulsifies the ingredients properly. Furthermore, some people find their gloss too sticky. This usually means there is too much wax or sticky oil. Try reducing the wax amount in your next batch. You can also add a bit of castor oil. Castor oil provides slip and reduces tackiness. If your gloss is not pigmented enough, add more mica or colorant. However, be careful not to add too much powder. Too much powder can make the texture gritty. By understanding these common problems, you can master how to make lip gloss at home like a pro.
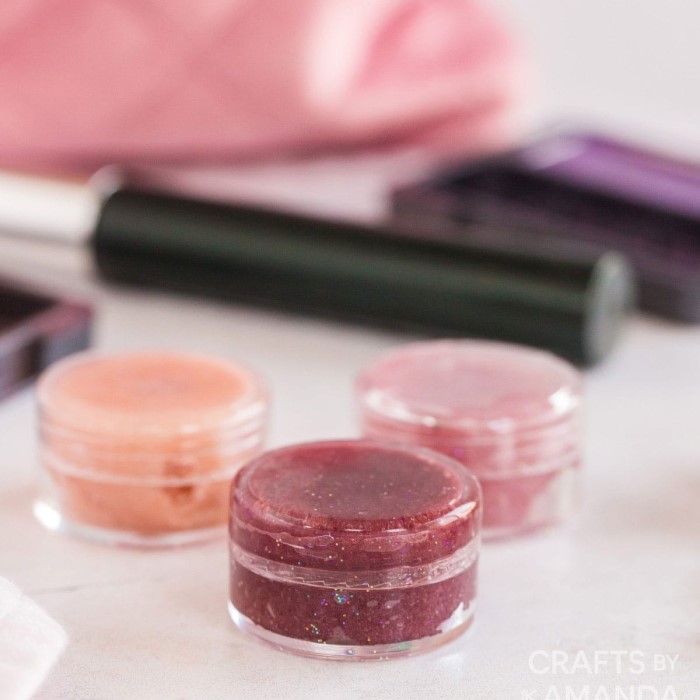
Packaging and Storing Your Creations
Proper packaging is essential for the longevity and appeal of your lip gloss. You want your product to look professional and stay fresh. First, consider the type of container you prefer. Squeeze tubes are great for liquid glosses. They are easy to apply on the go. However, pots require a finger or a brush for application. These are better for thicker balms. Regardless of the container, cleanliness is paramount. You must sterilize your containers before filling them. Bacteria can easily grow in moist environments. Therefore, washing them with soapy water and then wiping them with alcohol is a good idea. Once filled, label your creations. Include the date and the ingredients used. This helps you keep track of freshness.
Homemade lip gloss typically lasts for six to twelve months. Since there are no strong commercial preservatives, the oils can go rancid over time. Consequently, you should store your gloss in a cool, dark place. Avoid leaving it in a hot car or direct sunlight. Heat can melt the wax and spoil the oils. Proper storage ensures that your hard work pays off. You can enjoy your custom gloss for months.
The Benefits of Going Natural with Your Lip Care
Switching to homemade beauty products offers numerous advantages for your health and the environment. Commercial lip glosses often contain synthetic dyes and fragrances. These can cause allergic reactions or dry out your lips. Conversely, when you learn how to make lip gloss at home, you choose natural ingredients. Oils like jojoba and almond actually nourish your skin. They provide deep hydration without harmful side effects. Additionally, making your own products reduces plastic waste. You can reuse containers or buy sustainable packaging. This small step contributes to a healthier planet. Furthermore, DIY beauty is cost-effective. High-end lip glosses can be very expensive.
However, buying ingredients in bulk allows you to make many products for a fraction of the price. You can even make gifts for friends and family. Personalized lip gloss makes a thoughtful and unique present. Moreover, you have complete control over ethical sourcing. You can ensure that your beeswax is sustainably harvested. You can also guarantee that your oils are vegan and cruelty-free. This transparency is rare in the commercial beauty industry. Therefore, the shift towards DIY is a shift towards a more conscious lifestyle.
FAQ: Answering Your Most Pressing Questions
How do you make homemade lip gloss?
You make homemade lip gloss by melting a wax base, like beeswax, with carrier oils, such as coconut or almond oil. After melting, you whisk in colorants and flavors. Finally, you pour the mixture into containers to cool and set.
How to make 3 ingredient lip gloss?
To make a simple 3-ingredient gloss, you need coconut oil, beeswax, and a colorant like beetroot powder or mica. Melt the oil and wax together. Then, mix in the color. Pour it into a pot to set for a quick and easy balm.
What are the ingredients in lip gloss?
Common ingredients include waxes for structure, oils for moisture, and butters for texture. Many recipes also include Vitamin E for preservation. Colorants and flavor oils are optional additions for aesthetic appeal.
How to make Korean lipgloss at home?
Korean lip gloss focuses on a “glass lips” effect. You need a higher ratio of oil to wax for a very wet look. Use lightweight oils like grapeseed oil. Add a touch of shimmer for that popular, dewy finish.
Conclusion: Embrace Your Inner Cosmetic Chemist
The journey into DIY beauty is both rewarding and empowering. By mastering how to make lip gloss at home, you take charge of what touches your skin. You no longer need to rely on commercial products with unknown chemicals. Instead, you can create safe, natural, and effective alternatives right in your kitchen. The process is simple, fun, and incredibly creative. You have learned about the essential ingredients and tools. You have also discovered various recipes and troubleshooting tips.
Furthermore, you now understand the importance of packaging and storage. As you experiment with different flavors and colors, you will develop your own signature style. Remember that practice makes perfect. Do not be afraid to try new combinations. Perhaps you will invent the next big beauty trend. So, gather your supplies and start mixing today. Your lips will thank you for the natural, loving care. Enjoy the shine and confidence that comes with your very own creation.