Introduction: Embracing the Art of Distillation
In recent years, the interest in home distillation has surged, as many people seek to create their own essential oils, spirits, and other homemade beverages. Understanding how to make a still empowers you to harness the art of distillation effectively. Whether you’re interested in extracting essential oils for health and wellness or crafting homemade spirits for personal enjoyment, creating your own still is a rewarding endeavor that offers both creative expression and practical benefits.

This comprehensive guide walks you through the process of making your very own still, providing details on the materials required, step-by-step assembly instructions, and important safety considerations. Let’s dive into the fascinating world of distillation and how you can get started on this exciting project!
The Benefits of Making Your Own Still
1. Cost Savings
One of the most compelling reasons to build your own still is the potential for significant cost savings.
- Lower Initial Investment: Commercial stills can be expensive—ranging from hundreds to thousands of dollars. By constructing your own still, you can keep expenses minimal by sourcing materials inexpensively. Many components can even be repurposed from household items.
- Long-term Savings: Once you have your still up and running, the cost of producing essential oils or spirits often becomes lower than purchasing them commercially. Over time, this can result in considerable savings, especially if you’re a frequent user.
2. Customization for Your Needs
Making your own still allows you to tailor it to your specific distillation goals.
- Personal Preferences: You have complete control over the design and size of your still, enabling you to create custom designs perfect for specific essential oils or beverages. You can modify your still for different techniques based on your distillation goals.
- Material Choices: Select the materials that best suit your preferences for performance and aesthetics. For example, higher quality copper may improve the flavor profile of distilled spirits, while glass can provide a clean and visually appealing option for essential oils.
3. Educational Experience
Building a still offers an excellent learning opportunity that can deepen your understanding of distillation.
- Hands-On Learning: Engaging in this DIY project provides valuable practical skills and insights into the science behind distillation. You will learn about how temperature and pressure affect the distillation process, enabling you to achieve better results.
- Fostering Creativity: The process of creating custom flavors, aromas, and blends allows for experimentation and innovation. Your initial designs can evolve as you learn more about the science and art of distillation.
Materials You’ll Need to Make a Still
1. Essential Components
To begin constructing your still, gather these essential materials:
- Copper Tubing: This is a primary material for the still due to its excellent heat conductivity and ability to remove undesirable sulfur compounds from alcohol during distillation. Aim for 16-18 gauge tubing, as it strikes a good balance between flexibility and strength.
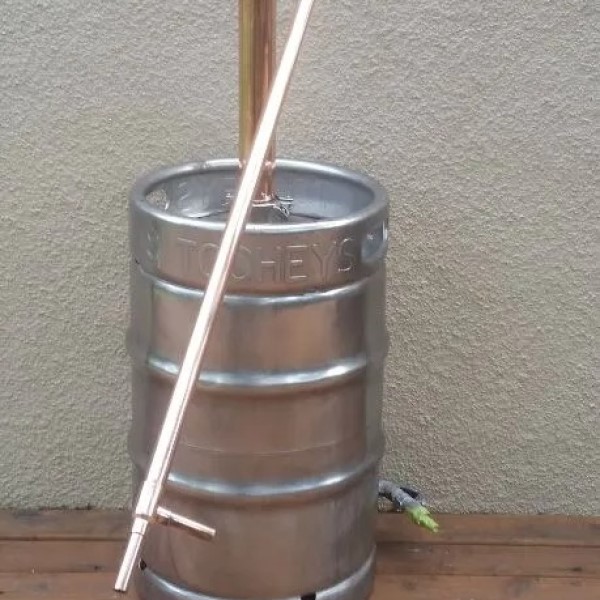
- Distillation Pot: Your pot should be heat-resistant and capable of withstanding high temperatures. Common choices include stainless steel or even aluminum cooking pots, provided they are made from food-safe materials.
- Distillation Head: This is a key component that directs the vapor to where it will condense. You can create this from a wide-mouth glass jar fitted with proper connections.
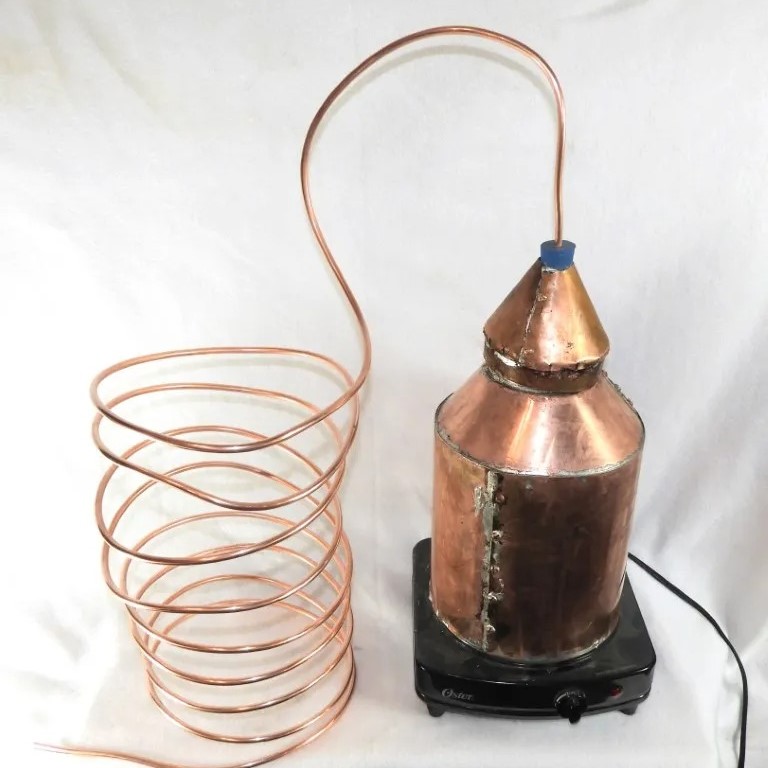
- Condenser: A cooling element that condenses vapor back into liquid form. This is often a coiled copper or glass tube running through a water jacket. Ensure it is capable of retaining cooling water effectively.
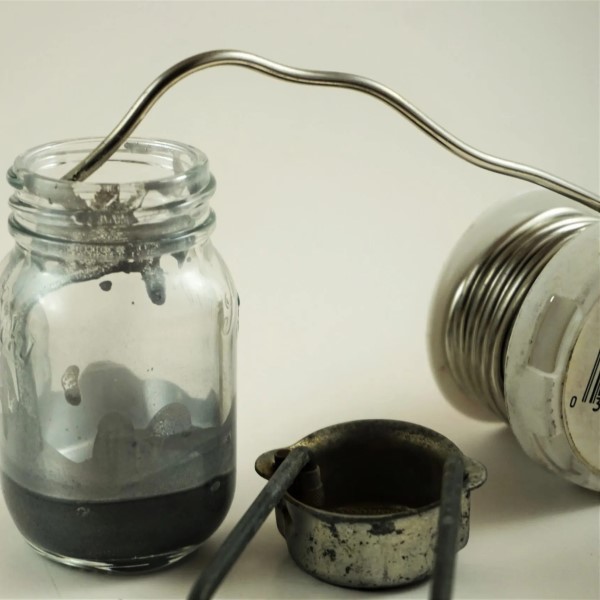
- Collection Jar: A clean glass container to hold the distilled output. Depending on your distillation goal, you may want to consider different jar sizes.
2. Optional Enhancements
To improve the performance and longevity of your still, consider the following optional materials:
- Sealing Materials: Use food-grade silicone sealant or plumber’s tape to create airtight seals. Proper seals are critical to maintaining pressure and direction of vapor flow during the distillation process.
- Heat Source: Depending on your setup, you may need a reliable heat source. Common options include a gas stove, electric hot plate, or induction cooktop, depending on your safety and convenience preferences.
- Thermometer: Using a thermometer will help you monitor and control temperatures throughout the distillation process. Proper temperature control is essential for achieving desired separation of components.
Step-by-Step Guide: How to Make a Still
1. Designing Your Still
How to make a still? The foundational step in making your still is planning and design.
- Sketch Your Blueprint: Create a rough design of your still, detailing how each part will connect. Consider the flow of vapor and how each component will integrate together.
- Determine Overall Size: Decide the size of your still based on your intended production volume. If you plan to distill large quantities, a larger setup will be necessary, which will dictate the length of copper tubing and the size of your pot.
2. Assembling the Still
Follow these steps to assemble your still effectively:
Preparing the Pot
- Thorough Cleaning: Start the process by cleaning your pot meticulously. It’s important to remove any dirt, grease, or residues from previous uses. Use a mixture of warm water and mild dish soap, scrubbing well to ensure that all surfaces are clean and free of contaminants.
- Inspecting Old Pots: If you are using an older pot that has been previously used for other purposes, inspect it carefully. Look for any signs of wear or damage, as well as any chemical residues from past operations. Avoid using pots that have been treated with toxic materials, as these can leach into your distillate.
- Cutting the Lid for the Distillation Head: Once the pot is clean, focus on preparing the lid. Using a suitable cutting tool, carefully cut a hole in the center of the lid. Make sure that the diameter of the hole is appropriate for the size of the distillation head you will be using, allowing it to fit snugly without excessive movement.
- Ensuring Proper Fit: After cutting the hole, check for rough edges. Use sandpaper or a file to smooth out any sharp edges that might scratch the tubing or create a poor seal during assembly. A snug fit is vital to prevent vapor loss during the distillation process.
Connecting the Distillation Head
- Securing the Copper Tube: With the pot prepared, the next step is to connect the distillation head. Position a copper tube over the hole in the pot lid. Ensure that the diameter of the tube matches the hole closely for an efficient connection.
- Creating a Tight Seal: Use a clamp or bracket to hold the copper tube securely in place. This prevents movement during the distillation process, which can lead to inefficient vapor capture.
- Employing Sealant: To enhance the connection and prevent any vapor from escaping, apply food-grade sealant around the joint where the copper tube meets the lid. This ensures an airtight seal and helps to maintain the necessary pressure within the pot during operation.
- Check for Gaps: After applying the sealant, inspect the connection points carefully. Ensure that all gaps are filled to prevent energy loss and maximize the efficiency of your distillation setup.
Setting Up the Condenser
- Positioning the Condenser: Find an appropriate location to position your condenser. It should be oriented in a way that allows it to capture the vapors effectively as they rise from the distillation head. Make sure the setup has good accessibility and ventilation.
- Connecting Tubing: Attach tubing from the end of the distillation head to the condenser. Ensure that the tubing is the correct length and diameter for efficient vapor flow, and use clips or brackets to secure it in place.
- Ensuring Cold Water Flow: To properly condense the vapor back into liquid form, ensure that cold water circulates around the condenser. Connect a water line to the condenser’s jacket or inlet, and make sure that water can flow freely to maintain a cool temperature.
- Monitoring Water Levels: If your condenser design requires a reservoir for water, regularly check the water levels to ensure that the condenser remains cool during operation. An insufficient water supply could result in inefficient condensation and may affect the overall quality of the distillate.
- Testing Connections: Once the condenser is set up and connected, double-check all fittings and tubing for tightness. Any leaks in this system can lead to safety hazards and reduced efficiency during the distillation process.
3. Testing the Still
Once you assemble the still, it’s crucial to ensure it functions properly before using it for distillation.
- Water Test: To ensure everything works correctly, conduct a water test. Fill the pot with water and turn on the heat. Monitor for leaks and check that vapor flows correctly through the condenser.
- Adjustments as Needed: If you find any leaks or performance issues during the water test, make the necessary adjustments before proceeding with actual distillation.
Safety Considerations When Distilling
1. Personal Safety
How to make a still? Safety should always be your top priority when working with a still.
- Work in a Well-Ventilated Area: Ensure your workspace is well-ventilated to reduce exposure to fumes produced during distillation.
- Wear Protective Gear: Use goggles and gloves to protect yourself from burns and chemical exposure. Safety should never be overlooked during the distillation process.
2. Handling Distillates
When handling the distilled product, ensure you take precautions.
- Labeling: Clearly label each container with the contents and production date. This helps avoid mix-ups and ensures safe storage.
- Proper Storage: Store your spirits or essential oils in cool, dark areas using airtight containers. This helps maintain quality and flavor while preventing evaporation.
Frequently Asked Questions
How to make a solar still at home?
To make a solar still, create a shallow container filled with water, place a smaller container in the center, cover the larger container with clear plastic, and place a weight in the center of the plastic. Sunlight will cause evaporation, which will then condense and collect in the small container.
How much will a 5-gallon still produce?
A 5-gallon still typically yields approximately 1 to 1.5 gallons of distilled spirits or essential oils per run, depending on the ingredients and the efficiency of the distillation process.
What gauge copper is used to make a still?
For constructing a still, using 16 to 18 gauge copper tubing is common. This thickness provides sufficient flexibility and strength while allowing for effective heat transfer.
Can you make spirits without a still?
While you cannot produce distilled spirits without a still, you can create fermented beverages like beer or wine through fermentation processes that do not require distillation.
Conclusion: Start Your Distillation Journey
Understanding how to make a still not only helps you create your own essential oils or spirits but also connects you with a time-honored craft that can be both fun and rewarding. By following the steps outlined in this guide and adhering to safety precautions, you can successfully build and operate your still at home.
The skills you gain through building your still can inspire further exploration into renewable resources and home crafting. Embrace this journey into the world of distillation, experiment with different recipes, and enjoy the satisfaction of creating your own products. Gather your materials, follow the instructions, and start crafting your very own still today!