Introduction: The Joy of Crafting Origami Stars
Origami is an ancient Japanese art form that transforms simple sheets of paper into intricate designs through folding techniques. Origami star instructions allow you to create beautiful stars, ideal for decorations, gifts, or fun crafting projects. These stars add a touch of creativity and charm to any space, making them perfect for parties, holidays, or simply brightening your home.
In this comprehensive guide, we will explore easy origami star instructions, along with tips for creating awe-inspiring decorations. Whether you’re a beginner looking to dive into the world of origami or an experienced folder seeking new designs, this article will provide you with everything you need to get started.
The Basics of Origami
1. Understanding Origami Fundamentals
Origami, derived from the Japanese words “ori” (folding) and “kami” (paper), originated over a thousand years ago. This art form promotes creativity and mindfulness while encouraging intricate designs through the art of paper folding.
- Artistic Expression: Origami serves as a medium for personal and artistic expression. Through folding, individuals can create everything from simple shapes to complex models.
- Cognitive Benefits: Engaging in origami enhances fine motor skills, improves concentration, and promotes patience. Each fold is a step towards mastering the craft, enhancing mental discipline.
2. Gathering Your Materials
Before diving into origami star instructions, gather the essential materials to make your crafting experience enjoyable and productive.
- Paper Choices: Start with square sheets of origami paper in vibrant colors. Traditional origami paper is lightweight and easy to fold, making it an ideal choice. You can also experiment with patterned or textured paper for added flair.
- Tools for Success: While most origami can be done without tools, having a bone folder or a flat object like a credit card helps create sharp, clean folds. These tools enhance the precision of your work and maintain the integrity of the designs.
Easy Origami Star Instructions
1. The Basic Origami Star Design
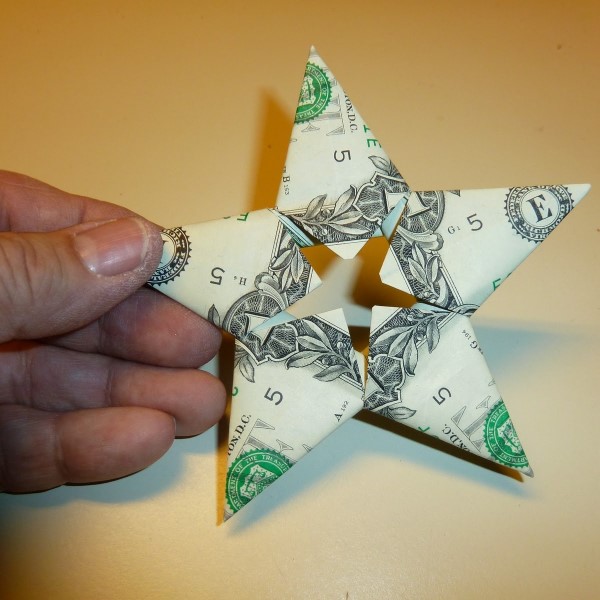
Let’s begin by creating a simple origami star. This easy design serves as a foundation upon which you can build more intricate projects in the future.
Start with a Square
- Selecting the Paper:
Begin with a square sheet of paper. It can be any size you prefer, but a standard 6×6 inch piece works well for easy folding. Use a piece of colored paper with the colored side facing up; this will be the visible side of your star. - Positioning:
Place the paper on a flat, sturdy surface. Ensure you have enough space to work without distractions, as a clean workspace makes it easier to focus on your folding.
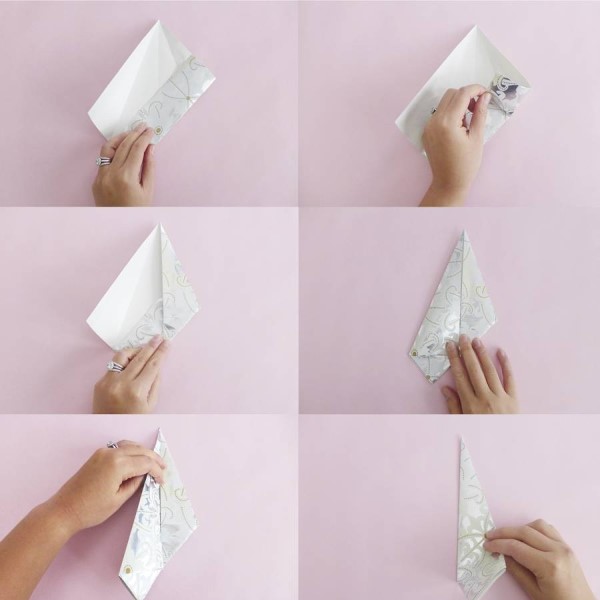
Fold in Half Diagonally
- Creating a Triangle:
Fold the paper diagonally by bringing one corner to meet the opposite corner. This forms a triangle. Make sure the edges align perfectly for an accurate fold. - Creasing the Fold:
Use your finger or a flat object, like a ruler, to crease the fold firmly. After creasing, unfold the paper back to its square shape. This crease will serve as a guide for the next steps.
Create a Smaller Triangle
- Folding the Top Point:
Take the top point of the triangle (the peak) and fold it down to meet the bottom edge of the paper. This action creates a smaller triangle that sits on top of the square. - Ensuring Accuracy:
Make sure the new fold is precise, ensuring that the sides match up evenly. Crease the fold well to maintain the shape effectively.
Fold the Corners
- Bringing the Corners Up:
Take the left and right corners of this smaller triangle. Fold each of them toward the top point (the peak) of the triangle. This creates a new triangle that narrows and tapers toward the top, forming a pointed shape. - Check Your Work:
Make sure the corners are aligned carefully with the top point. A precise fold will result in a more symmetrical design, which is key for an aesthetically pleasing star.
Flip and Fold
- Turning the Paper Over:
Carefully flip the entire folded paper over so that the new triangle you’ve created is facing down. This will hide the previous folds and prepare for the next step in forming the star. - Creating a Pocket:
Fold the bottom point of the triangle upwards. Tuck this point into the folds you just made, creating a pocket-like structure. Ensure that the fold is secure, so it doesn’t unfold easily. - Shaping the Star:
Adjust the shape to resemble that of a star. Gently pull at the edges and corners to refine the form. You can manipulate the folds slightly until you’re satisfied with the star’s appearance.
Final Touches
- Adjusting for Symmetry:
Once your star shape is formed, step back to look at its overall symmetry. Make small adjustments to any points that seem out of place or uneven. - Decorating (Optional):
If desired, you can decorate the star with markers or stickers to add personal flair. This can make your creation even more special if you’re using it for festive occasions. - Displaying Your Star:
Your paper star is now complete! You can hang it, use it for decorations, or even attach it to a card for a thoughtful gift. Enjoy your handiwork!
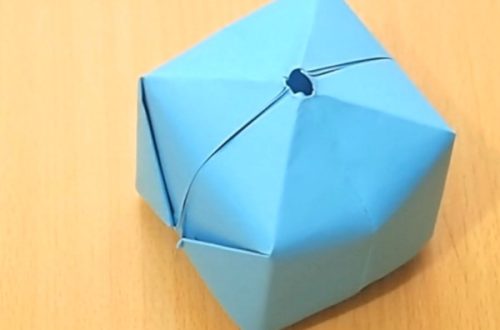
2. Inflating the Star
- Gently Inflate: Locate the open pocket at the bottom. Carefully blow air into this opening to inflate your star into a three-dimensional shape. Tweak and shape as needed to ensure it has a smooth and balanced appearance.
- Final Adjustments: Use your fingers to smooth out any wrinkles or make adjustments to achieve a clean finish. Your simple origami star is now ready for display!
Creative Variations of Origami Stars
1. Exploring Different Designs
Now that you have created a basic origami star, let’s look at some variations. Playing with designs allows you to develop skills and enjoy the creative process.
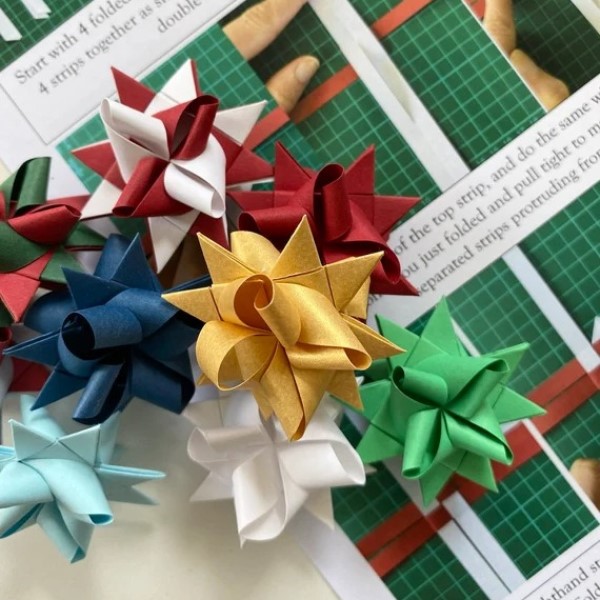
- Multi-Layered Stars: Consider crafting layered stars by folding several smaller stars and stacking them on top of each other. This adds depth and intricacy to your decoration.
- Star Medallion: Modify the basic design into a star medallion by using different patterns and sizes. Layering different colored papers or using metallic finishes can enhance the visual appeal.
2. Using Stars for Decorations
Now that you can make a variety of origami stars, let’s discuss ways to use them to brighten up your space.
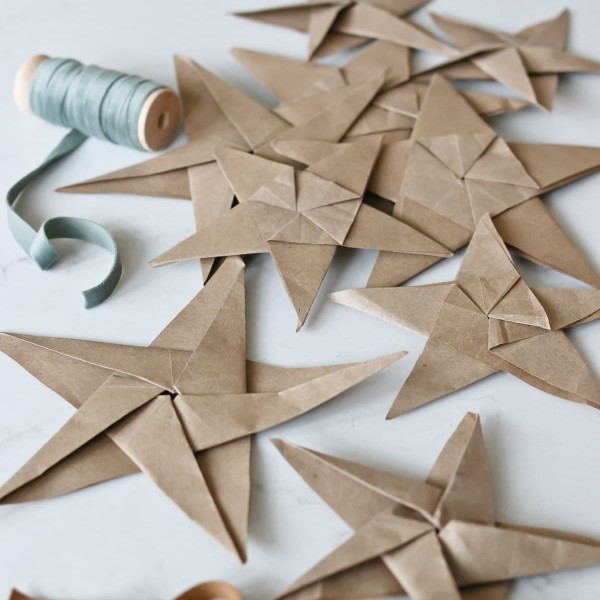
- Festive Displays: Hang multiple stars from the ceiling or create a garland of origami stars to decorate for parties or special occasions. They can also serve as stunning centerpieces on tables.
- Gift Wrapping: Attach a small origami star to gift packages as a unique embellishment. It adds personal flair to your gifts and shows that you have put in extra effort.
Tips for Successful Origami-Hubbub
1. Practice Makes Perfect
As with any skill, practice is essential for mastering origami. Don’t be discouraged if your first attempts don’t turn out perfectly.
- Start Small: Begin with simpler designs and gradually move to more complex ones. This helps build confidence and skills over time.
- Use Online Resources: There are many video tutorials and step-by-step diagrams available online. These valuable resources can provide visual aids and clarify complex folding techniques.
Engaging with the origami community can greatly enhance your experience.
- Join Online Forums: Participate in forums or social media groups dedicated to origami. Share your designs and learn from others.
- Host Origami Parties: Gather friends or family for craft sessions. Sharing the process can be both fun and educational, allowing everyone to learn and create together.
FAQs About Origami Stars
What Is the Easiest Origami Star to Fold?
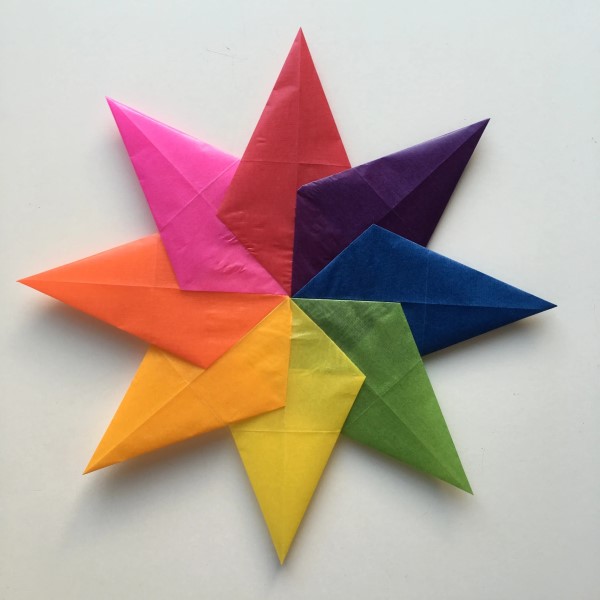
The easiest origami star to fold is typically a five-point star, which involves simple steps and can be completed quickly, making it ideal for beginners.
Can I Use Regular Paper for Origami?
While you can use regular paper for origami, origami paper is specifically designed for folding, making it easier to create clean, crisp shapes.
How Can I Inflate My Origami Star?
To inflate your origami star, locate the open pocket of the star and gently blow air into it. Adjust the shape as it inflates to ensure a symmetrical look.
Are There Advanced Origami Star Designs?
Yes, many advanced origami star designs exist, including intricate layered stars, shooting stars, and complex models that require multiple steps and experience.
Conclusion: Brightening Your Space with Colorful Origami Stars
In conclusion, origami star instructions provide a gateway to crafting beautiful and celebratory decorations. By learning how to create these vibrant stars, you can infuse your space with creativity and charm.
From basic designs to advanced variations, origami stars can transform any environment, making them perfect for parties, gifts, or home décor. Embrace the art of origami, share your creations with others, and enjoy the delightful satisfaction of watching your work brighten any room. The joy of crafting origami stars is limitless, so gather your materials and get started today!