Introduction: The Appeal of Minecraft and Perler Beads
The world of Minecraft captivates millions of players with its endless creativity and charm. One exciting way to express that creativity is through Minecraft perler bead patterns. These patterns let players craft their favorite characters, items, and scenes using colorful perler beads. Not only is this a fun activity, but it also allows gamers to take a piece of their beloved game into the real world.
In this comprehensive guide, we will explore various Minecraft perler bead patterns step-by-step. Whether you’re a beginner or a seasoned crafter, you will find unique designs that cater to different skill levels. Let’s embark on this crafting adventure and bring some pixelated magic to life!
Understanding Perler Beads
1. What Are Perler Beads?
- Definition: Perler beads, also known as fuse beads, are small plastic beads that can be arranged on a pegboard. They are melted together using heat from an iron, resulting in colorful, durable crafts.
- Materials: Besides the beads, you will need a pegboard, parchment paper, and an iron. These materials are readily available in craft stores and make it easy to start your minecraft perler bead patterns.
2. Why Use Perler Beads for Minecraft Designs?
- Versatility: Perler beads allow for versatile designs ranging from simple shapes to complex characters. This flexibility is particularly appealing for Minecraft fans, enabling them to replicate elements from the game.
- Tangible Creations: Crafting with perler beads provides a way to create tangible memorabilia of your favorite game moments. Once completed, these designs can be displayed, gifted, or even used as keychains.
Step-by-Step Instructions
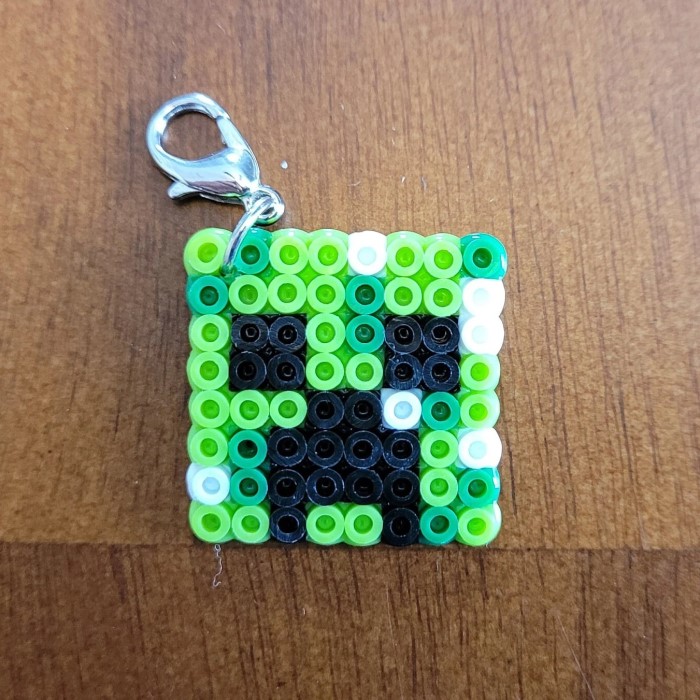
1. Basic Creeper Design
- Materials Needed: For this simple project, you will need green, black, and white perler beads, a square pegboard, and an iron.
- Pattern Layout: Begin by arranging your beads according to the infamous Creeper face. The pattern typically consists of a green background with black squares for eyes and a mouth, creating a pixelated effect.
- Fusing the Beads: Once your design is complete, place parchment paper over the beads. Iron on low heat for a few seconds, ensuring you know how long to press down gently. Turn the design over and fuse the other side for added stability.
- Final Touches: After cooling, your Creeper design is ready. You can use it as a coaster or display it among other Minecraft decor.
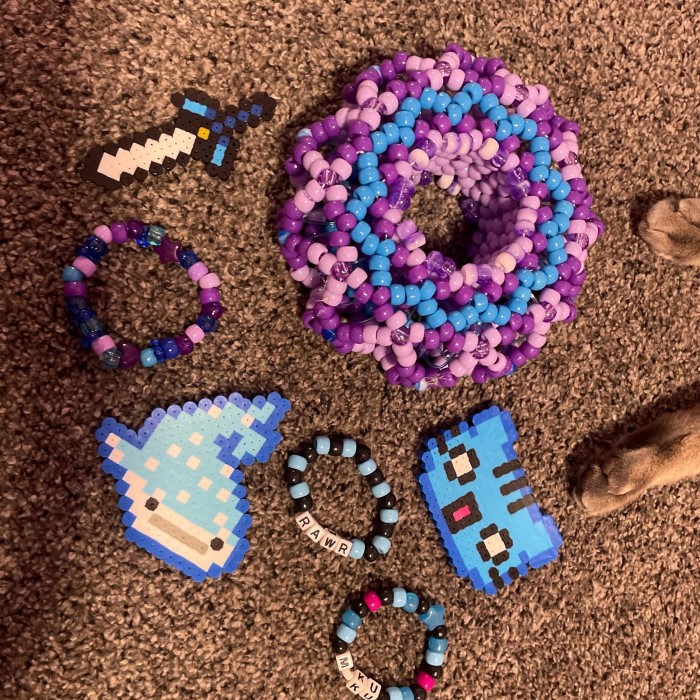
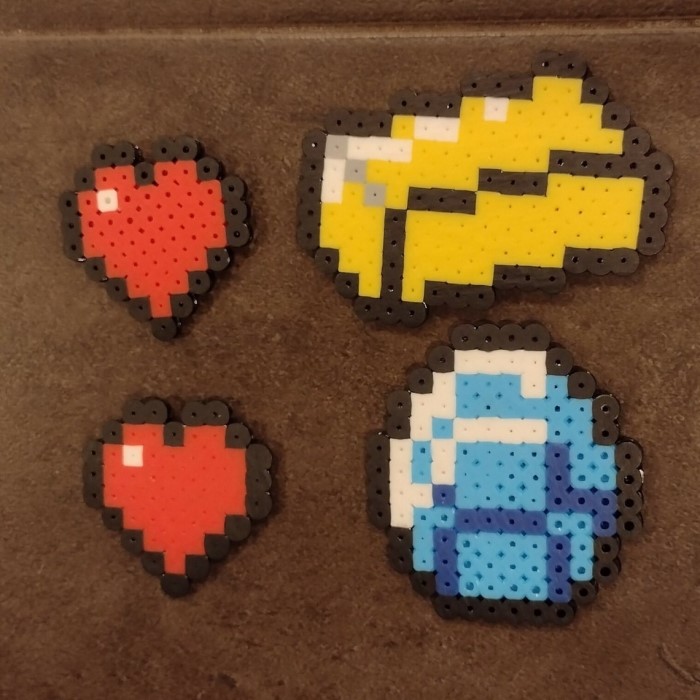
2. Minecraft Pickaxe
- Gather Materials: For this project, you’ll require gray, brown, and blue beads. A rectangular pegboard works well for this design.
- Design Instructions: Arrange the beads starting with the handle in brown, followed by shades of gray for the head of the pickaxe. The blue beads can represent a diamond pickaxe, offering a classic Minecraft item.
- Fusing Technique: As with the Creeper, cover the design with parchment paper, apply heat, and gently fuse the beads together. Rotate and fuse the opposite side for a secure hold.
- Display Your Craft: Once cooled, this pickaxe can be a fun addition to your gaming collection or even a unique gift for a fellow Minecraft enthusiast.
Intermediate Patterns for More Experience
1. Pixelated Steve Character
- Character Representation: Steve is the default player character in Minecraft. Creating an 8-bit version in perler beads is an excellent way to represent yourself in the game.
- Material List: You will need tan, blue, and brown beads for this project, arranged on a larger square pegboard for more detail.
- Pattern Assembly: Follow a reference image or template to arrange the beads. This character design includes features such as Steve’s face, blue shirt, and brown hair.
- Fusing Process: Fuse the design using the previously mentioned techniques, carefully ensuring that each layer adheres well. Let it cool off completely before handling.
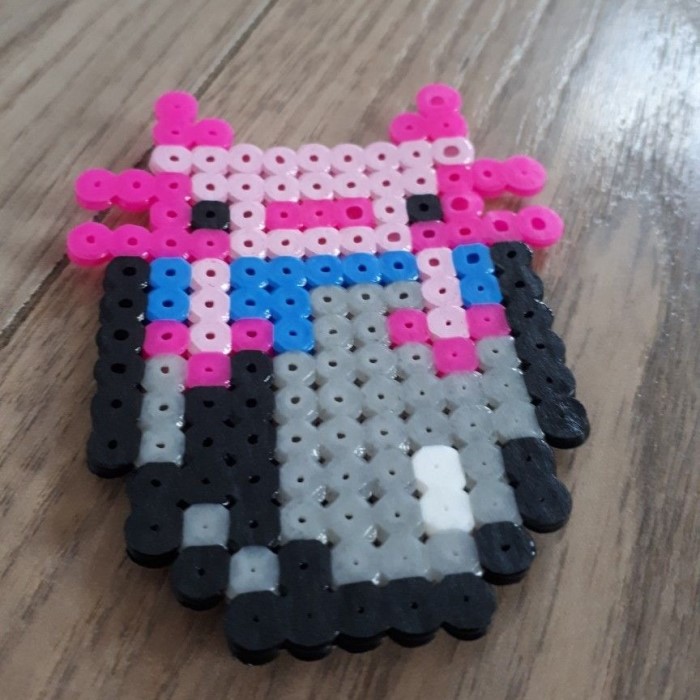
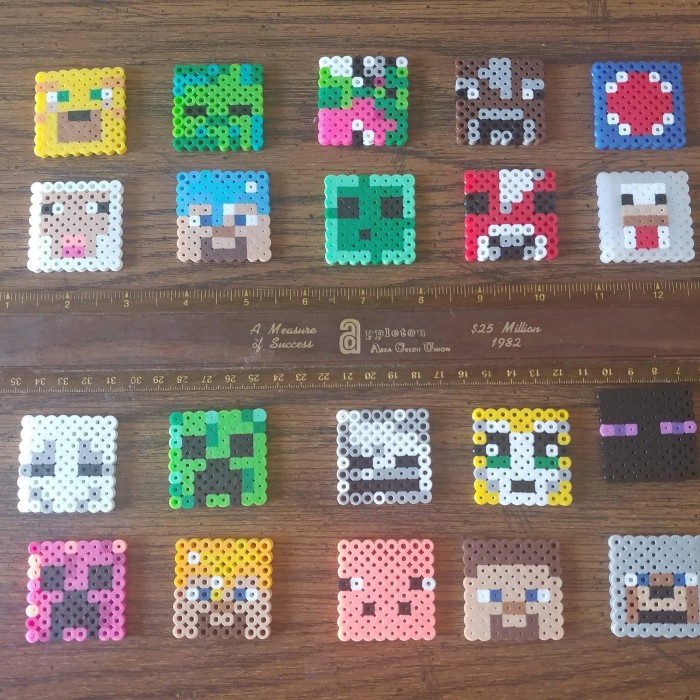
2. Iconic Minecraft Zombie
- Material Requirements: You will need green, black, and gray beads for this design. A square pegboard is also recommended for creating the Zombie character.
- Design Strategy: Start by arranging the head and body separately, focusing on the green color for the zombie’s skin, black for eyes, and gray for clothing.
- Fusing the Beads: Follow the fusing instructions as before. This design might take longer due to the details, but the end result will be worth it.
- Final Presentation: After cooling, your pixelated zombie design can serve as art, a gift, or even a fun challenge for your friends to replicate.
Advanced Patterns for Expert Crafters
1. Minecraft Scene Creation
- Choosing a Theme: For advanced projects, consider creating a full scene such as a village, cave, or overworld. Gather various beads based on the theme you choose.
- Additional Elements: Incorporate elements such as trees, animals, or even buildings to make the scene more vivid. Think about the layout and how the individual components will fit together.
- Fusing: Keep to the same fusing technique, making sure to double-check that all pieces are combined properly. This type of project requires patience and might take a longer time to complete.
2. 3D Perler Bead Creations
- Creating Three-Dimensional Objects: For an impressive project, think about crafting three-dimensional objects like a miniature house or a creeper. This involves creating layers that can be stacked or connected.
- Using Different Techniques: Consider using connectors or additional materials such as foam to stabilize your 3D designs. This advanced method requires a good understanding of perler bead structure and design.
Tips for Successful Perler Bead Crafting
Patience is Key
- Take Your Time: Crafting with perler beads is an intricate process that requires careful attention. Spending adequate time to arrange your beads without haste can lead to a better outcome.
- Focus on Accuracy: Being precise while placing each bead is crucial. When beads are placed correctly, the final design will look polished and intentional. This attention to detail enhances the overall aesthetic of your craft.
- Avoid Rushing: Rushing through the arrangement can result in misplaced beads or accidental overlaps. These mistakes not only detract from the beauty of your creation but can also disrupt your creative flow.
- Prevent Disappointment: Taking time to do it right can prevent feelings of frustration and disappointment. If you are unhappy with your design, it may discourage you from continuing your crafting journey.
- Enjoy the Process: Art is about the journey, not just the destination. Relishing the craft can make the experience fulfilling and enjoyable, allowing you to appreciate the creativity involved.
Experiment
- Mix Colors Freely: Don’t hesitate to combine different colors in your designs. Experimenting can lead to unique minecraft perler bead patterns that reflect your personal style and artistic expression.
- Try New Techniques: Use various placement styles and patterns in your projects. Experimentation with shapes and color combinations can create unexpected and beautiful designs.
- Resulting Achievements: When you try out new ideas and techniques, you may discover impressive outcomes that you never anticipated. This sense of creation can boost your confidence as a crafter.
- Learning from Mistakes: Allow yourself to make mistakes during the experimentation process. Each error can serve as a learning opportunity, helping you grow and refine your skills in future projects.
- Innovate: Embrace the creative process. Take inspiration from other crafters or from the game itself, but always add your twist. Innovation leads to more engaging and personal projects.
Organize Your Workspace
- Keep Beads Sorted: Organizing your beads by color or size can save you a significant amount of time. Clearly labeled containers or compartments for each color will allow for a smoother crafting experience.
- Reduce Clutter: An organized workspace helps reduce visual clutter, allowing you to focus better on your design. It can make finding specific colors much easier and allows for better concentration.
- Efficient Workflow: Having everything in its place means you can complete tasks more quickly. An efficient workflow enhances productivity, enabling you to spend more time crafting and less time searching for materials.
- Prepare Tools Ahead: Beyond beads, organizing your pegboards, irons, and parchment paper will help you gather all necessary supplies before starting. This preparation prevents interruptions and keeps the creative flow going.
- Maintain Cleanliness: Regularly clean and sort your crafting area. A tidy space promotes healthy crafting habits and ensures that you can enjoy your hobby without unnecessary distractions.
Use Good Quality Beads
- Invest in Quality: Using high-quality perler beads will greatly improve the outcome of your projects. Quality beads are more likely to melt and fuse properly, resulting in a solid and durable final piece.
- Avoid Cheap Alternatives: Cheaper perler beads may melt unevenly or not at all, leading to a frustrating crafting experience. Poor quality can ruin your designs and cause you to lose time on a project.
- Check for Consistency: High-quality beads typically have a more uniform shape and size, which leads to better arrangement and a cleaner look in your designs. Consistency is key in achieving professional-looking results.
- Long-Lasting Creations: Investing in better materials means your finished products are more likely to last. They will remain intact, retaining their beauty and integrity over time.
- Enhance Your Crafting Experience: Quality materials can make the crafting experience more enjoyable and rewarding. Knowing you are using the best supplies encourages you to take pride in your work and commit to larger projects.
Join Crafting Communities
- Engage with Fellow Crafters: Connecting with other players and crafters online allows for a rich exchange of ideas and techniques. Engaging in discussions can help you learn new skills and find inspiration.
- Share Ideas and Patterns: Crafting communities often share their patterns and successful designs. Access to these shared resources can open your eyes to new projects you would not have considered otherwise.
- Receive Feedback: Joining a community means you can receive constructive feedback on your creations. This feedback can be invaluable in improving your skills and ensuring your craft evolves.
- Participate in Events: Many crafting communities host competitions, challenges, and events. Participating in these activities can boost motivation and encourage you to try new techniques or themes.
- Stay Inspired: Continuous engagement with a community keeps you inspired. Seeing others’ creations often sparks new ideas that can lead to your innovative designs and revitalizes your love for crafting.
Frequently Asked Questions
What Are the Best Beads for Minecraft Patterns?
High-quality perler beads work best for crafting these designs. Look for brands that specifically market their beads as suitable for fusing projects.
Can I Make My Own Patterns for Minecraft?
Absolutely! Many crafters create unique designs inspired by their favorite characters or scenes. Feel free to explore your creativity.
How Do I Remove Mistakes While Crafting?
If you make a mistake, carefully remove the beads from the pegboard. Be cautious when handling the beads to prevent breaking them.
Conclusion: Craft Your Own Minecraft Adventure
In conclusion, Minecraft perler bead patterns offer an engaging and creative way to express your love for the game. By following step-by-step instructions and exploring various designs, you can create unique pieces of art that reflect your personality as a gamer.
Whether crafting simple shapes or intricate scenes, the process allows for boundless creativity and enjoyment. With practice and patience, anyone can master perler bead designs, making them a perfect hobby for gamers and crafters alike. So gather your supplies, unleash your creativity, and start your perler bead adventure today!