Understanding
Making soap is a delightful and creative hobby that has gained popularity in recent years. If you’re considering diving into this craft, understanding the role of lye for soap making is crucial. Lye, a caustic soda (sodium hydroxide), is an essential ingredient in the saponification process, where fats or oils transform into soap. This guide will take you through everything you need to know about using lye for soap making, from safety measures to tips for achieving perfect results.
What is Lye and Its Role in Soap Making
Lye is a crucial ingredient in traditional soap making. It plays an important role in transforming oils and fats into soap through a chemical process called saponification. Without lye, true soap cannot be created. Understanding lye and how it works is essential for anyone interested in crafting their own soap.
Chemical Composition of Lye
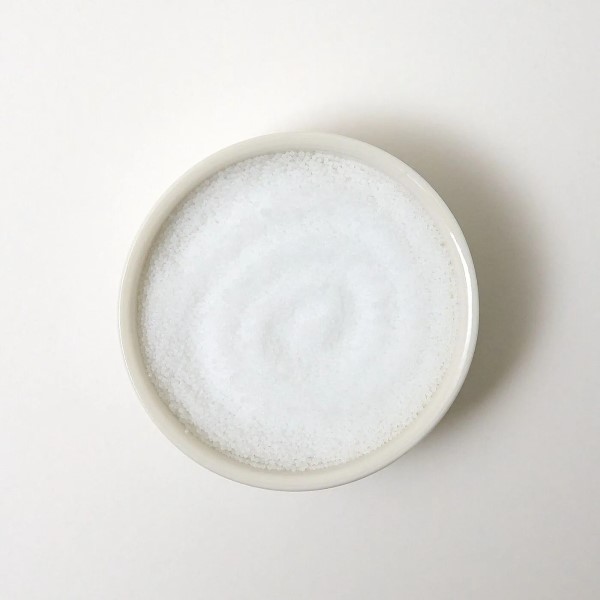
Lye, also known as sodium hydroxide (NaOH) or potassium hydroxide (KOH), is a strong alkali. Sodium hydroxide is commonly used for making solid bar soaps, while potassium hydroxide is used for liquid soaps. These compounds are highly reactive and dissolve in water to create a highly alkaline solution. When lye is mixed with oils, it initiates saponification, turning the mixture into soap and glycerin.
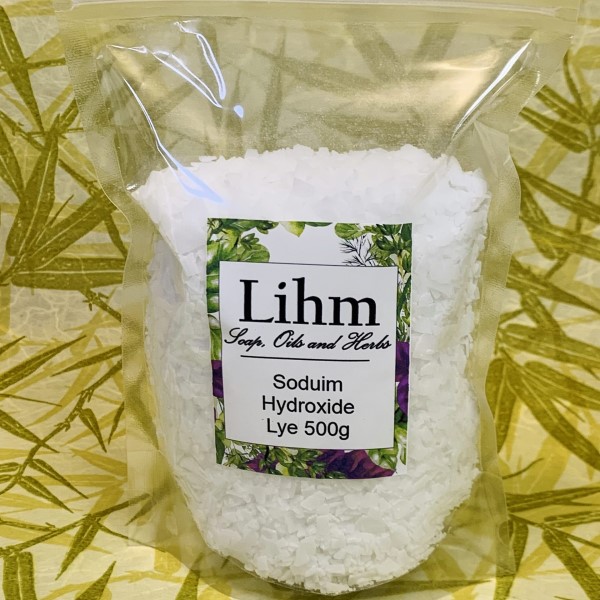
It’s vital to handle lye with care due to its caustic nature. Always use high-quality, food-grade lye for safe soap making. Avoid using industrial-grade lye as it may have impurities that can affect your soap’s quality or safety.
Why Lye is Essential in the Saponification Process
Saponification is the chemical reaction between lye and fatty acids found in oils or fats. This reaction breaks down the fats and combines them with the lye to form soap molecules and glycerin. The glycerin adds moisture to the skin, which makes handmade soaps gentle and nourishing.
Without lye, the fats and oils cannot transform into soap. Melt-and-pour soap bases do not require handling lye directly because the saponification has already occurred during production. However, for traditional soap making, lye remains a necessary component.
Understanding lye’s role helps soap makers create safe, effective, and skin-friendly products. Respecting its properties and following proper techniques ensures a safe and rewarding soap-making experience.
Safety Precautions When Handling Lye
Working with lye for soap making can be dangerous without proper precautions. Its caustic nature requires careful handling to ensure safety. Taking the right steps minimizes risks and ensures enjoyable soap production.
Protective Gear You Should Use
When handling lye, wearing protective gear is essential. Proper equipment shields against burns and irritation.
- Gloves: Use chemical-resistant gloves to protect your hands from lye splashes.
- Safety goggles: Shield your eyes with goggles to prevent irritation or injury from fumes or splashes.
- Long sleeves and pants: Wear clothing that covers your arms and legs to avoid skin exposure.
- Mask or respirator: If you’re sensitive to fumes, consider wearing a mask while working with lye.
Investing in high-quality gear ensures both safety and confidence while making soap.
Working in a Safe Environment
Creating a safe workspace is crucial during the soap-making process. Follow these guidelines for safety:
- Ventilation: Work in a well-ventilated area to avoid inhaling lye fumes.
- Stable surface: Use a flat, stable surface to prevent spills or accidents.
- Separate workspace: Keep pets and children away from the area while working.
- Proper storage: Store lye in a dry, cool place, away from moisture or heat.
- Clean tools: Ensure tools and equipment are clean and free from contaminants.
These measures create a controlled and safe environment for crafting soap.
First Aid Tips for Lye Exposure
Accidents can happen despite precautions. Knowing basic first aid is vital for quick responses:
- Skin contact: Rinse the area immediately with cool, running water for 15 minutes. Do not rub.
- Eye exposure: Flush eyes gently with water for at least 15 minutes. Seek medical help immediately.
- Inhalation: Move to an area with fresh air if you inhale lye fumes. Contact a doctor if issues persist.
- Ingestion: Do not induce vomiting. Rinse your mouth gently with water and seek emergency care.
Always keep a first aid kit nearby when working with lye. Also, keep emergency numbers accessible.
Adhering to these safety precautions ensures a secure and pleasant soap-making experience. Respecting lye’s potency is key to avoiding hazards.
Ingredients and Tools Needed
Gathering the right ingredients and tools is crucial for successful soap making. Each element plays a vital role in the process, ensuring safe handling and creating a high-quality product.
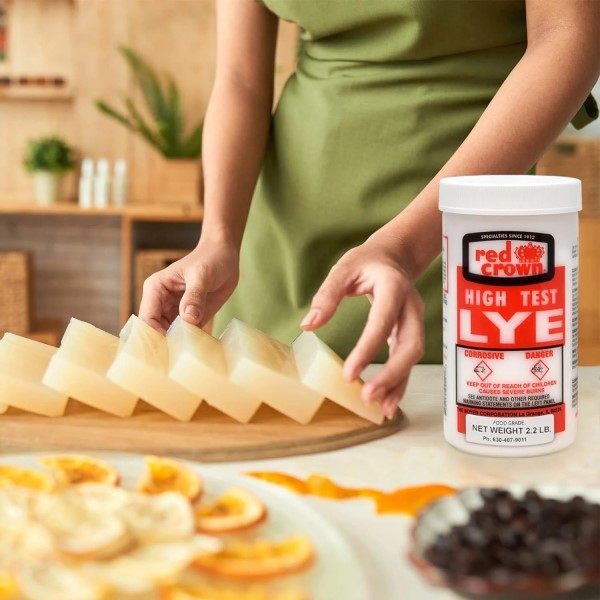
Types of Lye for Soap Making
Lye is the core ingredient for soap making. Choosing the right type depends on your desired soap form:
- Sodium hydroxide (NaOH): Commonly used for solid bar soaps due to its strong saponification properties.
- Potassium hydroxide (KOH): Preferred for liquid soaps, as it produces a softer consistency.
Always use food-grade lye to minimize impurities and ensure safe soap production. Never use industrial-grade lye, as it may contain harmful contaminants.
Essential Supplies for Soap Making
In addition to lye, ensure you have the proper tools and ingredients for the soap-making process. The essential items include:
- Oils or fats: Choose oils like olive, coconut, or palm oil for saponification.
- Scale: A digital scale ensures accurate measurements of lye and oils.
- Thermometer: Monitors the temperature of the lye solution and oils during mixing.
- Mixing bowls: Use heat-resistant, non-reactive bowls like stainless steel or silicone.
- Stick blender: Speeds up the emulsification process, combining lye and oils effectively.
- Soap molds: Shape your soap using silicone or lined wooden molds.
- Protective gear: Gloves, safety goggles, and long sleeves protect against lye spills and fumes.
With the right lye type and essential supplies, your soap-making journey becomes safer, simpler, and more enjoyable.
Step-by-Step Process of Using Lye in Soap Making
Making soap with lye is a rewarding process. Follow these steps carefully to ensure success.
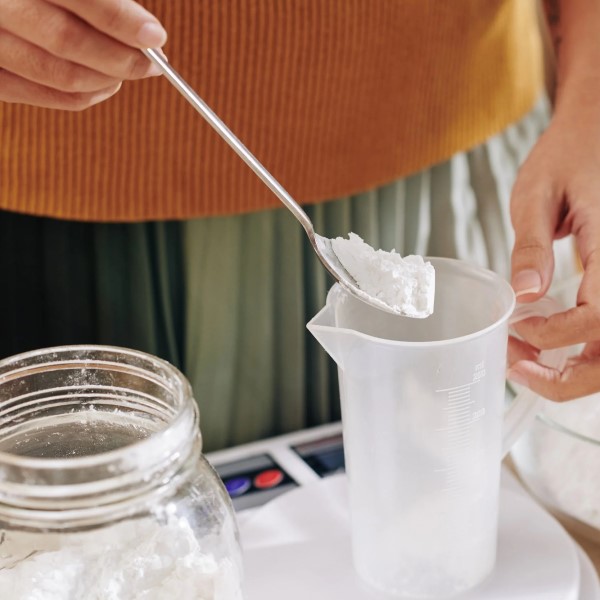
Creating the Lye Solution
Begin by preparing your lye solution. This is a critical first step in soap making.
- Wear protective gear: Put on gloves, goggles, and long-sleeve clothing.
- Choose the right container: Use a heat-resistant, non-reactive container like stainless steel or high-quality plastic.
- Measure precisely: Use a digital scale to measure the exact amount of lye and distilled water.
- Add lye to water: Slowly pour the lye into the water (never the reverse) to avoid splashes.
- Stir gently: Mix the solution with a silicone or stainless steel spoon until the lye is dissolved.
- Let it cool: Allow the lye solution to cool to around 100°F-120°F. Use a thermometer to check.
Always work in a ventilated area and keep safety your top priority during this step.
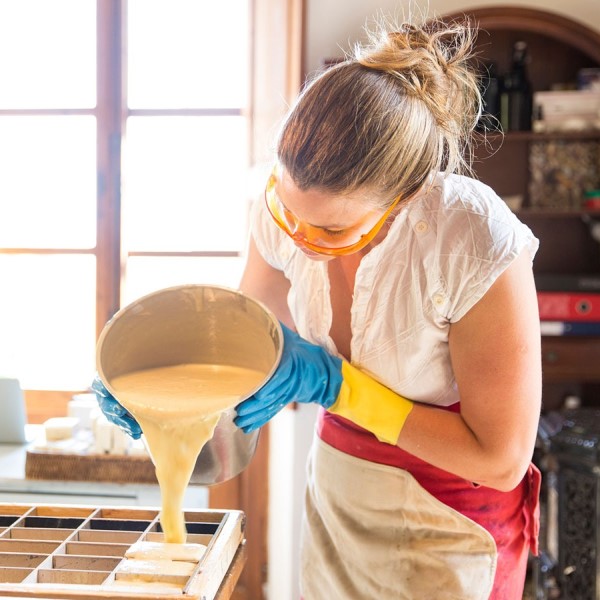
Mixing Lye with Oils
After the lye solution is prepared, the mixing process begins.
- Prepare oils: Warm your oils on low heat until melted. Maintain a temperature of 100°F-120°F.
- Check oil and lye temperatures: Ensure both reach similar temperatures before combining. Use a separate thermometer.
- Combine lye and oils: Slowly pour the lye solution into the oils. Stir the mixture gently.
- Use a stick blender: Blend the mixture until “trace” is reached (a pudding-like consistency).
- Add extras: If using fragrances, colors, or other additives, mix them in at this stage.
Keep your workspace clean to avoid contamination during mixing.
Curing and Storing Your Soap
After mixing, proper curing and storage are key for quality soap.
- Pour into molds: Carefully pour the traced soap into prepared molds.
- Cover and insulate: Use a towel to cover the molds and keep them warm.
- Allow to set: Let the soap rest for 24-48 hours to solidify.
- Unmold and cut: Remove the soap from the molds and slice it into bars.
- Cure the soap: Place the bars on a drying rack. Allow them to cure for 4-6 weeks.
- Store properly: After curing, store bars in a cool, dry place for long-lasting use.
By following these steps, you’ll create safe, effective, and high-quality soap. Always respect the properties of lye for the best results.
Tips for Beginners When Using Lye
Working with lye for soap making requires caution and attention to detail. Beginners often face challenges, but following simple tips can ensure a smooth experience. Understanding common pitfalls and focusing on accurate measurements are key.
Common Mistakes to Avoid
Avoiding mistakes is crucial for safe and successful soap making with lye. Here are common errors and how to prevent them:
- Pouring water into lye: Always add lye to water, never the reverse. Reversing the order causes splashing and dangerous reactions.
- Skipping protective gear: Never work without gloves, goggles, and long sleeves. Lye can cause serious burns.
- Using contaminated tools: Always use clean, dry equipment to avoid impurities in the soap.
- Ignoring temperature checks: Measure both lye and oil temperatures carefully. Differences in temperature can ruin saponification.
- Mixing too quickly: Do not rush. Blend gently until the soap mixture reaches trace, a thick consistency.
Taking these precautions minimizes risks and improves your soap-making results.
Measurements and Calculations for Accuracy
Accurate measurements and calculations are vital in soap making with lye. Mistakes in proportions cause issues like lye-heavy soap or incomplete saponification. Follow these steps:
- Use a digital scale: Measure lye, oils, and water precisely. Avoid estimating amounts.
- Follow a trusted recipe: Use tested soap recipes with clear lye ratios. Avoid improvisation as a beginner.
- Understand lye calculators: Use online lye calculators to find the perfect ratio for your ingredients.
- Measure temperatures: Use a thermometer to check the temperature of oils and lye solution before mixing.
- Work with distilled water: Always use distilled water to prevent contamination or impurities affecting your soap.
By maintaining accuracy, you create safe, high-quality soap that meets your expectations.
Learning these beginner tips ensures safer handling and better soap-making outcomes. Respect the properties of lye and focus on precision to enjoy crafting your own soap.
Alternatives to Lye in Soap Making
Making soap without handling lye is possible. There are alternatives for safe soap-making processes. These options are beginner-friendly and eliminate the need for direct lye use. Let’s explore two popular methods.
Melt-and-Pour Soap Bases
Melt-and-pour soap bases provide an easy, lye-free soap-making option. These bases are pre-made and have already undergone saponification.
- Pre-made and safe: The lye process is already completed, removing the need for handling lye at home.
- Various options: Choose from glycerin, shea butter, goat milk, or other types of bases.
- Simple process: Melt the base, add your desired colors, scents, or additives, and pour it into molds.
- Customizable: Enhance your soap with essential oils, exfoliants, or natural pigments.
- Quick results: No need to cure. Once solidified, the soap is ready to use.
Melt-and-pour soap bases are perfect for beginners or those who want a quick method.
Pre-made Soap Supplies
Pre-made soap supplies are a convenient alternative to using lye in traditional soap making. These options allow creativity without handling harsh chemicals.
- Soap kits: Purchase all-in-one kits with pre-made soap bases and instructions.
- Ready-to-use products: Pre-mixed soap batter or blocks eliminate the need for measuring ingredients.
- Minimal equipment: You only need basic tools like molds and mixing utensils.
- Eco-friendly choices: Some brands offer organic, palm-free, or cruelty-free pre-made options.
- Beginner-friendly: Ideal for those new to soap making or short on time.
Pre-made supplies provide a stress-free way to make custom soap. They are practical and require less preparation.
Both alternatives are excellent for those who want to avoid handling lye directly. They allow for creativity and produce high-quality, safe soaps for personal use or gifting.
Troubleshooting Issues with Lye in Soap Making
Making soap with lye is a precise but rewarding process. However, problems can occur and affect your results. Addressing challenges promptly ensures safe and effective soap production.
Identifying and Fixing Common Problems
When soap-making issues arise, pinpointing and resolving the cause is crucial. Here are common problems and solutions:
- Soap didn’t harden: This occurs due to incorrect oil-to-lye ratios or inaccurate measurements. Use a lye calculator and weigh ingredients properly.
- Lye-heavy soap: Soap feels harsh because of excess lye. Double-check recipes and adjust ingredient proportions before starting.
- Separation of layers: Oils and lye fail to mix fully. Blend thoroughly with a stick blender until trace consistency.
- Soap discoloration: Incorrect additives or impurities cause discoloration. Choose fresh oils and use food-grade lye.
- Soap crumbles when cutting: Soap may not have cured long enough. Allow soap to cure for the recommended duration.
- Brittle texture: Remedy this by ensuring proper curing and avoid overheating the mixture during insulation.
Understanding these issues prevents future mistakes and saves batches from imperfections. Always work carefully.
How to Know If Your Soap is Safe to Use
Safety is essential in soap making. Follow these steps to confirm your soap is ready:
- Perform a lye test: Use phenolphthalein solution on soap to check its pH. A pH between 8 and 10 is safe.
- Inspect soap texture: Safe soap should feel smooth, not grainy or overly harsh to the touch.
- Smell the soap: Strong lye odor indicates incomplete saponification. Let soap cure longer if needed.
- Curing duration: Ensure bars cure for 4-6 weeks in a dry, cool place. Cure time neutralizes lye.
- Use trusted recipes: Verify recipe instructions and adjust ratios using reliable lye calculators.
- Test on skin: Rub a small amount on your hand to check for irritation.
By troubleshooting issues and testing safely, your soap will be effective and gentle to use. Paying attention to detail ensures successful results.
Frequently Asked Questions About Lye in Soap Making
Is Lye Soap Safe for Skin?
Yes, lye soap is safe for skin when made correctly. During the saponification process, lye reacts with oils. This reaction completely consumes the lye, leaving no harmful residue in the finished soap.
High-quality soap made with lye is gentle and nourishing for the skin. Glycerin, a byproduct of saponification, retains moisture and prevents dryness. This makes handmade soaps better for sensitive or dry skin than some commercial options.
To ensure safety, always use accurate measurements when making soap. Follow trusted recipes and use a lye calculator. Proper curing time, usually 4-6 weeks, is essential to neutralize any remaining lye. Before using, check the soap’s pH level to confirm it is between 8 and 10.
Can You Make Soap Without Lye?
Yes, you can make soap without handling lye directly. Using alternatives like melt-and-pour bases simplifies the process. These soap bases have already undergone saponification, removing the need for working with lye.
Melt-and-pour soap bases are available in glycerin, shea butter, or goat milk varieties. They allow for easy customization by adding colors, fragrances, or exfoliants. Simply melt the base, mix in your additives, pour into molds, and let it cool. There is no curing time required, so the soap is ready to use quickly.
For completely lye-free soap, opt for pre-made soap kits or supplies. These kits provide all the ingredients you need, including pre-mixed bases. They are perfect for beginners or those avoiding the risks of lye handling.
While direct lye use is essential for traditional soap making, these alternatives offer safe and efficient options. You can still enjoy creative and customizable soap without dealing with lye.
Final Thoughts
Mastering the art of soap making, particularly the use of lye, opens up a world of creativity and sustainability. By following this guide, you not only prioritize safety but also understand the saponification process, learn to customize your soaps, and troubleshoot potential issues. With practice, you’ll create perfect bars of natural soap that reflect your personal artistry.
Embrace this delicate balance of science and creativity while utilizing lye for soap making. As you gain confidence in your skills, the possibilities for unique and beneficial soap creations will become endless!