Introduction: The Timeless Art of Quill Pens
In our increasingly digital world, the nostalgic allure of traditional writing tools like the quill pen remains strong. How to make a quill pen is not just a crafting query; it is a journey into history, artistry, and personal expression. Creating your own quill pen allows you to connect with the past while embracing a unique writing experience. Whether you are a writer, artist, or simply someone who appreciates the beauty of handwritten words, mastering the art of quill making can open new doors of creativity. This comprehensive guide covers everything from materials and techniques to tips for using your handcrafted quill pen effectively. Let’s dive into this rewarding DIY project together!
Understanding the History of Quill Pens
Before embarking on the crafting journey, it’s essential to appreciate the historical significance of quill pens and their traditional charm.
The Origins of Quill Pens
- Historical Significance: Quill pens date back to ancient times and were highly favored from the 6th century until the 19th century. Used primarily by scribes and scholars, these pens were crafted from bird feathers and became synonymous with careful writing and artistry.
- Craftsmanship: The process of turning feathers into quills involved careful preparation, including cutting, shaping, and inking. Each quill was a unique tool, offering writers personalized control and a distinct writing style.
Why Make Your Own Quill Pen Today?
Artistic Expression
- Engage with the Craft: Making your own quill pen offers a unique opportunity to immerse yourself in the art of writing. This hands-on approach allows you to explore the nuances of the craft in a way that digital tools cannot replicate.
- Fostering Creativity: As you create your quill pen, you unleash your creativity. Each design choice and method you employ lets your artistic vision flourish, providing a satisfying outlet for self-expression.
- Tangible Connection: Unlike typing on a keyboard, crafting a quill pen gives you a tangible connection to your writing. The physical act of dipping the pen in ink and placing it on paper transforms your thoughts into something real and enduring.
- Finding Balance: In a world increasingly dominated by digital communication, using a quill pen allows you to find balance. It encourages you to slow down and appreciate the beauty of handwritten words while offering a refreshing contrast to the fast-paced digital landscape.
Personal Connection
- Linking with History: Crafting a quill pen creates a personal connection to the rich history of writing. As you shape your pen, you join a lineage of writers and artists who have used similar tools for centuries, experiencing the same joy and artistry they once did.
- Emphasizing Tradition: This connection to tradition enhances your overall writing experience. When you use a quill pen, you become part of an age-old practice that celebrates the uniqueness of handwriting and the story behind each stroke.
- Symbolizing Effort and Creativity: Each time you write with your quill pen, you embed your efforts and creativity into the text. The act of crafting your pen makes every word you write a reflection of your personal journey and artistic expression.
- Deepening Your Engagement: This personal touch fosters a deeper engagement with your writing. You are not just producing text; you are creating a piece of art that embodies your thoughts, emotions, and unique perspective.
Gathering Your Materials
Now that you understand the allure of quill pens, let’s gather the necessary materials to create one.
Required Supplies
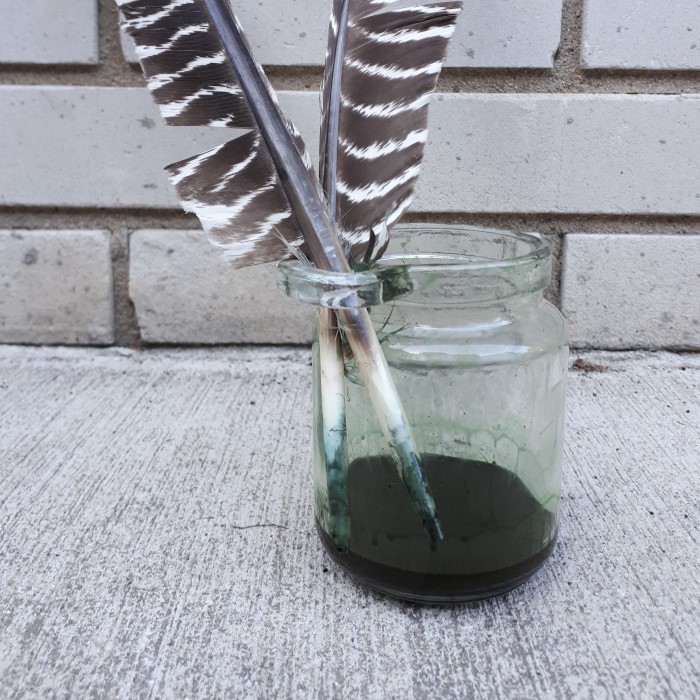
- Feather: Select a large bird feather, preferably from a goose, turkey, or crow. The size and strength of the feather will significantly impact the pen’s performance. A well-chosen feather gives you more control while writing.
- Craft Knife or Scissors: A sharp craft knife is crucial for shaping the nib. If preferred, scissors can also work for those who are more comfortable with them.
- Ink: High-quality ink is essential for a smooth writing experience. You can use traditional fountain pen ink, calligraphy ink, or specialized dip pen ink. Choose a color that suits your style.
- Paper: Have some smooth, high-quality writing paper available for practice and final projects. Opt for paper that prevents ink bleed for the best results.
Step-by-Step Guide: Crafting Your Quill Pen
With your materials assembled, follow these detailed steps to make your own quill pen.
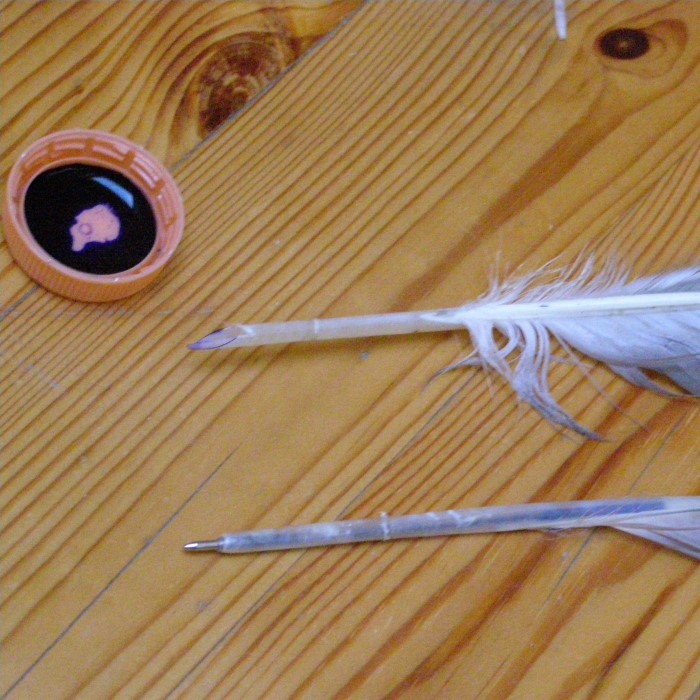
Preparing the Feather
- Select the Feather: Choose a feather that is straight and strong. Avoid damaged or overly small feathers, as they may not perform well as a writing tool.
- Cleaning the Feather: If necessary, clean the feather with a damp cloth to remove any dirt or residue. This ensures a smoother writing experience.
Shaping the Nib
- Trim the Tip: Using the craft knife, carefully trim the pointed end of the feather to create the nib. Slice at an angle, shaping it into a sharp point. A sharp nib will allow for better ink distribution while writing.
- Customize the Nib: Depending on your writing style, you may want to create a broader or finer point. Adjust the angle of your cut to suit your personal preferences. Practice cutting the nib until you achieve the perfect shape.
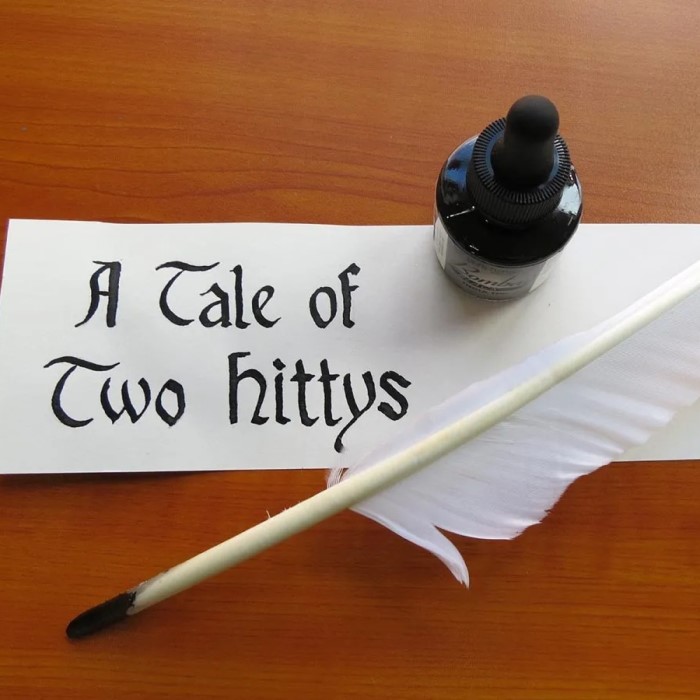
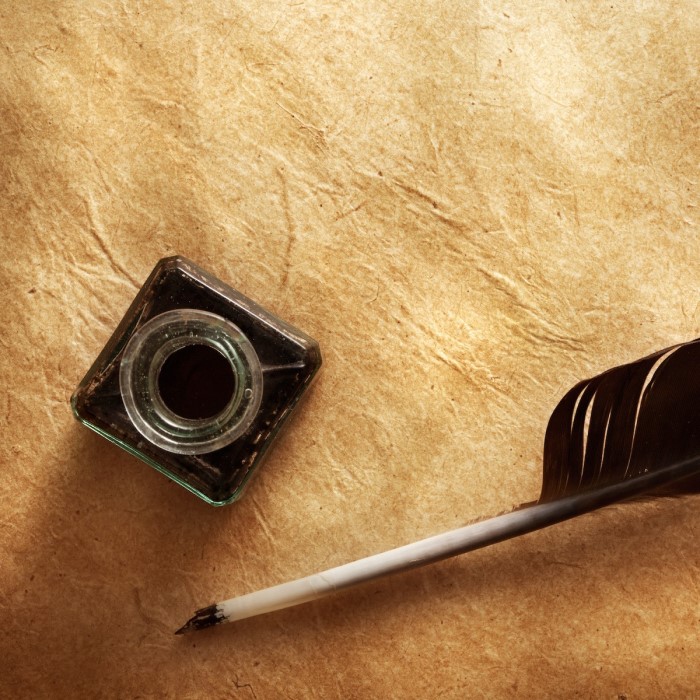
Preparing the Ink
- Ink Selection: Pour a small amount of your chosen ink into a shallow dish or an ink well. Make sure the ink is usable and flows well.
- Dipping the Nib: Dip the freshly cut nib into the ink, covering just the tip. Avoid submerging the entire nib, as this can lead to excessive ink flow and smudges. Tap the nib gently on the side of the inkwell to remove excess ink.
Writing with Your Quill Pen
Now that you have crafted your quill pen, it’s time to put it to use and enjoy the delightful experience of writing by hand.
Writing Techniques
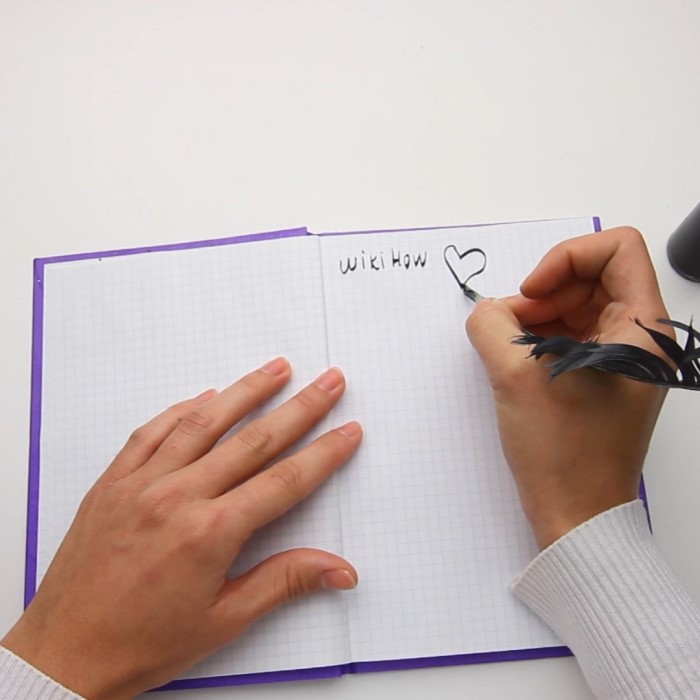
- Correct Holding Position: Grip the quill pen comfortably, holding it at about a 45-degree angle to the paper. This angle optimizes ink flow and allows for fluid writing.
- Smooth Strokes: Use consistent pressure as you write. Allow the nib to glide over the paper, creating smooth, beautiful lines. Practice controlling the pressure to achieve varying line thicknesses.
Practice and Experimentation
- Test Your Ink Flow: Before starting on an important piece, practice on scrap paper to gauge how much ink flows from the nib. Adjust the nib shape if necessary for improved writing quality.
- Explore Different Styles: Try experimenting with various writing styles, such as cursive, calligraphy, or decorative lettering. The quill pen gives you the freedom to create beautiful handwriting with unique flourishes.
Advanced Techniques and Tips
Once you’re comfortable with your quill pen, consider diving into more advanced techniques to enhance your writing and artistry.
Incorporating Decorative Elements
- Flourishes and Swirls: Use your quill pen to add decorative flourishes to your writing. Encouraging creativity in this area can add a personal touch to letters, invitations, or art pieces.
- Combining with Other Mediums: Try mixing your quill writing with watercolors or colored inks. This combination offers exciting creative possibilities and can create stunning effects.
Maintaining Your Quill Pen
- Cleaning the Nib: After each use, clean the nib thoroughly. Rinse it gently under running water to remove any residual ink. This maintenance prolongs the life of your quill and ensures consistent performance.
- Proper Storage: Store your quill pen in a dry place, ideally with the nib protected to avoid damage. Consider investing in a pen case if you plan to carry it with you.
Common FAQs About Quill Pens
Here are some frequently asked questions that may help as you explore crafting and using quill pens:
How to make a quill pen at home?
To make a quill pen at home, gather a feather, craft knife, and ink. Trim the feather’s tip to form a precise nib, dip it in ink, and start writing on paper.
How to turn a quill into a pen?
Turning a quill into a pen involves shaping the nib by cutting the end of the feather. Once shaped, dip it in ink to create a functional writing tool.
Can you turn any feather into a quill?
Generally, larger feathers from birds like geese or turkeys work best as quills due to their size and strength. Smaller feathers may not provide sufficient structure for writing.
How to make a pen and quill in Minecraft?
In Minecraft, players can create a pen and quill by combining a feather, an ink sac, and a stick in a crafting table. This results in a writable book that adds a unique touch to the gaming experience.
Conclusion: Embrace Your Creativity with a Quill Pen
In conclusion, learning how to make a quill pen allows you to connect with the art of writing in a profound way. By following the steps outlined in this article and immersing yourself in the beautiful tradition of quill writing, you not only create a personal writing instrument but also engage with history and artistry.
The experience of crafting and using a quill pen enhances your appreciation for written expression. With practice, you’ll discover your own writing style and flair. Embrace the gentle artistry of your quill pen, let your creativity flow freely, and enjoy the satisfying connection to tradition it brings to your writing. Each stroke of your crafted pen will remind you of the beauty in the art of writing. Start your journey with the quill pen today, and unlock new dimensions of creativity in your life!


