Introduction to Drawing a Piano
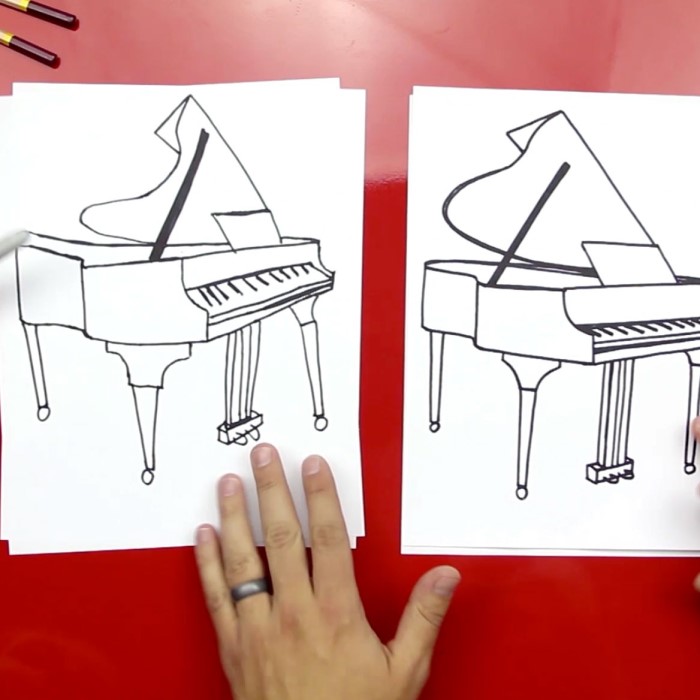
Learning how to draw a piano can seem daunting at first, especially for beginners. However, with the right techniques and guidance, you can create a stunning piano drawing that showcases your artistic talent. In this blog post, we will explore easy tips on how to draw a piano like a pro this year. You will gain valuable insights and step-by-step techniques that will make your piano drawing experience enjoyable and rewarding.
Materials and Tools Needed for Drawing
Before starting your piano drawing, gather the necessary materials and tools. Having the right supplies ensures a smooth and enjoyable experience. Below is a list of recommended items you will need:
- Sketchbook or Drawing Paper: Use high-quality paper for better results. A sketchbook works great for practice.
- Pencils: Get a set of pencils with varying hardness. Commonly used pencils include HB, 2B, and 4B. These help create light sketches and darker outlines.
- Eraser: Choose a kneaded eraser or a regular eraser. Use it to fix mistakes or create highlights.
- Ruler: A ruler helps you draw straight and accurate lines for the piano’s edges and keys.
- Fine-tip Pens or Markers: Use these to outline your drawing once the sketch is finished. They add definition and clarity.
- Blending Tools: Blending stumps or cotton swabs help in shading and creating textures on your drawing.
- Colored Pencils (Optional): If you want to add colors to your piano drawing, keep colored pencils handy.
Prepare these supplies in an organized workspace before you begin. A neat and well-lit area will enhance your focus. Having everything at hand helps make your drawing process even more enjoyable. Ready your tools and let’s move to the next step in learning how to draw a piano!
Understanding the Basic Structure of a Piano
Understanding a piano’s structure is an essential first step in learning how to draw one. The piano is a complex instrument with several key components that give it a distinct shape. Breaking down its design into simple parts will help you tackle your drawing more effectively.
Key Components of a Piano
- Keyboard: The keyboard is the most prominent feature of a piano. It consists of white and black keys arranged in a specific pattern.
- White keys are longer and more numerous.
- Black keys are shorter and sit between the white keys in groups of two and three.
- Body: The piano’s body holds the keyboard and internal mechanisms.
- Upright pianos have a vertical body.
- Grand pianos have a horizontal, wing-shaped body.
- Lid: The lid covers the piano’s internal components.
- For grand pianos, it opens upward.
- Upright pianos usually have a fixed lid.
- Music Stand: Positioned above the keyboard, it holds sheet music.
- Legs and Pedals: Grand pianos have three sturdy legs. Beneath the keyboard are pedals used for sound effects.
Understanding Proportions
When drawing a piano, visualizing proportions helps achieve accuracy:
- The keyboard is central and usually long compared to the body.
- The body’s height differs depending on the piano type (upright or grand).
- Legs and pedals are typically smaller but noticeable.
Taking time to study these components closely will make drawing a piano much simpler. You can start by sketching simple rectangles to represent the base, body, and keyboard. This initial understanding will serve as the foundation for your drawing in the next steps.
Sketching the Outline of the Piano
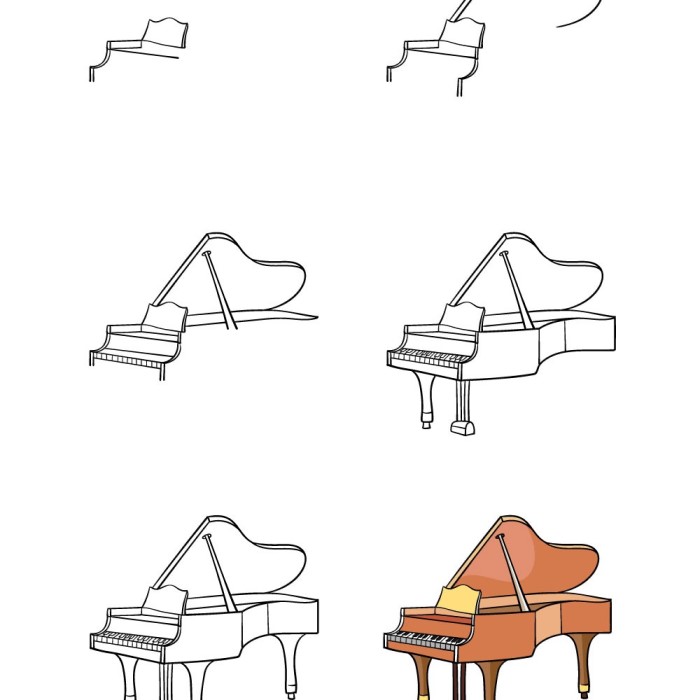
Starting with the outline is crucial when learning how to draw a piano. It sets the foundation for the entire artwork and ensures that all components fit together accurately. Follow these steps to create a basic outline:
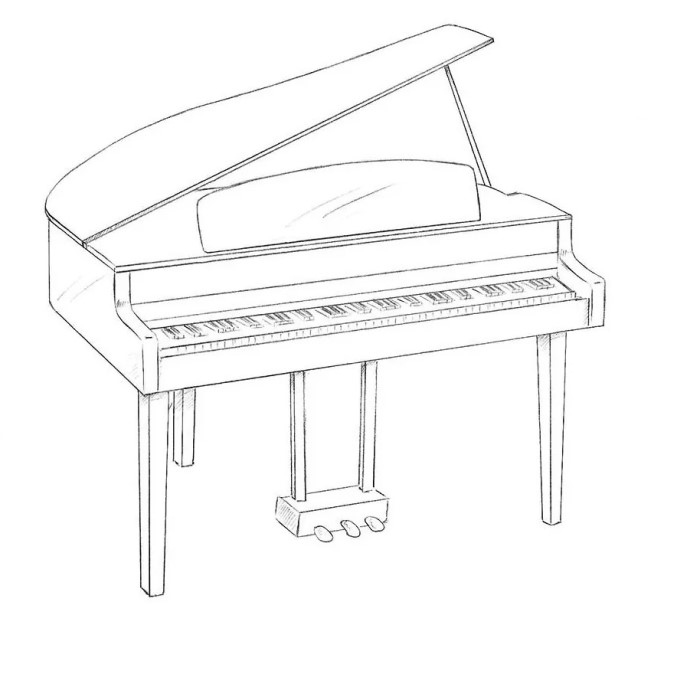
- Identify the Overall Shape: Begin by studying the piano’s structure. Grand pianos have a wing-shaped horizontal body, while upright pianos have a vertical rectangular body. Decide which type you want to draw and visualize its shape clearly.
- Draw the Body: Use your pencil and ruler to sketch the main body of the piano. For a grand piano, create a horizontal oval or curved shape. For an upright piano, draw a tall rectangle. Keep the proportions accurate to mimic the real piano’s size.
- Add the Keyboard Area: The keyboard is central to the piano. Draw a long, slim rectangle to represent the keyboard section. Place this rectangle where it aligns with the body.
- Sketch the Lid: Draw the lid to cover the top of the piano’s body. If it’s a grand piano, show the lid open by sketching it upright at an angle. For an upright piano, draw a fixed lid above the body.
- Outline the Music Stand: Draw the music stand positioned horizontally above the keyboard. It should be thinner than the keyboard area.
- Draw the Legs: Add three symmetrical legs if you’re sketching a grand piano. For an upright piano, make sure the legs are shorter and more subtle.
Tips for Sketching the Outline
- Use Light Lines: Lightly sketch initial marks to allow room for corrections.
- Focus on Proportions: Ensure the body, keyboard, lid, and legs are proportionate to each other.
- Use a Ruler: For straight edges, especially when sketching the keyboard.
- Start Simple: Begin with basic shapes (rectangles and ovals) and refine as you proceed.
By following these steps, you’ll have a clear and proportional outline of your piano. Once your outline is ready, move to adding detailed elements to enhance the drawing in the next section.
Adding Keys to Your Piano Drawing
Adding the keys to your drawing is a crucial step for creating a realistic piano. The keyboard is the most noticeable and intricate part of the instrument. Follow these simple steps to draw the piano keys perfectly:
- Draw the Keyboard Base:
- Start by refining the long, slim rectangle you outlined earlier for the keyboard.
- Make sure it aligns proportionally with the body of the piano.
- Mark the White Keys:
- Divide the rectangle into equal sections for the white keys.
- Use a ruler to keep the lines straight and evenly spaced.
- Grand pianos and upright pianos typically have 52 white keys.
- Add the Black Keys:
- Draw shorter, smaller rectangles on top of the white keys to represent the black keys.
- Organize them in groups of two and three across the keyboard.
- Remember, black keys are not present on every white key, so observe the pattern carefully.
- Ensure Proper Alignment:
- Check that the black keys sit exactly between the white keys without overlap.
- The spacing gives the keyboard its distinct look.
- Add Depth to the Keys:
- Use light shading on the sides of the keys for a 3D effect.
- Ensure white keys appear slightly longer than the black keys.
Tips for Drawing Accurate Keys:
- Use a fine-tip pencil for precision.
- Check symmetry regularly to avoid uneven spacing.
- Add small details like the edges of the keys for more realism.
When you finish adding the keys, your piano drawing will look more realistic and complete. Next, move on to drawing the piano legs and pedals for further detailing.
Drawing the Piano Legs and Pedals
Adding legs and pedals is an essential step to complete your piano drawing. These parts provide character and functionality to your artwork. Follow these simple steps to draw them accurately:
- Identify the Position of the Legs:
- For a grand piano, the legs are thicker and positioned under the body.
- Upright pianos typically have shorter, less prominent legs.
- Mark the positions symmetrically to keep the drawing balanced.
- Sketch the Legs:
- Use straight lines for upright piano legs, ensuring they are aligned properly.
- For a grand piano, draw the legs cylindrical or rectangular with subtle decorative details.
- Include the base of the legs for a stable and polished look.
- Draw the Pedals:
- Locate the pedals under the keyboard section.
- Most pianos have three pedals. Space them evenly and make them uniform in size.
- For upright pianos, the pedals may be smaller and less prominent.
- Add Dimension:
- Outline the structure of each leg and pedal to give them a 3D appearance.
- Use shading to show their depth and curvature.
- Refine and Erase:
- Erase any extra lines that make the legs or pedals look untidy.
- Enhance details and clean up edges for a polished result.
Tips for Accuracy
- Use a ruler to draw straight, clean lines for symmetric legs.
- Study existing photos of pianos to understand the leg and pedal design.
- Keep proportions consistent with the rest of the piano.
By carefully sketching and refining the legs and pedals, your piano drawing will gain realism. Ensure your work is accurate and polished before moving on to fine details and finalizing the shape in the next section.
Creating Fine Details and Finalizing the Shape
Now that the basic structure of your piano drawing is ready, it’s time to refine it. Fine details make your artwork stand out and appear more realistic. This step involves enhancing the structure, cleaning up lines, and adding intricate elements. Follow these steps:
- Refine the Outline:
- Examine your initial sketch and identify areas that need improvement.
- Use a sharper pencil or fine-tip pen to redraw clean, smooth lines.
- Erase any overlapping or unnecessary marks.
- Add Intricate Details:
- Draw small details like hinges and the edges of the piano lid.
- Add texture to the music stand and decorative trims if present.
- For grand pianos, include the lid brackets and the inside strings’ hints if the lid is open.
- Enhance the Keyboard:
- Highlight the separation between white and black keys for better clarity.
- Add light shadows beneath the keys to create more depth.
- Focus on Alignment and Proportions:
- Ensure the legs, pedals, and the music stand are symmetrical.
- Compare every part to the rest of the piano to maintain balance.
- Tidy Up the Sketch:
- Check for any uneven or jagged lines and fix them.
- Remove smudges using a clean eraser.
Tips for Perfect Refining:
- Use a ruler or straight edge for precision.
- Work on one section at a time to focus better.
- Take breaks to check the drawing from a distance for better perspective.
By refining the details, your piano drawing starts to truly take shape. This foundation will prepare your artwork for the shading and texturing in the next step.
Shading and Adding Texture to Your Drawing
Shading and adding texture enhances the realism of your piano drawing. These techniques bring depth and life to your artwork. Here are steps to follow:
Preparing for Shading
- Select Your Tools:
- Use pencils with varying hardness (e.g., 2B, 4B, or 6B).
- Have blending tools like stumps or cotton swabs ready.
- Plan the Light Source:
- Imagine or decide on the direction of light hitting the piano.
- This helps you identify which parts need shading or highlights.
- Clean Your Outline:
- Ensure your drawing has clean and sharp lines before shading.
- Erase smudges or overlapping lines to avoid mistakes.
Adding Shadows and Highlights
- Shade Gradually:
- Start with light, consistent strokes for a smooth texture.
- Increase the pressure for darker areas.
- Focus on the Lid and Body:
- Add shadows on the edges of the piano body.
- For grand pianos, shade beneath the open lid to show depth.
- Keyboard Texture:
- Shade lightly between the keys to separate them.
- Add shadows under the keys for a realistic look.
- Depth Around Legs and Pedals:
- Use darker shading where light doesn’t reach, like under the piano.
- Highlight edges for a 3D effect and add subtle textures.
Creating Texture
- Add Detail to Surfaces:
- If the piano has wood patterns, carefully draw lines to resemble the texture.
- Keep these lines subtle and uniform across the piano.
- Blending Shadows:
- Blend shaded areas smoothly using blending tools for softer transitions.
- Avoid harsh lines unless they are part of specific designs.
- Focus on Finer Details:
- Include small features like screws, hinges, or material texture.
- Darken these elements slightly to make them noticeable.
Final Steps
- Check and Adjust:
- Analyze your drawing for consistency in shading and texture.
- Make corrections where necessary.
- Clean Your Drawing:
- Use an eraser to remove unnecessary marks or smudges.
- Keep the artwork tidy for a professional look.
- Take a Step Back:
- Review your work from a distance to ensure accurate shapes and shadows.
With shading and texture, your piano drawing will look realistic and polished. These techniques highlight the beauty and complexity of the piano, making it stand out.
Tips for Perfecting Your Piano Artwork
After completing your piano drawing, take extra steps to enhance its overall appearance. This final process focuses on improving accuracy, adding finesse, and ensuring balance. Follow these tips to refine your piano artwork:
Review and Reflect
- Examine Your Work: Look for areas that need attention or adjustment.
- Check Proportions: Verify that the keyboard, body, and legs are well-balanced.
- Assess Shading Curvature: Ensure shadows align with your chosen light source.
Tidy and Clean
- Erase Smudges: Use a clean eraser to fix stray marks.
- Sharpen Details: Touch up fine lines or edges with sharp pencils and pens.
- Smooth Shading: Blend edges and shadows for a cohesive look.
Add Final Touches
- Enhance Textures: Add subtle woodgrain or reflective effects on the piano’s body and keys.
- Highlight Details: Focus on small accents like screws, hinges, and edges.
- Include Depth: Ensure every corner has accurate lighting and shadow application.
Gain Perspective
- Take a Step Back: View your piano drawing from different angles.
- Get Feedback: Ask others for their opinions and suggestions.
- Make Final Adjustments: Refine your work based on what you notice and feedback received.
By following these tips, you can achieve a polished and professional piano drawing. Remember, practice helps refine your skills over time!
Conclusion: Completing Your Piano Drawing
In summary, learning how to draw a piano can be both fun and rewarding. By understanding the anatomy of a piano, gathering the right materials, and following a structured approach, you can create impressive piano drawings. Remember to practice and experiment with different styles and techniques. With time, you’ll be able to draw a piano like a pro this year. Embrace the journey and let your creativity soar as you develop your artistic skills.
By applying these tips and guidelines, you can refine your drawing process and produce captivating artwork that showcases your passion for music and art. Happy drawing!


