What is Hammered Spray Paint?
Hammered spray paint is a unique type of paint that creates a textured, hammered-like finish. It is designed to give surfaces an industrial or metallic look. This finish mimics the appearance of hammered metal, adding character and depth. Hammered spray paint is versatile and can be used on a variety of surfaces including metal, wood, concrete, and plastic. It is especially popular in projects requiring a durable, protective coating with a distinct aesthetic appeal.
Features of Hammered Spray Paint
- Textured Appearance: Hammered spray paint creates a dimpled, uneven texture resembling hammered metal.
- Durable Coating: It is formulated to resist scratches, chips, and fading over time.
- Rust-Resistant Properties: Most hammered spray paints are designed to prevent rust, especially on metal surfaces.
- Variety of Colors: Available in various hues, it complements different decor styles.
- Easy Application: The spray format allows for even application on intricate surfaces.
Common Uses of Hammered Spray Paint
- Metal Furniture: Popular for revamping old or rusty metal furniture, giving them a fresh look.
- Decorative Projects: Used for creating artistic effects on items like picture frames, vases, or lamps.
- Home Improvement: Ideal for enhancing radiators, light fixtures, and door handles.
- Automotive Touch-ups: Great for refinishing car parts and adding a rugged metal appearance.
- Outdoor Items: Works well on items like garden tools, benches, and fences due to its durability.
Hammered spray paint combines aesthetic appeal with functionality, offering a durable, decorative solution for various projects.
Advantages of Using
Hammered spray paint is valued for its incredible advantages that make it a popular choice. From providing protection to improving aesthetics, it serves versatile purposes for DIY and professional projects.
Durability and Protection
- Resists Damage: Hammered spray paint offers a strong coating that resists scratches, chips, and impacts.
- Rust Prevention: Forms a barrier that prevents rust, especially on metal surfaces prone to corrosion.
- Withstands Weather: It is designed to endure harsh outdoor elements like sunlight, rain, and humidity.
- Long-lasting Finish: Keeps surfaces intact for years, maintaining both appearance and functionality.
Visual Appeal and Texture
Unique Texture
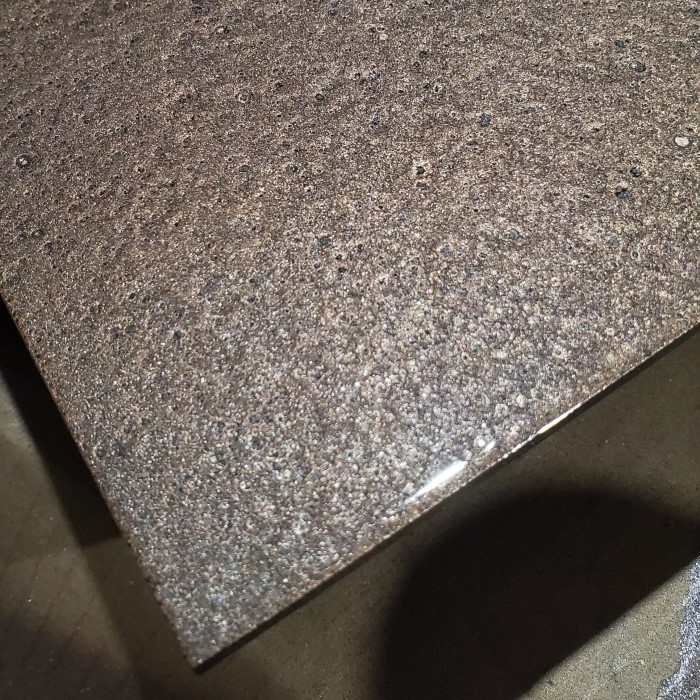
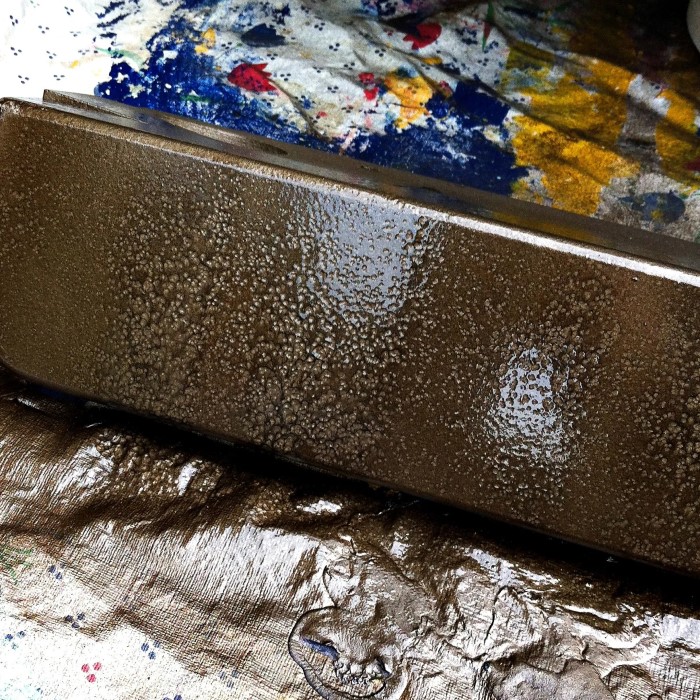
- Hammered Appearance: The hammered spray paint creates a distinctive dimpled effect that mimics the look of hand-hammered metal. This texture offers a unique visual experience to any surface, setting it apart from traditional finishes.
- Depth and Dimension: The irregular surface produced by the paint adds depth, making flat objects appear more dynamic. This dimensionality can enhance the overall interest of the item, drawing the eye and inviting closer inspection.
- Character Development: The texture imparts a sense of individuality to each project. When applied, the unique effect can make mundane objects feel more personal and bespoke, elevating their status in home decor.
Industrial Look
- Rugged Aesthetic: The metallic finish produced by hammered spray paint contributes to a rugged, industrial aesthetic. This style is increasingly popular in contemporary interior design.
- Enhances Modern Decor: Ideal for modern homes, the paint adds charm and sophistication to various decor styles. It meshes well with raw materials, such as wood and concrete, making it a versatile choice.
- Statement Pieces: Items treated with this paint can become statement pieces within a room. They can stand alone as bold accents or as part of a cohesive design theme, enhancing the overall atmosphere.
Color Variety
- Broad Spectrum of Colors: Hammered spray paint is available in an array of colors, providing options for various tastes and design settings. From classic metallic shades like bronze and silver to vibrant hues like blue and green, there’s something for everyone.
- Compatible with Different Themes: The wide variety of colors allows for effortless integration into diverse decor styles. Homeowners can choose colors that complement existing furnishings or create striking contrasts.
- Personal Expression: With so many options available, individuals can express their personality through color selection. This flexibility enables customization, ensuring that each project resonates with the owner’s style.
Aesthetic Versatility
- Applications Across Various Items: Hammered spray paint is suitable for a wide range of objects, including furniture, decor pieces, and functional items. It can transform ordinary products into visually engaging elements.
- Enhancing Functionality: Beyond just aesthetics, items painted with hammered spray paint maintain their functional aspects while becoming more visually appealing. This dual benefit adds value to everyday objects.
- Improving Visual Appeal: The rugged charm and unique finish significantly elevate the attractiveness of furniture and decor. People are drawn to pieces that stand out and that can enhance the ambiance of a space. This versatility ultimately improves the overall design of any environment.
Hammered spray paint combines protective properties with a beautiful finish, making it a superior choice for various uses.
Choosing the Right Hammered Spray Paint
Choosing the right hammered spray paint is essential for your project’s success. Different paints cater to various needs, so understanding types and brands is vital.
Types of Hammered Spray Paints
- Oil-Based Hammered Spray Paint:
- Highly durable and weather-resistant.
- Ideal for outdoor furniture and tools.
- Offers excellent rust protection on metal surfaces.
- Water-Based Hammered Spray Paint:
- Environmentally friendly with low odor and VOC levels.
- Dries faster and is easier to clean up.
- Works well on indoor items like home decor.
- Multi-Surface Hammered Spray Paint:
- Adheres to diverse materials like wood, plastic, concrete, and metal.
- Versatile for DIY projects and crafts.
- High-Heat Hammered Spray Paint:
- Withstands extreme temperatures.
- Perfect for radiators, grills, and other heat-exposed surfaces.
Best Brands Available on the Market
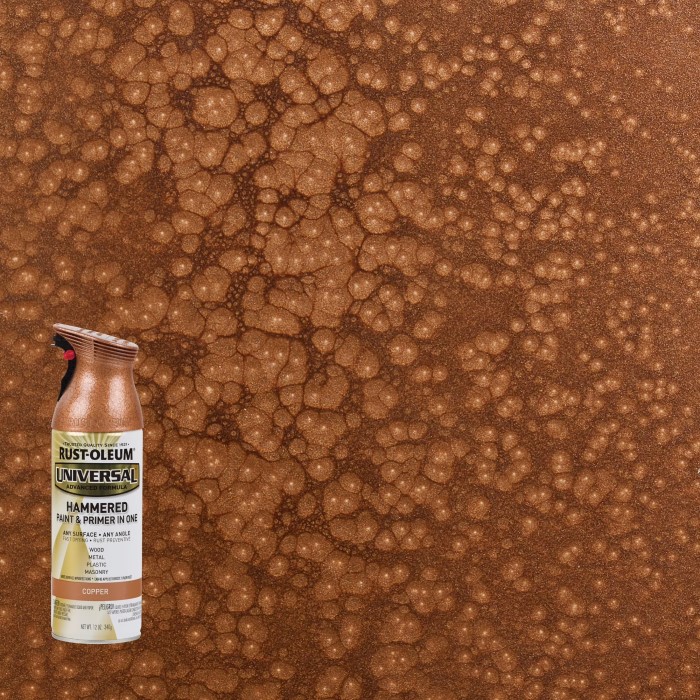
- Rust-Oleum:
- Known for high-quality, long-lasting finishes.
- Offers a wide variety of colors.
- Especially popular for rust protection.
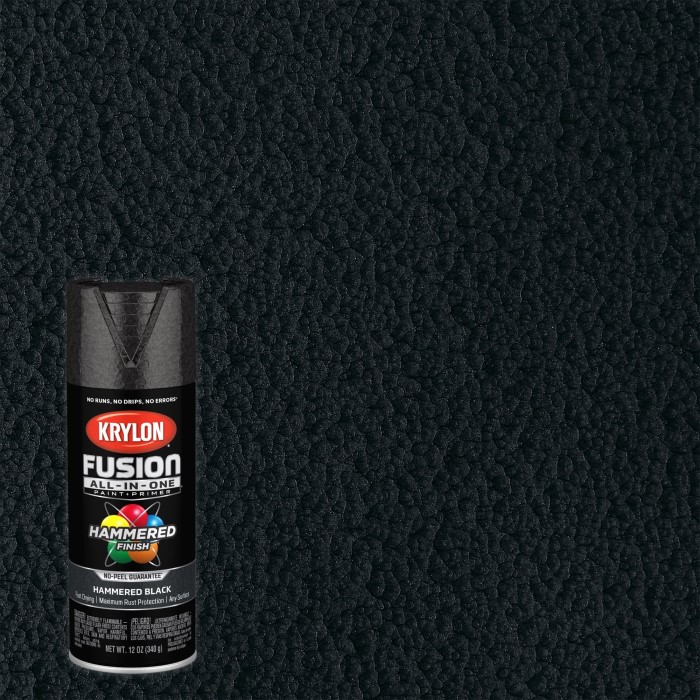
- Krylon:
- Offers innovative spray paints with excellent texture and coverage.
- Versatile options available for different surfaces.
- Montana:
- Ideal for artistic and decorative projects.
- Provides vibrant colors with durable coatings.
- Hammerite:
- Specializes in tough coatings for metal.
- Comes with built-in rust protection and a beautiful hammered texture.
When choosing hammered spray paint, consider your project’s material, location, and purpose. Select reputable brands for reliable quality and stunning results.
Preparing Surfaces
Proper surface preparation is crucial for achieving excellent results with hammered spray paint. By investing time and effort in cleaning, sanding, and priming, you ensure better adhesion and a flawless finish for your projects. Follow these key steps to make the process smoother and more effective.
Cleaning and Sanding the Surface
- Remove Dirt and Debris: Clean the surface thoroughly to eliminate dirt, oils, or residues using soap and water.
- Degrease: Use a degreaser for stubborn grease or oil stains on your material.
- Dry the Surface: Allow the cleaned surface to dry completely for proper sanding and paint adhesion.
- Sand Imperfections: Sand rough areas, peeling paint, or rust using sandpaper or a sanding block.
- Smooth the Surface: For uneven surfaces, switch to finer grit sandpaper to achieve smoothness.
- Wipe Off Dust: Remove sanding dust using a damp cloth or tack cloth to keep the surface clear.
Cleaning and sanding ensure the surface is clean, smooth, and ready for paint application. Neglecting these steps can result in poor paint adhesion and uneven finishes.
Priming the Surface for Best Results
- Choose the Right Primer: Use a primer suitable for the material, such as metal, wood, plastic, or concrete.
- Rust Prevention: For metal surfaces, select a primer with anti-rust properties to prevent corrosion.
- Apply Primer Evenly: Spray a light coat of primer evenly across the surface to create a stable base.
- Allow Primer to Dry: Follow the manufacturer’s drying time recommendations before applying hammered spray paint.
- Sand Primer Coat (Optional): For a flawless finish, lightly sand the dried primer coat before spraying paint.
Priming enhances paint adhesion and durability, providing a solid foundation. It also improves the texture and color of the hammered spray paint finish.
Preparing surfaces properly ensures your hammered spray paint results are durable and visually appealing. Careful attention to cleaning, sanding, and priming leads to success in crafting lasting finishes.
How to Apply Hammered Spray Paint
Applying hammered spray paint properly ensures a durable, eye-catching, and long-lasting finish. Follow these steps to achieve professional results and enhance your project.
Tools and Materials Needed
Before you begin, gather the necessary tools and materials to streamline the process:
- Hammered Spray Paint: Choose the right type and color for your project.
- Primer: Select a suitable primer for the surface material.
- Sandpaper and Sanding Block: Use different grits for surface preparation.
- Degreaser or Cleaning Solution: Clean surfaces thoroughly for ideal adhesion.
- Cloths or Tack Cloth: Remove dust and residues.
- Painter’s Tape: Protect areas you don’t want to be painted.
- Drop Cloth or Plastic Sheeting: Cover surrounding areas to prevent overspray.
- Mask or Respirator: Protect yourself from fumes while spraying.
- Gloves: Keep your hands clean and protected.
- Spray Handle or Trigger (Optional): For better control and comfort during application.
With all materials ready, you’re set to start transforming your surface!
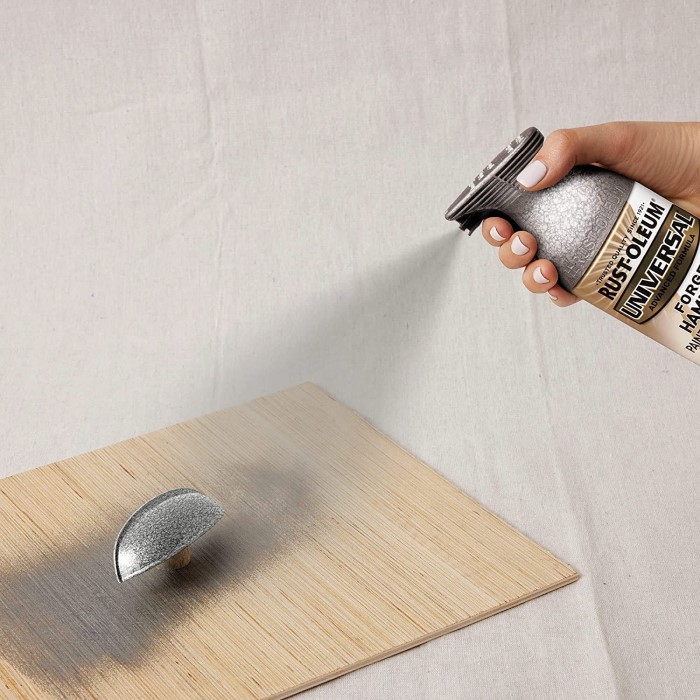
Step-by-Step Application Process
- Choose a Well-Ventilated Area:Ensure good airflow to reduce exposure to paint fumes.
- Protect the Surroundings:Cover nearby areas with a drop cloth or plastic to prevent unwanted paint.
- Prepare the Surface:
- Thoroughly clean the surface to remove grease, dirt, and dust.
- Sand any imperfections or rust for smoothness and wipe off residue.
- Apply a suitable primer and let it dry completely.
- Read the Spray Paint Instructions:
- Shake the can vigorously for 1-2 minutes.
- Follow manufacturer recommendations for temperature and distance.
- Test the Spray:Test the paint spray on a scrap surface to ensure smooth flow.
- Apply the First Coat:
- Start spraying 8-12 inches away from the surface.
- Use sweeping, back-and-forth motions for even coverage.
- Let the First Coat Dry:Allow the first coat to dry per the instructions on the can label.
- Apply Additional Coats:Add more thin coats for uniform texture and color. Avoid spraying too thickly.
- Inspect the Finish:Closely check for even texture and color after the final coat dries.
By utilizing the correct tools and following these steps, you will achieve a stunning hammered spray paint finish. Take your time to ensure even coatings and a professional outcome.
Tips and Tricks
Mastering the use of hammered spray paint requires attention to detail and proper techniques. Following essential tips and tricks can help you achieve flawless results.
Avoiding Common Mistakes
- Skipping Surface Preparation:
- Always clean, sand, and prime to ensure better paint adhesion and a smooth finish.
- Applying Too Much Paint:
- Apply multiple thin coats instead of a thick, single coat to avoid drips or runs.
- Ignoring Drying Times:
- Follow the manufacturer’s instructions for drying to prevent smudges or uneven textures.
- Painting in Poor Conditions:
- Avoid painting in high humidity or windy conditions to ensure smooth application.
- Holding the Can Too Close:
- Maintain an 8-12 inch distance from the surface to prevent uneven texture.
Taking care to avoid these mistakes ensures a better and more professional finish.
Enhancing the Final Look
- Use Consistent Spraying Motion:
- Move the spray can in continuous, smooth strokes to cover the surface evenly.
- Overlap Each Stroke Slightly:
- Slight overlapping ensures a seamless, consistent finish across the surface.
- Shake the Can Thoroughly:
- Shake for 1-2 minutes before spraying to mix the paint evenly.
- Test Before Application:
- Test spray on scrap materials to check the flow and adjust your technique.
- Use a Good Primer:
- Apply a primer that matches the surface material for a more vibrant, lasting finish.
- Stay Patient:
- Allow sufficient drying and curing time between coats for a durable, professional result.
- Seal the Finish if Needed:
- Protect the finish with a clear sealant, especially for high-use or outdoor items.
By avoiding common mistakes and applying these tips, your hammered spray-painted items will have a flawless, beautiful finish.
Maintenance and Care
Keeping your hammered spray paint finish fresh and intact requires regular maintenance and care. Proper handling will help preserve its unique texture and color for years to come.
Cleaning Without Damaging
- Use Mild Cleaners:
- Clean with a soft cloth or sponge and mild dish soap.
- Avoid harsh chemicals that could damage the texture and color.
- Wipe Gently:
- Avoid scrubbing. Use gentle movements to clean dirty areas.
- Avoid Abrasive Tools:
- Do not use steel wool or scouring pads to clean the surface.
- Opt for microfiber or soft materials.
- Rinse and Dry:
- Rinse thoroughly with water to remove soap residue.
- Pat the surface dry with a clean cloth to prevent water spots.
- Dust Regularly:
- Keep your project free of dust with a soft, lint-free cloth.
Following these tips ensures your hammered finish stays flawless while avoiding unnecessary damage.
Reapplications and Touch-Ups
- Inspect Regularly:
- Check for chips, scratches, or fading areas over time.
- Clean Before Touch-Ups:
- Remove dirt, dust, and grease before applying fresh paint.
- Prepare the area with light sanding, if necessary.
- Use Matching Paint:
- Always use the same hammered spray paint brand and color for touch-ups.
- Apply Thin Coats:
- Spray thin, even coats until the damaged area blends seamlessly.
- Avoid spraying heavily to prevent drips.
- Allow Proper Drying:
- Let touch-up areas dry completely. Follow the manufacturer’s drying guidelines.
- Seal if Needed:
- Use a clear topcoat for extra protection in high-use or outdoor areas.
Routine maintenance, gentle cleaning, and timely touch-ups ensure your hammered spray paint projects stay durable and beautiful.
Conclusion: Embracing Hammered Spray Paint Finishes
In conclusion, hammered spray paint offers a unique method for enhancing various projects. Understanding how to use hammered spray paint effectively will enable you to create stunning finishes that stand out. From selecting the right product to mastering application techniques, each step plays a pivotal role in achieving your desired results. Embrace the current trends and consider trying hammered spray paint for your next DIY adventure. Whether revamping furniture or crafting new decorations, the possibilities are endless, and your creativity will shine through.
By following the tips in this guide, you’ll be well on your way to transforming everyday items into spectacular finishes with hammered spray paint. Enjoy the creative process and let your projects reflect your personal style!


