Introduction to Corner Bookmarks
Bookmarks are essential tools for avid readers. They help keep your place in a book, ensuring that you can easily return to your reading without losing your spot. Among the various types of bookmarks, corner bookmarks stand out for their unique design and functionality. Knowing how to make a corner bookmark adds a personal touch to your reading experience, turning an ordinary book accessory into a creative expression of your style.

In this article, we will explore several innovative ideas on how to make corner bookmarks with ease. Whether you’re looking for simple designs or more intricate crafts, there’s something here for everyone. So, grab your materials and let’s dive into the fun world of DIY corner bookmarks!
The Basics of Corner Bookmarks
- What is a Corner Bookmark?
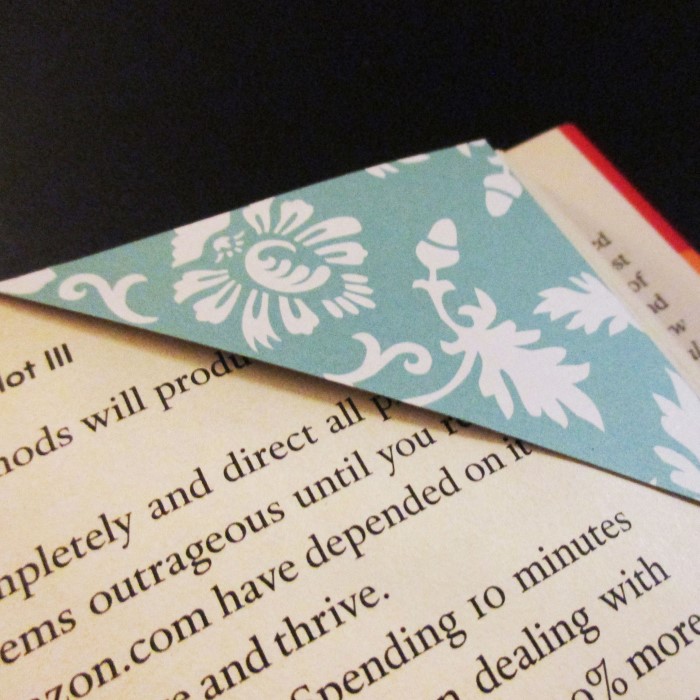
A corner bookmark is a type of bookmark designed to fit securely over the corner of a page. Unlike traditional bookmarks, corner bookmarks not only mark your place but also prevent slipping, ensuring that they stay in place while you read. - Materials Needed:
To start making your corner bookmarks, gather some basic materials. You’ll need:- Colored paper or cardstock
- Scissors
- Glue (if needed for decorations)
- Ruler
- Pencil
- Decorative items such as stickers, washi tape, or markers
- Enrich Your Creativity:
While basic materials are sufficient, think about what else you might want to include in your bookmarks. You can experiment with different paper textures, patterns, and colors to personalize your bookmarks to your liking. - Understanding the Folding Process:
The beauty of corner bookmarks lies in their simplicity. The folding technique is straightforward, but precision is key. Each fold should be crisp to yield a professional-looking bookmark that feels durable. - Why Make Your Own Bookmarks?
Making your own corner bookmarks allows you to express creativity. You can design bookmarks that match the theme of your favorite books or personalize them as gifts for friends and family. Homemade bookmarks make reading a more delightful and personalized experience.
Step-by-Step Guide: How to Make a Simple Corner Bookmark
- Cutting Your Paper:
How to make a corner bookmark? Begin by cutting a square piece of paper. A common size for corner bookmarks is 6 inches by 6 inches, but feel free to adjust based on your preference. Using a ruler and a pencil can help ensure exact measurements. - Folding the Paper:
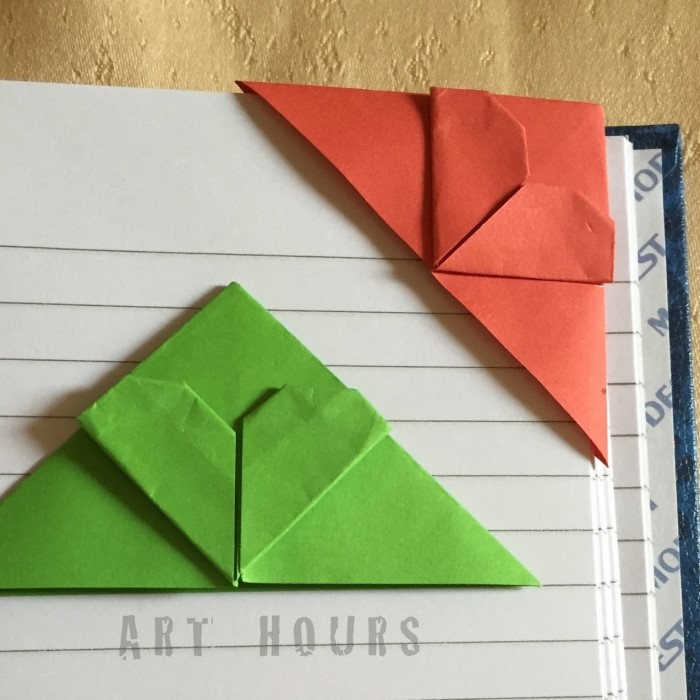
Take the square piece of paper and fold it diagonally, creating a triangle. Next, unfold it to make a crease, then fold each corner of the square toward the center crease. This step creates a smaller square within your original square. - Creating the Corner:
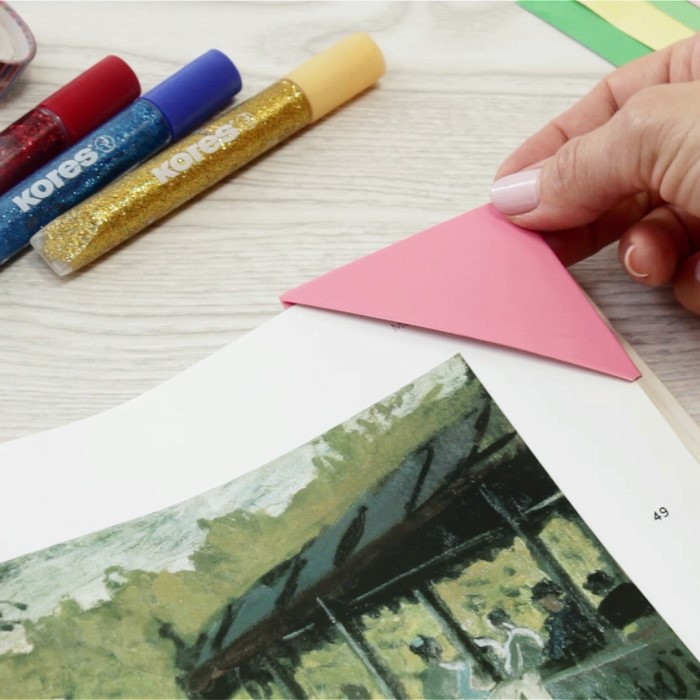
Fold the top point of the triangle down to the straight edge of the smaller square. This folding technique creates the corner that will hold the bookmark securely on the page. Make sure to press down firmly to maintain the shape. - Final Adjustments and Gluing:
If you’d like to add decorations, now is the time to do so. Use glue and embellishments to personalize your corner bookmark. You can also write inspirational quotes or add intricate drawings using colored markers. - Enjoy Your Bookmark:
After the glue has dried if you used any, your corner bookmark is ready to use. Slide it onto the corner of your book page and enjoy your reading!
Creative Variations for Corner Bookmarks
- Animal Corner Bookmarks:
Design corner bookmarks that resemble animals—like cats, owls, or rabbits. Simply draw the animal face on the top point of the triangle and add ears that extend upwards. This adds a playful touch to your bookmarks. - Themed Bookmarks:
Create themed bookmarks based on your favorite books or genres. For example, if you love fantasy, you could craft dragon-themed bookmarks. Use vibrant colors and relevant symbols to enhance the theme. - Seasonal and Holiday Designs:
Design corner bookmarks to celebrate different seasons or holidays. Christmas, Halloween, and Easter inspire fun designs. Add glitter, stickers, and seasonal patterns for extra flair. - Interactive Bookmarks:
If you’re feeling imaginative, consider creating bookmarks that include interactive elements, such as a small puzzle or a fold-out section that reveals a cute drawing or message. - Personalized Photo Bookmarks:
Print small photos or illustrations and glue them to your bookmarks. Personalizing them with family pictures or memorable trip photos can create sentimental value and invoke delightful memories every time you read.
Tips for Making Corner Bookmarks with Kids
Choose Simple Designs
- Select Beginner-Friendly Patterns:
When creating corner bookmarks with children, opt for designs that are straightforward and easy to execute. Simple shapes, such as triangles or squares, can be great starting points that don’t overwhelm young crafters. - Limit the Number of Steps:
Break down the creation process into fewer steps. A design requiring minimal folding or cutting helps keep the children engaged and allows them to experience success without frustration. - Utilize Visual Aids:
Provide step-by-step visual instructions, using illustrations or photos of each stage. These aids can guide children through the process, making it easier for them to follow along. - Choose Familiar Themes:
Select designs featuring popular characters, animals, or shapes that kids recognize and enjoy. Familiar themes will pique their interest and motivate them to participate actively. - Demonstrate Before They Create:
Take time to demonstrate how to make the corner bookmark before letting them independently craft their own. A live demonstration can clarify any confusion and build their confidence in the task.
Use Safe Materials
- Select Non-Toxic Craft Supplies:
Ensure that all materials used in the project are labeled as non-toxic. This includes glue, paint, or any other decorations that children may be tempted to use. Safety should always be a priority. - Provide Age-Appropriate Tools:
Choose tools that are suitable for children’s ages. For instance, use scissors designed for kids with rounded edges to prevent accidental cuts and injuries while they create their bookmarks. - Utilize Colorful, Kid-Friendly Paper:
Offer a selection of colorful, textured, or patterned paper for children to work with. Bright colors and unique textures can make the craft more enjoyable and visually appealing. - Organize All Materials Beforehand:
Set up a designated crafting area with all the materials neatly organized. This organization minimizes chaos and helps children focus on their creations rather than searching for supplies. - Conduct a Safety Briefing:
Before starting the crafting session, briefly explain safety practices. Teach children to handle tools properly, avoid eating craft materials, and be cautious in their movements.
Encourage Creativity
- Promote Personal Expression:
Allow children the freedom to personalize their bookmarks. Encourage them to choose their favorite colors, themes, and designs that reflect their unique personalities. This freedom fosters creativity and ownership of their projects. - Introduce Various Decoration Options:
Present a range of embellishments, such as stickers, stamps, or washi tape, for kids to choose from. Providing diverse options encourages children to experiment and think outside the box while decorating. - Share Inspiration but Allow Individuality:
While it’s helpful to share examples or inspiration, emphasize that each bookmark is a personal expression. Encourage them to incorporate their ideas and styles rather than strictly following a template. - Celebrate Their Creations:
Show genuine enthusiasm about the designs created by the children. Compliment their work, highlighting specific details, which builds confidence and encourages them to continue crafting. - Engage in Group Discussions:
Use group discussions as a platform for children to talk about their designs and the choices they made. Sharing thoughts about their creative processes can deepen their understanding and appreciation for art.
Make It a Group Activity
- Host Crafting Sessions:
Organize dedicated time for crafting corner bookmarks with friends or family members. Creating together promotes bonding and makes the crafting experience more enjoyable. - Encourage Team Collaboration:
Have children work in pairs or small groups to encourage collaboration. They can help each other with techniques, share ideas, and provide support throughout the crafting process. - Add Elements of Fun and Competition:
Introduce fun challenges, such as who can create the most unique design. Lighthearted competition can make the activity engaging and motivate children to put their best effort into their creations. - Facilitate Sharing Sessions:
After creating their bookmarks, host a show-and-tell session where each child presents their bookmark to the group. This encourages confidence and communication skills while celebrating each person’s work. - Extend the Crafting Experience:
Organize multiple sessions where children can create various types of bookmarks or try different crafting techniques. This approach not only fuels their creativity but also sustains their interest in arts and crafts.
Explore Educational Themes
- Introduce Cultural Themes:
Use the corner bookmark activity as an opportunity to introduce children to different cultures. Explore themes relevant to specific countries, traditions, or historical figures and encourage children to represent these themes in their bookmarks. - Create Historical References:
Encourage children to create bookmarks based on significant historical events or figures that interest them. Crafting bookmarks with educational themes can ignite their curiosity about history and the world around them. - Utilize Books as Teaching Tools:
Pair the crafting session with reading books related to the themes. Discuss the stories or backgrounds of the characters or events portrayed in the bookmarks, enhancing both creativity and knowledge. - Foster Global Awareness:
Highlight the importance of cultural appreciation through crafting. By creating bookmarks that represent various themes from around the world, children can develop a broader perspective and understanding of diversity. - Incorporate Nature Themes:
Explore nature as an educational theme by crafting bookmarks that feature plants, animals, or ecosystems. Children can learn about environmental conservation while expressing their creativity through artistic representations.
FAQs about Corner Bookmarks
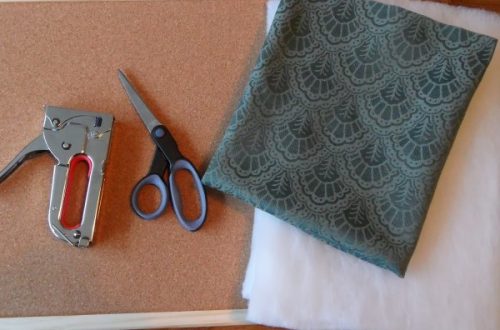
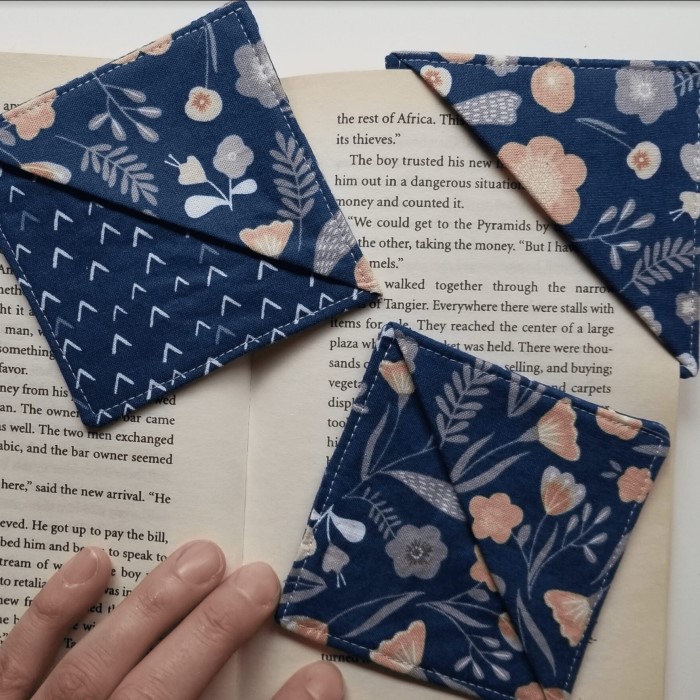
- How to make a stitch corner bookmark?
To create a stitched corner bookmark, use fabric instead of paper. Cut two triangular pieces of fabric, place one on top of the other, and stitch along the edges while leaving the top open. Turn it inside out for a nicely finished bookmark. - Can kids make corner bookmarks?
Yes, making corner bookmarks is an excellent craft activity for kids. Simple designs and the opportunity to personalize them make it a fun project for children of all ages. - How to fold paper into a corner?
To fold paper into a corner bookmark, start with a square piece of paper. Fold diagonally to create a triangle, then fold each corner toward the center to form a smaller square, creating the corner that grips the page. - What are the benefits of making your own bookmarks?
Making your own bookmarks allows for personalization, creativity, and the chance to recycle materials. They also serve as thoughtful gifts and encourage a fun, engaging craft activity.
Conclusion: Embrace the Art of Bookmark Making
Learning how to make a corner bookmark can enhance your reading experience while allowing you to express your creativity. By following the steps outlined in this article, you can create unique and personalized bookmarks that make reading even more enjoyable.
Whether you’re crafting solo or involving your kids, this fun and straightforward project can yield beautiful results. Embrace this small art form, and enrich your love of reading with bookmarks that reflect your personality and tastes! Happy crafting!