Introduction
In a world dominated by digital media, the timeless joy of reading physical books often gets overlooked. There’s something uniquely satisfying about turning the pages of a book. One little tool that can significantly enhance your reading experience is a bookmark. However, not just any bookmark will do. Personalized bookmarks crafted with love can truly represent your style and personality. This is where a bookmark making kit becomes invaluable. These kits allow you to explore your creativity and design unique bookmarks that can make reading even more enjoyable. In this article, we will explore various aspects of bookmark making, including materials, techniques, and frequently asked questions, to help you ignite your passion for this delightful hobby.
The Benefits of Using a Bookmark Making Kit
Utilizing a bookmark making kit comes with a plethora of advantages that go beyond mere practicality. Firstly, these kits are fantastic for promoting creativity. Each blank bookmark serves as a canvas for your imagination. Whether you prefer vibrant colors, intricate designs, or minimalistic styles, you can tailor each bookmark to reflect your unique taste. Moreover, the process of crafting bookmarks is undoubtedly enjoyable. Sitting down to work on a creative project can be a wonderfully relaxing activity, whether you are doing it solo or with friends and family.
Additionally, handmade bookmarks can serve as meaningful gifts. Unlike generic bookmarks found in stores, handmade creations have a personal touch that shows thoughtfulness and care. Friends and family members will appreciate the time and effort you put into crafting a beautiful bookmark just for them.
Another significant benefit of using a bookmark making kit is stress relief. Engaging in hands-on creative work can be an excellent way to unwind. The repetitive motions of cutting, gluing, and decorating can become meditative. This hobby allows you to disconnect from technology and focus on the present moment.
Lastly, the beauty of a bookmark making kit lies in its accessibility. Most kits are beginner-friendly and typically come with clear instructions, making them suitable for crafters of all skill levels. Even if you have never crafted before, you can create beautiful bookmarks with ease.
What Comes in a Bookmark Making Kit?
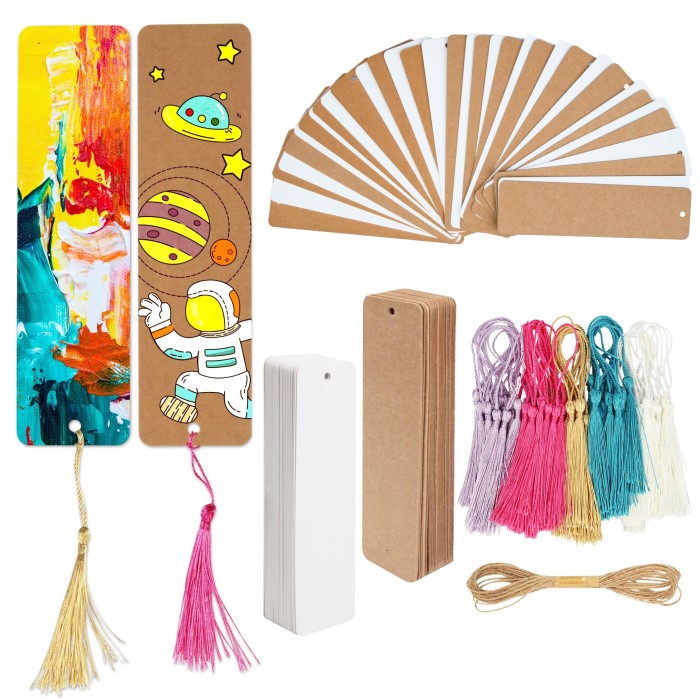
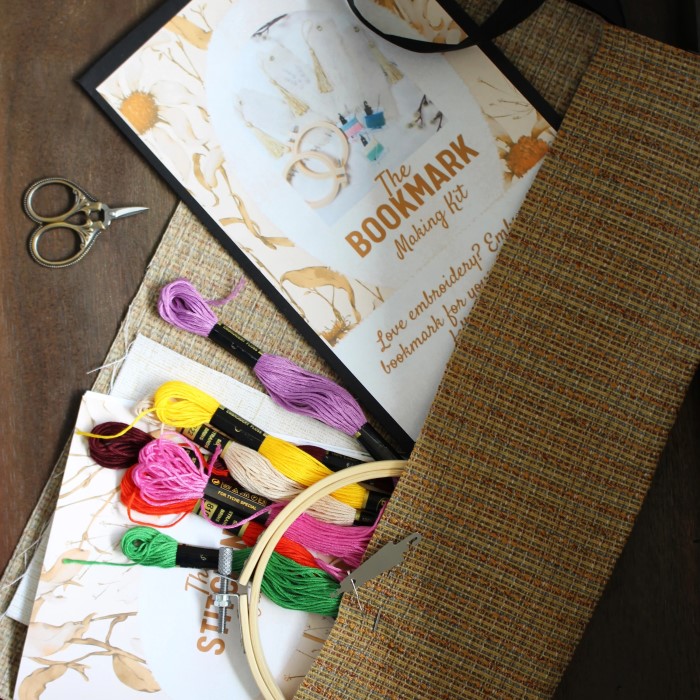
When you purchase a bookmark making kit, you’ll find an assortment of supplies that will make your crafting experience enjoyable. Each kit may vary in its contents, but typical components include:
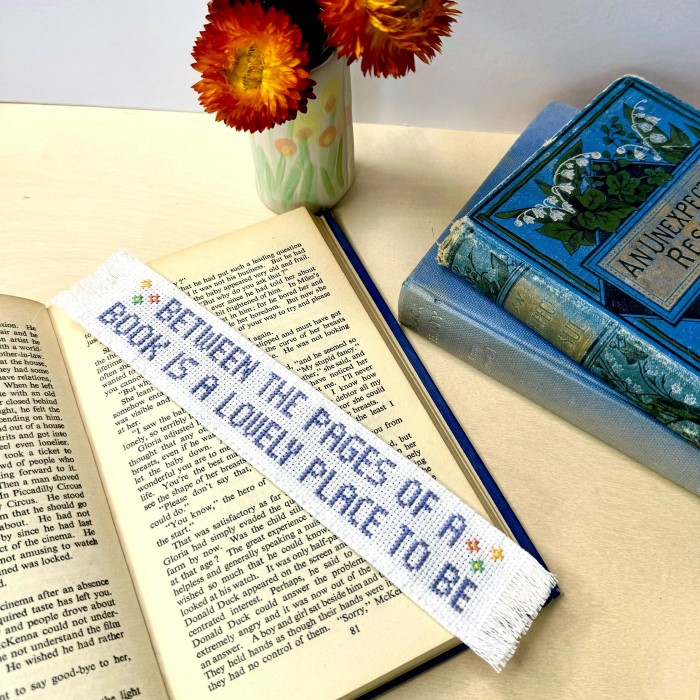
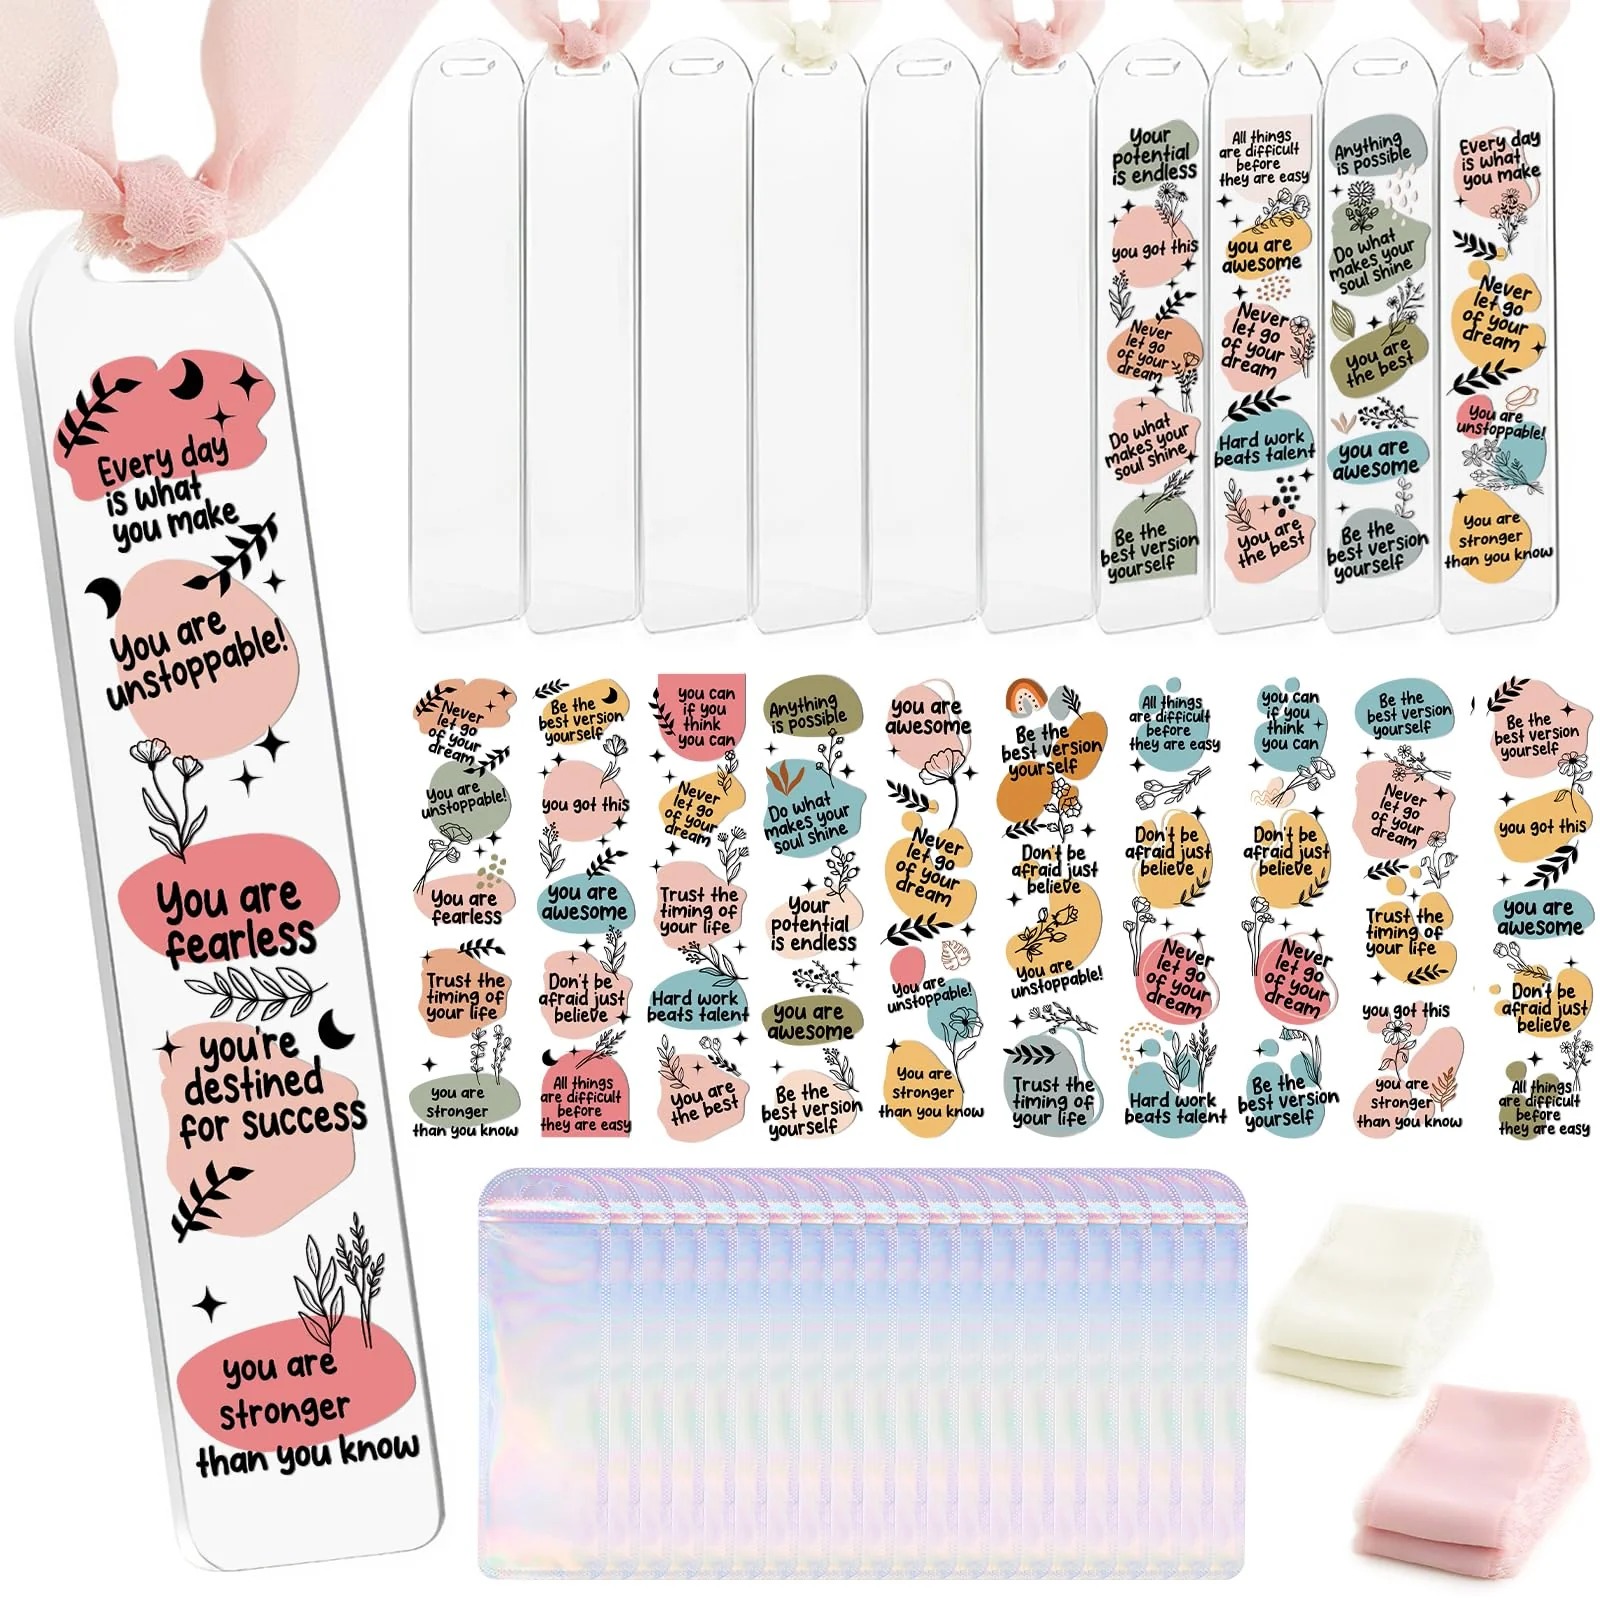
- Blank Bookmarks: Usually, these are made from durable materials like thick cardstock, plastic, or wood. Blank bookmarks serve as the base for your designs and can vary in size and shape.
- Art Supplies: Most kits come loaded with various art supplies like colored markers, paints, glitter, and sometimes even stamps or stickers. This variety allows you to explore numerous design possibilities.
- Finishing Options: Many bookmark making kits provide laminating sheets or varnish to help protect your bookmarks. Adding a finish not only enhances the look but also increases durability.
- Crafting Tools: Some kits include essential crafting tools such as scissors, glue, or double-sided tape, ensuring you have everything you need to get started.
- Instruction Booklet or Ideas: A good bookmark making kit will often come with a guide filled with suggested designs and techniques to inspire your creativity and help you make the most of your materials.
With this diverse range of components, you can experiment with various styles and techniques, producing bookmarks that are not only functional but also artistically impressive.
Techniques for Creating Unique Bookmarks
Crafting unique bookmarks using a bookmark making kit allows for countless possibilities and techniques. Here are some popular methods to get you started:
Watercolor Painting
- Beautiful Blended Look: Watercolor painting allows for a stunning visual effect on your bookmarks, creating a harmonious blend of colors that is both artistic and eye-catching.
- Preparation: Begin by wetting your blank bookmark. This step helps the watercolors flow more evenly and prevents harsh lines from forming.
- Applying Watercolors: Use a brush to apply watercolors onto the damp bookmark. Experiment with different techniques, such as wet-on-wet or wet-on-dry, to achieve various effects. By mixing colors directly on the paper, you can create smooth gradient effects that transition beautifully from one hue to another.
- Adding Details: Once the paint has dried completely, enhance your bookmark with additional details. You can use markers or fine-tipped pens to outline shapes, add text, or create patterns. This provides contrast and depth, making your watercolor bookmarks truly unique.
Collage and Scrapbooking
- Adding Depth: Collaging and scrapbooking techniques can significantly enhance your bookmarks’ appearance by introducing layers and diversity in design.
- Selecting Materials: Gather a variety of scrapbook papers with different colors, patterns, and textures. Choose images or shapes that resonate with your style.
- Cutting and Arranging: Carefully cut out the selected images or shapes from the scrapbook paper. Play around with the arrangements on your bookmark until you find a layout you love. Don’t be afraid to overlap pieces for a dynamic composition.
- Gluing Down: Once satisfied with your arrangement, use glue to attach the cutouts to the bookmark. Press firmly to ensure they stick well. This technique allows for exciting combinations of colors and textures that add depth to your design.
Stencils
- Easier Patterns: Stenciling provides a simple yet effective way to incorporate intricate patterns into your bookmarks without requiring advanced artistic skills.
- Choosing Stencils: Start by selecting pre-made stencils that fit the theme or design you want for your bookmark. You can find these in various shapes, from floral designs to geometric patterns.
- Placement: Position the stencil on the bookmark and secure it in place using tape. This will prevent it from moving while you’re applying color.
- Applying Color: Use colored pencils, markers, or paints to fill in the stencil openings. Carefully remove the stencil once you finish coloring to reveal the detailed design underneath. This method ensures precision and a clean finish.
Embossing and Foiling
- Touch of Elegance: Embossing and foiling can add a luxurious flair to your bookmarks, making them stand out with eye-catching shine and texture.
- Embossing Techniques: You can use an embossing kit or heat tool to create raised patterns on your bookmarks. This involves applying embossing powder to specific areas and then using heat to melt the powder, resulting in a three-dimensional effect.
- Foiling for Accents: Foil accents can be applied using adhesive or special foiling sheets. By adhering foil to certain areas of your bookmarks, you can create shiny, decorative elements that catch the light beautifully.
- Craft Store Kits: Many craft stores offer simple kits that make it easy to experiment with embossing and foiling. These kits often include everything you need, from the powders and foils to the tools required for application, allowing you to achieve stunning results effortlessly.
Fabric Bookmarks
- Textile Art Exploration: For those interested in a different medium, creating fabric bookmarks can be an exciting way to combine creativity with textile arts.
- Choosing Fabric: Select from various materials such as felt, cotton, or even denim. Each fabric brings its own unique texture and aesthetic to your bookmarks.
- Designing and Sewing: Cut the fabric into your desired bookmark shape. You can sew on designs, decorative patches, or even use fabric paint to add your personal touch. Experiment with stitching techniques like embroidery or appliqué to create intricate designs.
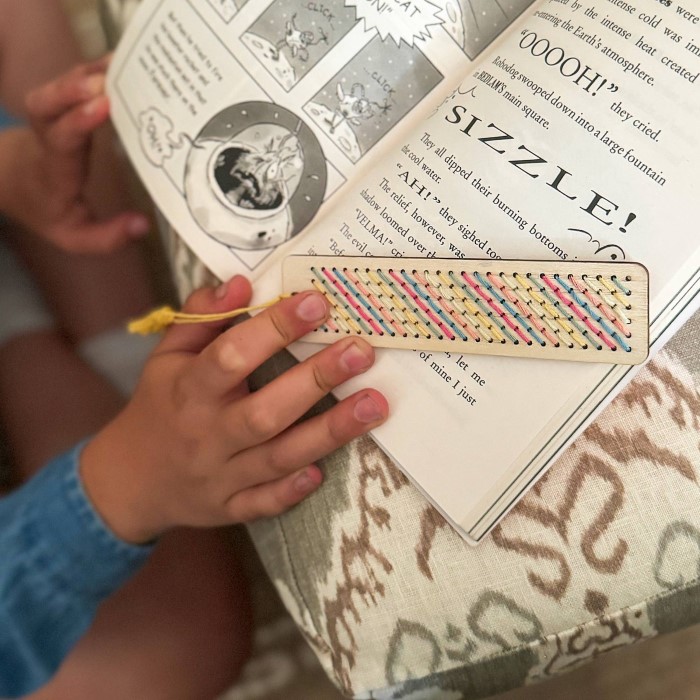
- Tactile Experience: Fabric bookmarks are unique for their tactile quality. They provide a different sensory experience compared to traditional paper bookmarks, making them not only beautiful but also enjoyable to handle. This element adds a new dimension to your crafting and reading experience.
Frequently Asked Questions about Bookmark Making
How do I make my own bookmarks?
Making your own bookmarks involves a few straightforward steps. Start with a blank piece of paper or cardstock cut to your desired size and shape. Once you have your base, use your chosen art supplies to decorate it, incorporating colors, illustrations, or any designs you feel inspired to create. After decorating, consider using a laminator or lamination sheets to protect your bookmarks from wear and tear.
What things are needed to make a bookmark?
To create a bookmark, you’ll need a few basic materials. First, you should have paper or cardstock for your base. Then, gather craft supplies such as scissors, glue, and artistic tools like colored pencils, watercolor paints, or stickers to decorate your bookmark. Additional materials like ribbons or tassels can enhance the final design.
Can I sell handmade bookmarks?
Absolutely! The market for handmade items, including bookmarks, is thriving. With creativity and unique designs, many individuals successfully sell their handmade bookmarks online through Etsy or at local craft fairs. To enhance your sales, focus on high-quality materials, innovative designs, and effective marketing strategies to reach your intended audience.
What is the best material for homemade bookmarks?
The best material for homemade bookmarks largely depends on personal preference. Cardstock is a common choice for its sturdiness and versatility. For a more unique touch, wooden bookmarks can be attractive and durable. Laminated paper also provides added protection against wear and tear, making them ideal for extended use.
Embedding Crafting into Your Lifestyle
Crafting bookmarks offers a delightful escape from the fast-paced, technology-focused world. As you get into the habit of making personalized bookmarks, you may find that this activity becomes more than just a hobby—it becomes a meaningful part of your life. Over time, you can explore the creative process even further by experimenting with more advanced techniques and materials.
Moreover, creating bookmarks can foster connections with others. Consider hosting crafting sessions with friends or sharing your creations through social media platforms. You may even establish an online community where members exchange ideas and inspiration, enhancing your crafting experiences and skills.
Conclusion: The Joy of Bookmark Making
In conclusion, a bookmark making kit opens up a world of creativity and joy that enriches your reading experience. The simple act of making personalized bookmarks can transform the way you enjoy books and can also be a wonderful way to give gifts that carry sentimental value. Whether crafting bookmarks for yourself or for loved ones, the possibilities are endless. Don’t hesitate to explore different designs, experiment with diverse materials, and refine your techniques.
As you embark on this delightful crafting journey, remember that the heart of bookmark making lies in the enjoyment of the process. Creating bookmarks can be a fulfilling adventure that invites you to express your creativity at every turn. Gather your bookmark making kit and start crafting your unique designs today, inviting joy, creativity, and personalization into your reading life!