Introduction
For any miniature painting enthusiast, selecting the right tools can dramatically impact your artwork. Among these tools, brushes hold a special place, particularly when it comes to painting intricate details on small models. Using the best brushes for miniature painting will not only enhance your overall painting experience but will also help you achieve impressive results. In this article, we will explore various types of brushes for miniature painting, including their sizes, materials, and how to choose the right ones for your projects.
Understanding the Importance of Brushes in Miniature Painting
When it comes to miniature painting, the choice of brushes is pivotal for achieving the desired precision and intricate details. Here, we will delve into why the right brushes are essential for this art form.
1. Precision Matters
- Detailing: Miniatures often feature intricate designs, which require precision when applying paint. The best brushes for miniature painting offer fine tips that allow artists to access small areas without trailing paint onto adjacent surfaces.
- Control: A good quality brush provides greater control over your strokes, allowing for more uniform application and improved detailing.
2. Different Brush Types
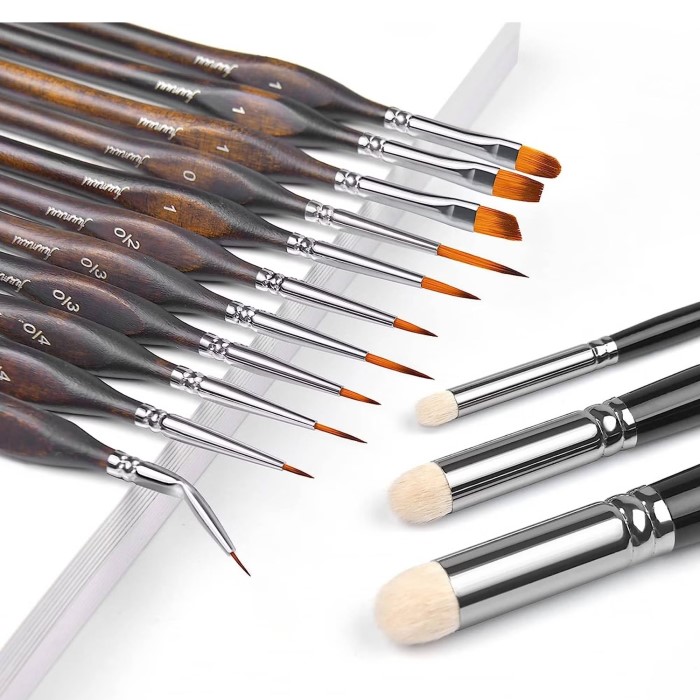
- Variety of Brushes: Various brush types are available, each serving a distinct purpose. From flat brushes for broader strokes to round brushes for detailed work, understanding these types helps artists select the right tools based on their needs.
- Versatility: Many artists use a combination of different brush types to achieve specific effects while painting.
3. Invest in Quality
- Durability: High-quality brushes save painters time and effort. Cheap brushes may shed bristles, fray, or lose their shape, while well-made brushes can withstand repeated use over time.
- Performance: Quality brushes tend to hold paint better, leading to smoother application and reduced wastage of materials.
Types of Brushes for Miniature Painting
Understanding the various types of brushes available is key to selecting the best brushes for miniature painting.
1. Round Brushes
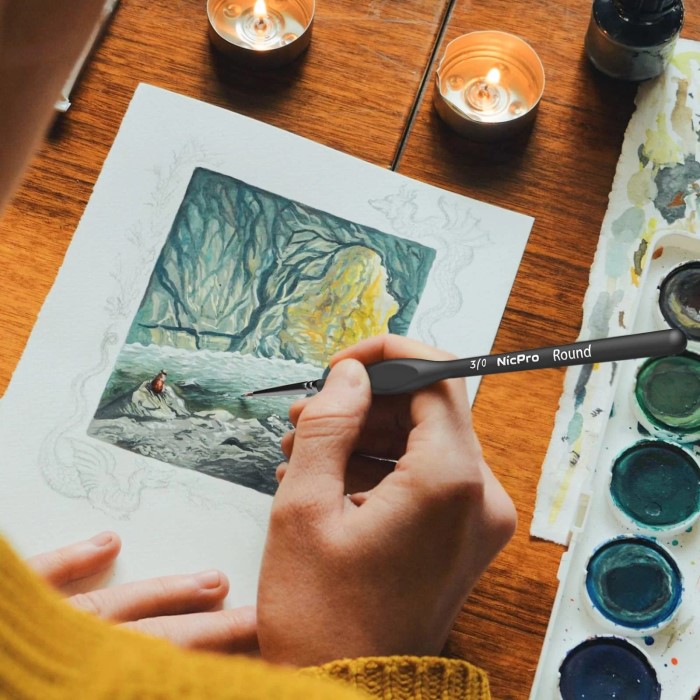
- Description: Round brushes feature a pointed tip and are ideal for detail work. These brushes offer versatility as they can be used for both fine lines and broader strokes.
- Use Cases: Use round brushes to add intricate details to miniatures, such as facial features or decorative elements.
2. Flat Brushes
- Description: Flat brushes have a wide, rectangular shape and are best for applying paint quickly over larger surfaces.
- Use Cases: Ideal for initial coats or for creating smooth, even layers of color across broader areas.
3. Liner Brushes
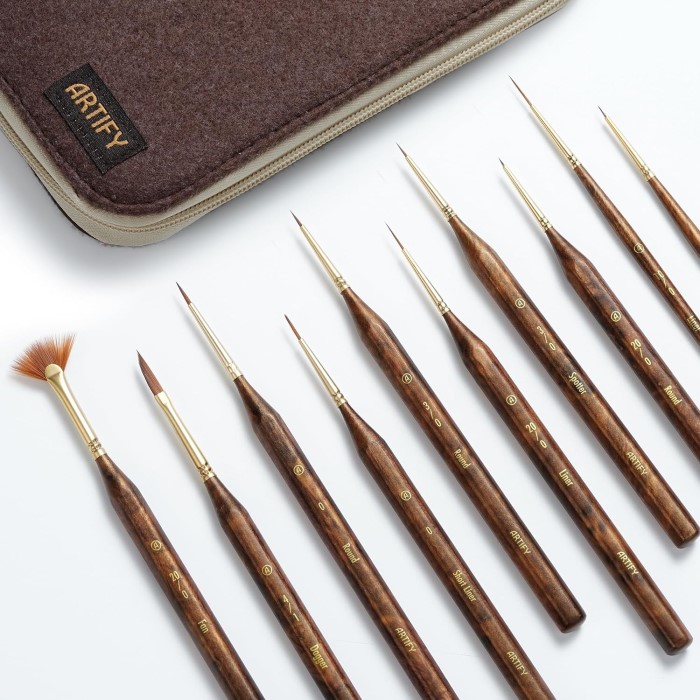
- Description: Liner brushes are thin and long, specifically designed for creating fine lines and intricate detailing.
- Use Cases: Use liner brushes for outlining, detailing work, and adding lines or textures to your miniatures.
4. Filbert Brushes
- Description: Filbert brushes combine the features of round and flat brushes. They have an oval tip, making them perfect for blending.
- Use Cases: Ideal for softening edges and creating smooth transitions between colors.
5. Spotter Brushes
- Description: Spotter brushes are extremely small and designed for the most intricate details.
- Use Cases: Best for tiny areas or extremely fine detail work, such as painting individual buttons or minute features on miniatures.
Materials Used in Brush Construction
The materials used to make brushes have a significant impact on their performance and suitability for miniature painting.
1. Natural Hair Brushes
- Materials: Natural hair brushes are typically made from materials like sable, squirrel, or hog bristles.
- Advantages: These brushes hold more paint and water, leading to smoother strokes. They are also excellent for blending and achieving soft edges.
2. Synthetic Brushes
- Materials: Synthetic brushes are made from man-made fibers and can mimic the feel of natural hair.
- Advantages: Often more durable and easier to clean than natural hair brushes, synthetic brushes are also more affordable. They can be a great option for beginners.
3. Blend of Natural and Synthetic
- Advantages: Some brushes combine both natural and synthetic materials to take advantage of the benefits of each. This offers durability without sacrificing performance.
Choosing the Right Size of Brushes
When selecting brushes for miniature painting, size matters greatly. Here’s how to determine what size you need:
1. Small Sizes for Detail Work
- Recommended Sizes: Look for sizes ranging from 00 to 2 for intricate details. These smaller brushes are perfect for facial features, small accessories, and fine texturing.
- When to Use: Use these sizes for detailing work on miniatures or for outlining parts where precision is key.
2. Medium Sizes for General Work
- Recommended Sizes: Sizes between 3 to 6 are excellent for general painting tasks. They can cover moderate areas while still allowing for detailed work.
- When to Use: These sizes work well for base coating larger areas or applying secondary details.
3. Larger Sizes for Base Coats
- Recommended Sizes: Consider sizes 8 and above for base coats or painting broader surfaces.
- When to Use: Ideal for applying preliminary layers of paint quickly over large areas of your miniatures before adding finer details.
Techniques for Miniature Painting
Once you have selected the best brushes for miniature painting, it’s time to explore some techniques that will enhance your skills.
1. Base Coating
- Initial Steps: Begin by applying a base coat using a larger flat or round brush. This helps establish the foundation color on your miniature.
- Even Application: Make sure to apply an even layer while minimizing brush strokes.
2. Layering
- Building Depth: Use smaller brushes for layering colors, adding darker shades for depth, and highlights for dimension.
- Gradual Approach: Layering enables you to create complex color transitions, enhancing the visual interest of your miniatures.
3. Dry Brushing
Technique:
- Preparation: Start by selecting a dry brush that has stiff bristles. This type of brush is ideal for achieving the desired texture and detail without excessive paint application.
- Choosing the Paint: Dip the brush into a small amount of paint—preferably a color that complements the base layer. Ensure that the paint has the right consistency for dry brushing, which is typically thicker than traditional paint.
- Removing Excess Paint: After dipping the brush, it’s essential to remove any excess paint. You can do this by lightly tapping the brush on a paper towel or palette. This step ensures that only a minimal amount of paint is applied, which is crucial for effective dry brushing.
- Application Technique: With the brush minimally loaded, lightly drag it across the raised details of the surface. Use quick, gentle strokes to allow the paint to catch only on the elevated areas, enhancing the texture.
- Building Layers: Repeat the process as needed, adding more layers of dry brushing for increased definition. Take care to allow each layer to dry before applying additional strokes, which helps avoid over-saturation.
Result:
- Enhanced Textures: This technique effectively highlights the textures of the painted surface, bringing out the details that might otherwise remain subdued. The dry brushing allows for a more nuanced appearance of the artwork.
- Subtle Color Application: By applying paint in this manner, the colors remain subtle and varied. This avoids the flat look that can occur when excessive paint is used, ensuring that the original colors are still visible underneath.
- Three-Dimensional Effect: The resulting effect gives the artwork a three-dimensional quality, as the raised areas appear to “pop” in contrast to the flatter areas. This adds depth and visual interest to the piece.
- Versatility: This dry brushing technique can be applied to a variety of mediums, including wood, canvas, and ceramics, making it a versatile tool for artists looking to enhance their work.
- Professional Finish: Ultimately, this method contributes to a more polished and professional finish in art projects, as it showcases skillful control over color and texture, elevating the overall aesthetic quality of the work.
FAQs About Brushes for Miniature Painting
What is the best brush for miniature painting?
The best brush for miniature painting often depends on your specific needs, but round brushes in small to medium sizes are commonly recommended for detail work, while flat brushes are ideal for base coats.
Are synthetic brushes good for miniature painting?
Yes, synthetic brushes can be quite effective for miniature painting. They are durable, often have fine tips for details, and are easier to clean compared to natural hair brushes.
What is the best hair for miniature brushes?
Sable hair is considered premium for its softness and ability to hold paint, making it a popular choice for high-quality brushes. Hog bristle is sturdier but may be preferred for heavier applications.
What size brush for miniature painting?
Sizes often range from 00 for intricate details to 2 for general outlining. Mid-range brushes (sizes 3-6) are perfect for most applications, while larger brushes (sizes 8+) are best for base coats.
Conclusion
In summary, selecting the best brushes for miniature painting is a crucial step for achieving stunning results. The quality, type, and size of the brushes significantly affect the precision and overall look of your miniatures. By carefully considering each aspect of your brushes—from materials to techniques—you can elevate your painting skills and bring your miniatures to life. Whether you are a beginner or an experienced painter, understanding your tools will help you master the art of miniature painting. So gather your materials, invest in quality brushes, and unleash your creativity on your next miniature project!