Introduction to the Bunsen Burner
History and invention
The Bunsen burner was invented by Robert Bunsen in 1855. Bunsen collaborated with technician Peter Desaga to refine the design. It emerged as a safer and more efficient heat source for laboratories. The key innovation was its ability to control the air and gas mixture. This led to a clean, adjustable flame suitable for scientific experiments. Since its invention, bunsen burner chemistry has become an essential laboratory tool for chemists worldwide.
Components and structure of a Bunsen burner
The bunsen burner chemistry has several key components for functionality. The base provides stability and prevents tipping. The gas inlet connects to the gas source, usually natural gas or propane. The barrel is a metal tube where air and gas mix. Adjusting the air holes at the base allows flame control. A collar is used to open or close these air holes. Together, these parts create an adjustable flame for various tasks in chemistry experiments.
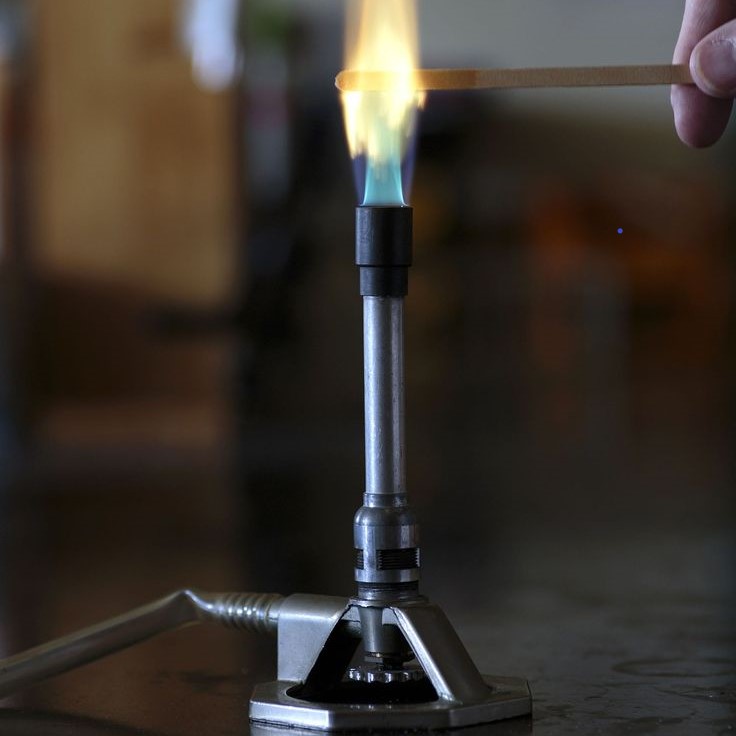
How a Bunsen Burner Works
Understanding how a Bunsen burner works is key for laboratory tasks. This device enables controlled combustion to achieve precise heating. Below, we explain the principles of combustion and flame control in detail.
Principles of combustion
Combustion occurs when fuel combines with oxygen, producing heat and light. The Bunsen burner uses this process efficiently. It mixes gas (like natural gas or propane) with air to create a flame. The air holes in the burner control the oxygen supply. More oxygen creates a hotter, cleaner flame, while less oxygen generates a cooler, yellow flame. This controlled process allows researchers to achieve specific temperatures for experiments.
Controlling flame types and temperatures
The flame of a Bunsen burner can be adjusted to suit various needs. The collar on the burner regulates the air entering the barrel. Opening the air holes allows more oxygen in, generating a hotter, blue flame (non-luminous flame). Closing the air holes limits oxygen, resulting in a cooler, yellow flame (luminous flame). This flexibility ensures the right temperature and intensity for tasks like boiling, heating, or precise chemical reactions.
Proper flame adjustment ensures safety and optimal performance. Always observe the flame’s color and size during use to match the experiment’s requirements.
Safety Guidelines for Using a Bunsen Burner
Common hazards and precautions
Using a Bunsen burner involves risks, so safety is crucial. Common hazards include burns, fire, and gas leaks. Precautions are essential to protect yourself and avoid accidents:
- Inspect equipment before use: Check for damage or gas leaks in the burner or hose.
- Work in ventilated spaces: Ensure proper ventilation to prevent accumulation of gases.
- Tie back loose items: Secure long hair and avoid wearing loose clothing.
- Use safety equipment: Wear protective goggles and heat-resistant gloves.
- Light the burner safely: Use a spark lighter; avoid using matches.
- Monitor the flame: Ensure the flame size and color match the experiment’s requirements.
- Turn off gas promptly: After use, ensure the burner is off and gas supply is shut.
By following these precautions, you reduce risks and maintain a safe lab environment.
Proper handling and maintenance
Handling and maintaining a Bunsen burner correctly is vital for safety and efficiency. Follow these practices:
Correct Ignition Technique
- Open the Air Holes:
- Before lighting the Bunsen burner, ensure that the air holes located on the base of the burner are fully opened. This step is crucial for producing a clean and efficient flame.
- Achieving the Right Flame:
- An open air supply allows for more oxygen to mix with the gas, resulting in a blue flame. This is essential for precise and safe heating during experiments, as it indicates complete combustion.
- Safety Precautions:
- Always double-check that the air holes are clear and functioning before ignition. This precaution minimizes the risk of flare-ups or incomplete combustion that can lead to soot production.
Adjust the Flame Properly
- Use the Collar for Control:
- The collar on the Bunsen burner allows you to adjust the air supply easily. Rotating the collar can increase or decrease the amount of oxygen entering the burner, which directly affects the flame’s characteristics.
- Controlling Temperature:
- By adjusting the collar, you can control both the temperature and the size of the flame. A wider flame indicates higher heat, while a smaller flame is better for gentle heating.
- Experiment with Settings:
- Familiarize yourself with how different collar positions affect the flame. It’s essential to find the right setting based on the specific needs of your experiment for optimal results.
Avoid Reaching Over the Flame
- Maintain Safe Distances:
- Always keep your hands and any tools at a safe distance from the burner top. This practice prevents accidental burns and ensures a safer working environment.
- Using Tools Safely:
- When manipulating materials near the burner, utilize appropriate tools such as tongs or holders. This avoids direct contact with the flame and minimizes risk.
- Be Aware of Surroundings:
- Stay aware of your surrounding area to ensure that flammable materials or equipment are not within reach of the flame. It helps avoid accidents and maintains a safe workspace.
Clean Regularly
- Regular Maintenance:
- After each use of the Bunsen burner, make it a point to clean it thoroughly. This includes removing soot and debris that may have accumulated in the burner barrel.
- Importance of Soot Removal:
- Soot buildup can affect the flame quality and cause inefficient burning. Regular cleaning helps ensure that the burner operates at peak performance each time it is used.
- Use Appropriate Cleaning Tools:
- Utilize brushes or cloths that are suitable for cleaning. Avoid using abrasive materials that could scratch or damage the burner’s surface.
Store Safely
- Optimal Storage Conditions:
- After cleaning, always store the Bunsen burner in a dry and secure area. This prevents moisture damage and keeps the burner ready for future use.
- Designated Storage Places:
- Designate a specific storage location for the burner, ensuring that it is away from potential hazards such as chemicals, sharp objects, or high traffic areas.
- Use Protective Covers:
- If possible, consider using protective covers for the burner during storage. This will help avoid dust accumulation and any physical damage.
Report Malfunctions Immediately
- Recognizing Malfunctions:
- Be vigilant in observing the burner’s performance. If you notice any irregularities, such as an unstable flame or difficulty igniting, it may indicate a malfunction.
- Informing the Supervisor:
- Report any issues to your supervisor right away. Prompt reporting is crucial for the safety of all personnel in the laboratory and can prevent potential accidents.
- Follow Protocol:
- Ensure you are familiar with the proper protocols for reporting malfunctions in your laboratory setting. Following these procedures helps maintain a safe and effective working environment.
Applying these handling and maintenance practices ensures safe and effective use of the Bunsen burner in chemistry labs.
Applications of Bunsen Burners in Chemistry
Bunsen burners play a crucial role in laboratory experiments. Their adjustable flame and precise heating ability make them versatile tools for various applications. Below, we highlight three major uses of Bunsen burners in chemistry.
Heating and boiling substances
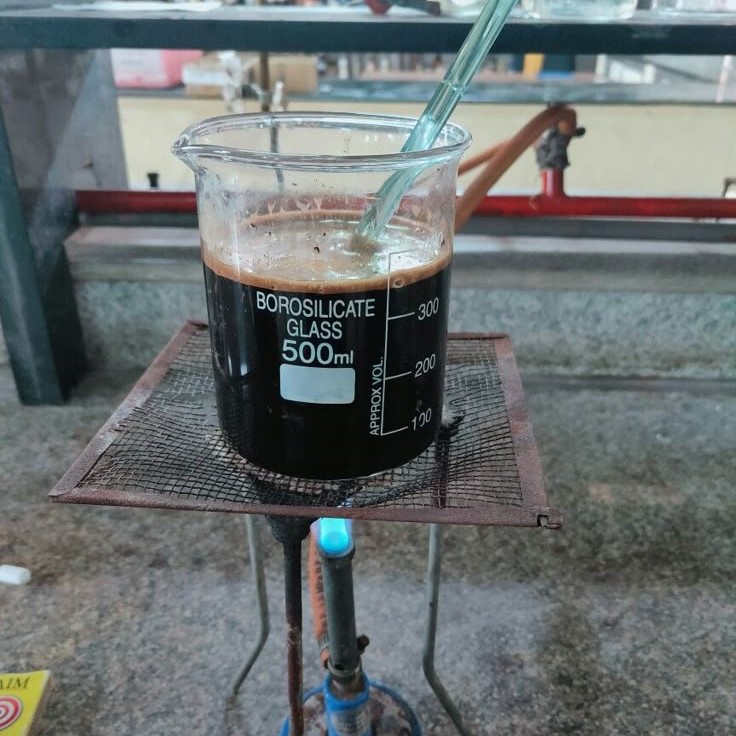
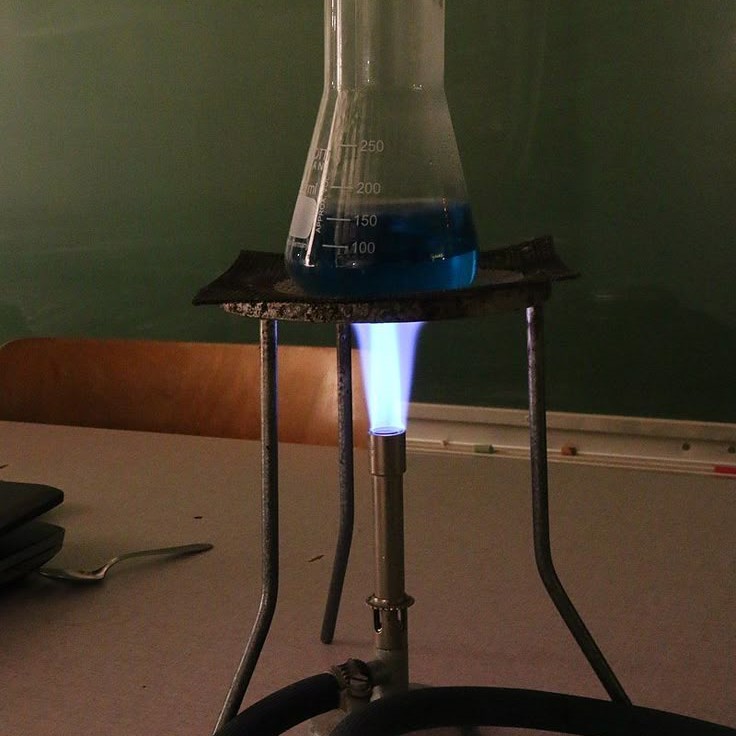
Chemists rely on Bunsen burners to heat and boil substances effectively. The adjustable flame allows control of the temperature, ensuring precise results. They are ideal for tasks that require steady heating, such as preparing solutions or conducting reactions. The blue, non-luminous flame is commonly used because it provides consistent and intense heat. This versatility makes Bunsen burners essential tools for experiments involving liquids and solids.
Sterilization of equipment
Sterilization is vital to maintain clean lab conditions. Bunsen burners are frequently used to sterilize tools like metal loops or forceps. The high-temperature flame kills bacteria and other contaminants quickly. Many chemists pass equipment through the flame for instant sterilization, ensuring a contamination-free environment. This practice is particularly important for microbiology and biochemical experiments.
Conducting flame tests
Flame tests are a classic application of Bunsen burners in chemistry. These tests identify the presence of specific chemical elements. By introducing a substance to the flame, chemists observe its color change to determine its composition. The burner’s ability to produce a clean flame is essential for accurate results. Flame tests are widely used in both educational labs and professional analytical studies.
Bunsen burners’ versatility ensures they remain a cornerstone of modern chemistry experiments. Their applications in heating, sterilization, and flame tests highlight their importance in every laboratory.
Types of Flames Produced by a Bunsen Burner
Bunsen burners produce different types of flames depending on the air supply adjustment. Understanding these flame variations is essential for safe and effective use in chemistry experiments.
Role of air supply in flame variations
The air supply significantly affects the characteristics of the flame in a Bunsen burner. The collar at the base of the burner regulates how much air enters through the air holes. Adjusting the air supply changes the flame’s temperature and appearance.
- More air (open air holes): A larger air supply creates a hotter, blue flame. This occurs because introducing more oxygen allows for complete combustion of the gas.
- Less air (closed air holes): A restricted air supply produces a cooler, yellow flame. This happens due to incomplete combustion, resulting in unburned carbon particles that glow yellow.
By controlling the air supply, chemists can select the best flame type for different experiments.
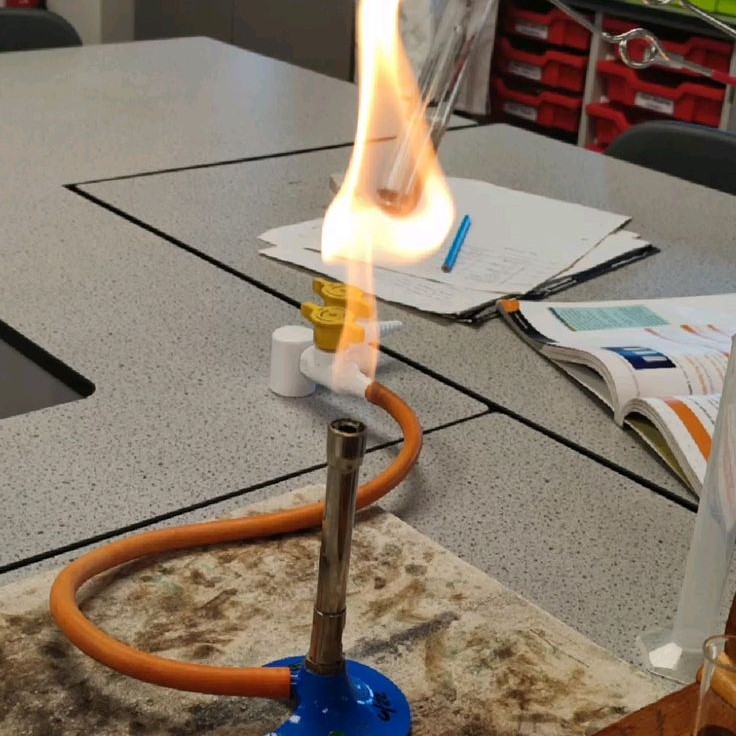
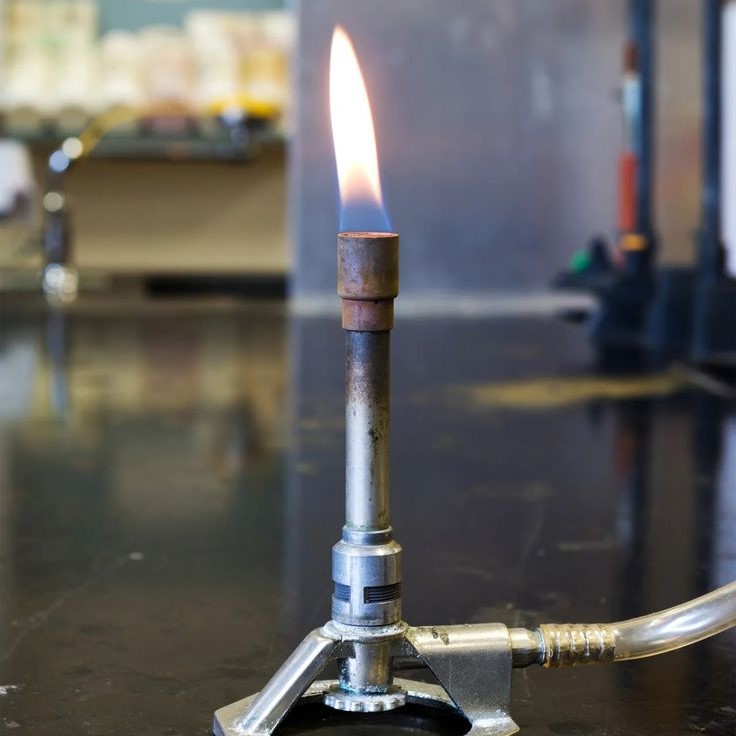
Differences between luminous and non-luminous flames
Two primary types of flames are produced by a Bunsen burner: luminous and non-luminous flames.
- Luminous flame:
- Characteristics: Yellow in color, cooler, and less clean.
- Caused by: Closed (or partially closed) air holes leading to incomplete combustion.
- Uses: Rarely used; mainly suitable for low-temperature applications.
- Non-luminous flame:
- Characteristics: Blue in color, hotter, and clean.
- Caused by: Open air holes promoting complete combustion.
- Uses: Preferred for most tasks, such as heating, boiling, and sterilization.
Each type of flame offers specific advantages. Proper adjustment ensures efficient and appropriate use of the bunsen burner chemistry based on experimental needs.
Importance of Bunsen Burners in Modern Laboratories
Bunsen burners are invaluable tools in modern laboratories due to their precision and flexibility. Their ability to deliver controlled heat and adjustable flames has revolutionized various scientific applications.
Enhancing experimental precision
Bunsen burners allow chemists to conduct experiments with high precision. The adjustable flame ensures researchers achieve the exact temperature needed for their tasks. For example:
- Controlled reactions: Scientists can maintain consistent heat for chemical reactions.
- Accurate measurements: Precise heating minimizes errors when preparing solutions or measuring material properties.
- Repeatable results: Consistent flames ensure experiments yield reproducible outcomes.
These features make the Bunsen burner crucial for laboratory accuracy. It helps researchers optimize results in both educational and professional settings.
Versatility in scientific studies
The Bunsen burner’s flexibility caters to a wide range of scientific studies. From basic education to advanced research, it offers significant utility:
- Educational labs: The burner introduces students to heat-based experiments like flame tests and boiling points.
- Analytical chemistry: Scientists use it for qualitative tests like identifying chemical elements.
- Microbiology: Its flame sterilizes equipment quickly, ensuring contamination-free conditions.
By supporting diverse applications, the Bunsen burner fosters innovation in many scientific fields. Its role in heating, sterilizing, and conducting flame tests highlights its importance. Overall, this essential tool continues to be a cornerstone of laboratory practices.
Troubleshooting Common Issues
Even with proper use, Bunsen burners may face common issues. Addressing these problems ensures safe and efficient operation in the lab.
Incorrect flame adjustment
An incorrectly adjusted flame can hinder experiments or pose safety hazards. Understanding and resolving this issue is crucial:
- Flame too large or small: Check the gas supply to ensure consistent flow. Adjust the gas valve if needed.
- Yellow, sooty flame: Ensure the air holes are open to allow sufficient oxygen for combustion.
- Flickering flame: Inspect for blockages in the burner barrel or air holes. Clean as required.
- Flame instability: Secure the burner on a flat surface. Tighten loose components like the gas inlet connection.
Regular inspections and adjustments prevent improper flame settings and ensure optimal performance.
Resolving ignition problems
Proper ignition of a bunsen burner chemistry is vital for experiments. Common ignition problems include:
- Burner won’t light: Check that the gas supply is turned on. Inspect the gas tube for blockages.
- Weak ignition spark: Use a functional spark lighter. Replace it if damaged or worn out.
- Flame extinguishes quickly: Ensure the air holes are slightly closed during ignition. Adjust after lighting.
- Gas odor: Turn off the gas supply immediately and inspect for leaks. Fix or report the issue.
Addressing these problems promptly ensures a safer and more reliable lab environment. Always follow safety guidelines when troubleshooting.


