Introduction
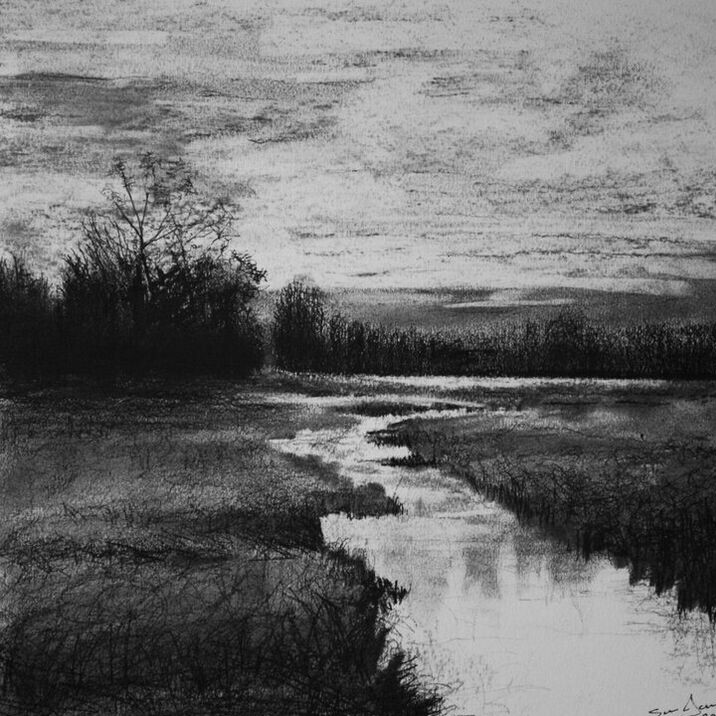
Pencil landscape drawing is an art form that focuses on creating natural scenes using pencils. It captures the beauty of nature through lines, shapes, and shading. This technique allows artists to portray forests, mountains, rivers, and more with precision and beauty. It is highly valued for its simplicity and timeless appeal.
What is Pencil Landscape Drawing?
Pencil landscape drawing involves sketching nature and outdoor scenes using only pencils. Artists use techniques like shading, layering, and texturing to add details and depth. This form of drawing emphasizes light, shadow, and perspective to bring the landscape to life. It is a versatile and accessible medium for beginners and professionals alike.
Benefits of Learning Landscape Drawing with Pencils
- Improves Artistic Skills: Pencil landscape drawing sharpens observation and drawing abilities over time.
- Budget-Friendly Hobby: It requires only basic tools like pencils and paper, making it cost-effective.
- Relaxes the Mind: Drawing natural scenes is a calming activity, reducing stress and boosting focus.
- Enhances Creativity: It encourages creativity by allowing artists to interpret and recreate the beauty of nature.
- Builds Attention to Detail: This form of art trains you to notice and replicate subtle details in landscapes.
By learning pencil landscape drawing, you can express your artistic potential while enjoying nature’s beauty.
Essential Tools and Materials
To excel in pencil landscape drawing, the right tools matter. Using appropriate materials ensures better results and enhances your artistic experience. Below are the essential tools that every artist should use.
Types of Pencils for Landscape Drawing
The type of pencil you select affects your drawing’s texture and shading. Common pencil options include:
- Graphite Pencils: Available in grades from hard (H) to soft (B). Use H pencils for fine, light lines and B for darker, softer strokes.
- Charcoal Pencils: These create rich, bold, and dramatic effects, ideal for intense shadowing.
- Colored Graphite Pencils: A great choice for adding subtle hues to your pencil landscape drawing.
- Mechanical Pencils: Perfect for precision and intricate details without frequent sharpening.
By experimenting with different pencil types, you can achieve desired textures and tones.
Paper Selection and Quality
Choosing the right paper is key to a successful pencil landscape drawing. Factors to consider include paper texture, thickness, and quality:
- Smooth Paper: Best for fine details and clean shading.
- Textured Paper: Adds depth, suitable for landscapes with rough surfaces like rocks and trees.
- Weight/Thickness: Use heavier paper (like 160gsm or higher) for durability and to prevent tearing during erasing.
- Acid-Free Paper: Avoids yellowing and preserves your work over time.
A sturdy, high-quality paper enhances blending and layering, helping make your artwork striking.
Additional Tools: Erasers, Blenders, and Sharpeners
Beyond pencils and paper, several tools contribute to achieving professional results:
- Erasers:
- Kneaded Erasers: Ideal for lightening areas or creating highlights without damaging the paper.
- Vinyl Erasers: Great for precise corrections and removing bold pencil marks.
- Blenders:
- Tortillons/Stumps: Paper tools for smoothing pencil strokes and creating seamless gradients.
- Cotton Swabs or Tissues: Alternative tools for soft blending on larger areas.
- Sharpeners:
- Manual Sharpeners: Provide fine points for delicate details.
- Knife or Sandpaper Blocks: Used for customizing pencil tips for varied strokes.
These additional tools enhance control, precision, and the overall quality of your pencil landscape drawing.
By selecting the right tools and materials, you lay a strong foundation for captivating artwork.
Fundamental Drawing Techniques
Mastering fundamental drawing techniques is essential for creating impressive pencil landscape drawing. These techniques help bring out depth, texture, and realism in your artwork.
Shading Techniques: Hatching, Cross-Hatching, and Blending
Shading adds shadows and enhances dimension in pencil landscapes. The most effective shading techniques are:
- Hatching: Use parallel lines to create shading. Densely packed lines make the area darker.
- Cross-Hatching: Layer intersecting lines at various angles for richer depth.
- Blending: Smooth and merge pencil strokes using a tortillon, tissue, or cotton swab for seamless shading effects.
Experiment with these methods to achieve dynamic and realistic shading in landscapes.
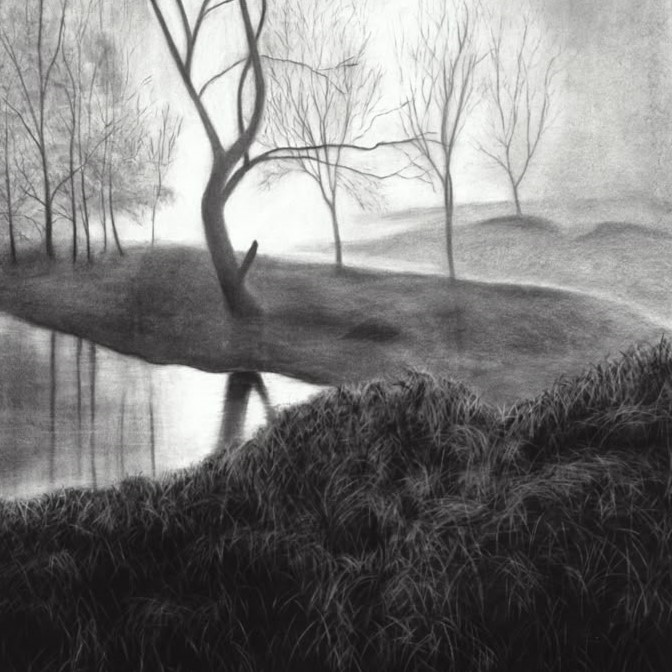
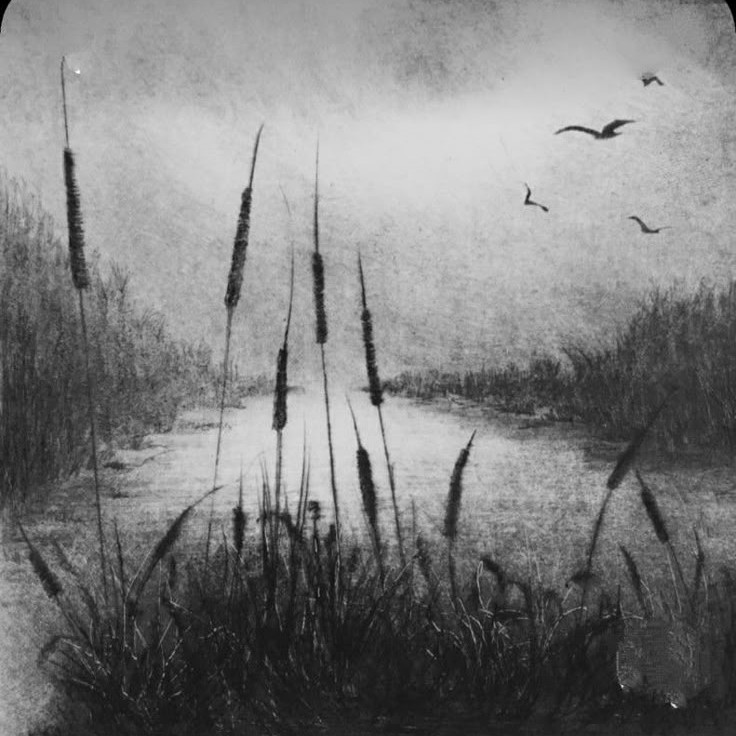
Creating Textures: Grass, Trees, and Water
Creating texture allows your landscapes to look natural and lifelike. Practice these for common elements:
- Grass: Draw short and quick strokes to represent blades, varying lengths for realism.
- Trees: Use irregular lines for bark textures. Sketch soft, layered strokes for foliage.
- Water: Draw smooth horizontal lines for still water and wavy ones for motion effects.
Add subtle variations in pressure and pencil type to enhance detail in textures.
Importance of Light and Shadow
Light and shadow create contrast and visual interest in landscapes. Observe how light interacts with objects:
- Place highlights where the light hits directly, leaving areas bright.
- Draw shadows using darker tones where the light is blocked.
- Adjust shading to add depth and make objects appear three-dimensional.
Focus on light direction to make your artwork vibrant and realistic.
Step-by-Step Guide to Drawing a Landscape
Creating a pencil landscape drawing involves a systematic approach to achieve beautiful results. Follow these steps to master the art of drawing.
Planning Your Composition
- Choose Your Scene: Pick a natural setting that inspires you.
- Decide on Key Elements: Highlight features like trees, mountains, or rivers.
- Establish Focal Points: Identify where the viewer’s attention should be.
- Balance Your Layout: Arrange elements evenly to create harmony.
- Use Reference Images: Study photos or visit the scene for accuracy and ideas.
Proper planning ensures your landscape has structure and flow for an appealing composition.
Sketching the Basic Outline
- Light Borders: Start with faint pencil strokes for defining the edges.
- Rough Shapes: Sketch basic forms like circles for trees and triangles for mountains.
- Position Key Details: Place the main objects where they complement the scene.
- Use Guidelines: Add lines to ensure perspective and depth.
- Refine Layout: Check proportions, adjusting as needed to match your vision.
A solid outline provides the foundation for your landscape drawing.
Adding Depth and Dimension
- Layer Light Shading: Lightly shade far elements to create distance.
- Darken Nearby Features: Add heavier shading to objects closer to the viewer.
- Adjust Overlaps: Show objects overlapping to emphasize depth.
- Apply Perspective: Use techniques like diminishing sizes for realism.
- Blend Edges: Smooth lines and tones for seamless transitions.
Depth makes your artwork look natural and realistic.
Refining Details and Final Touches
- Enhance Textures: Add intricate strokes for elements like bark and rippling water.
- Highlight and Shade: Emphasize light areas and deepen shadows for contrast.
- Focus on Clarity: Tidy up edges and eliminate unnecessary marks.
- Review Proportions: Ensure objects are sized correctly within the scene.
- Finalize Artwork: Apply finishing touches like bold strokes or erased highlights.
Refined details transform a simple sketch into a captivating landscape masterpiece.
Tips for Improving Your Landscape Drawings
Improving your pencil landscape drawing skills takes consistent practice and mindful application of techniques. Here are some tips to help you create better landscapes and enhance your artistry.
Practicing Observation Skills
- Observe real landscapes closely to understand their details.
- Focus on shapes, light, and textures while studying nature.
- Use photos or live scenery as references for practice.
- Train your eye to notice subtle changes in light and shadow.
- Sketch quick studies of landscapes to build familiarity.
Observation is key to capturing the essence of nature in your art.
Working with Different Perspectives
- Experiment with bird’s-eye, eye-level, and worm’s-eye views.
- Use perspective lines to create depth and realism.
- Study how objects appear smaller as they move into the distance.
- Incorporate foreground, middle ground, and background elements.
- Practice overlapping objects to enhance a sense of space.
Mastering perspectives will make your drawings more dynamic and engaging.
Simplifying Complex Scenes
- Break down intricate scenes into basic shapes and forms.
- Focus on key elements instead of overwhelming details.
- Use light pencil strokes to plan compositions first.
- Eliminate unnecessary objects for cleaner designs.
- Prioritize balance and clarity in your artwork.
Simplification helps highlight the main elements of your landscape.
Common Mistakes to Avoid
- Overusing Erasers: Adjust lightly instead of constantly erasing.
- Ignoring Proportions: Check sizes and spatial relationships in your composition.
- Skipping Perspective: Always plan perspective lines for realistic depth.
- Rushing Details: Work gradually on textures after the base sketch.
- Flat Shading: Apply varying tones to bring dimension to your drawing.
By avoiding these mistakes, you can refine your drawings effectively.
Inspirational Landscape Ideas to Try
Exploring different landscapes can expand your creativity and improve your pencil drawing skills. Each scene offers unique textures, shapes, and lighting to practice. Here are inspiring ideas to try in your next pencil landscape drawing project.
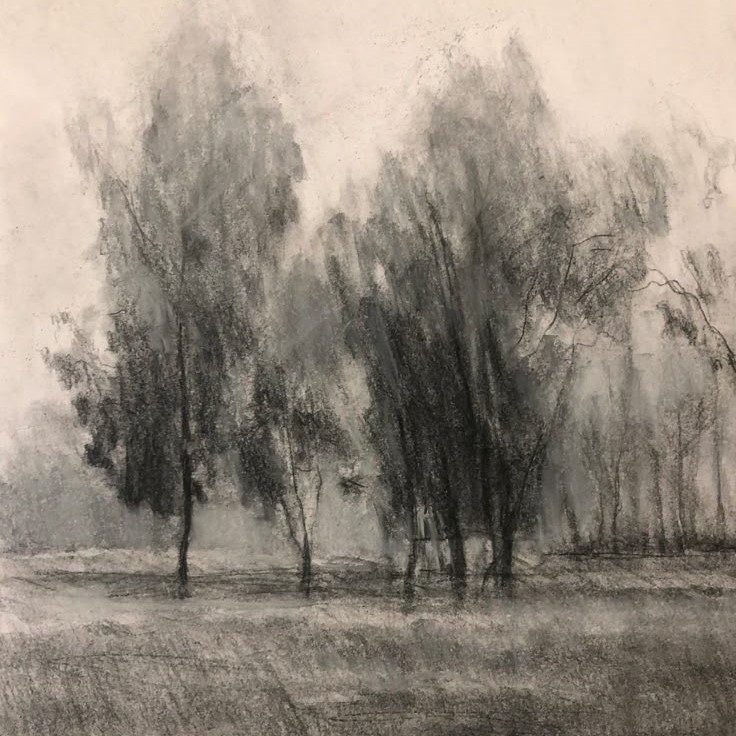
Drawing Forests and Woods
- Focus on Tree Varieties: Draw different tree species like oaks, pines, or willows.
- Create Dense Vegetation: Add overlapping plants and bushes for a realistic forest atmosphere.
- Highlight Light Filtering: Show sunlight breaking through leaves for interesting light effects.
- Incorporate Ground Details: Sketch fallen leaves, twigs, or patches of grass.
- Practice Bark Texture: Use irregular strokes to mimic bark patterns on tree trunks.
Forests offer endless inspiration for practicing shading and layering techniques.
Mountains and Valleys
- Emphasize Peaks: Draw jagged or smooth mountain tops with variety in height.
- Show Depth: Use perspective to position valleys between layers of distant mountains.
- Add Snow: Use light shading to depict frosty peaks or winter landscapes.
- Include Rocks and Cliffs: Create rugged terrain with textured lines.
- Capture Atmospheric Perspective: Shade distant mountains lighter for a sense of depth.
Drawing mountains sharpens your ability to depict distance and natural ruggedness.
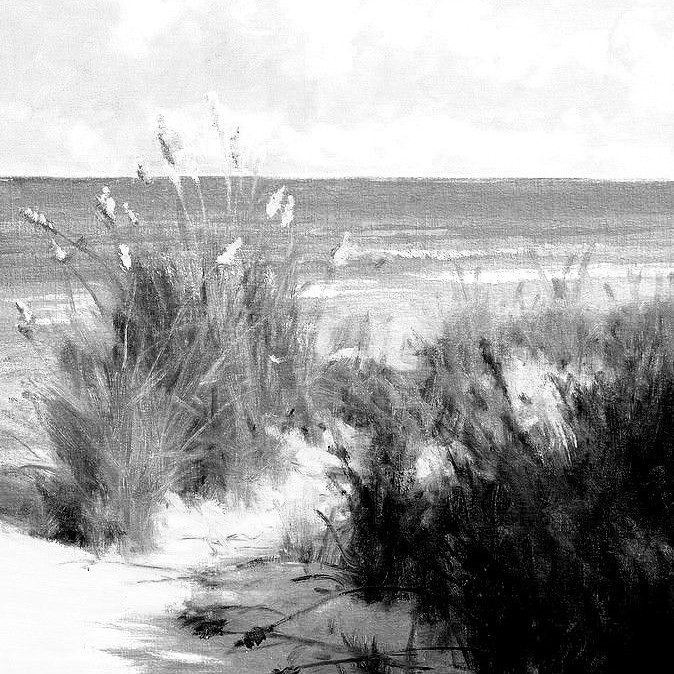
Seascapes and Beaches
- Sketch Waves: Use curved and wavy lines to show water movement.
- Add Reflections: Draw light reflections on water for added realism.
- Depict Sandy Textures: Use soft strokes to mimic the grainy feel of sand.
- Include Coastal Elements: Add seashells, driftwood, or footprints on the beach.
- Play with Horizon Lines: Draw a clear separation between sky and water for balance.
Seascapes teach you to create smooth blending and capture fluid motion.
Urban Landscapes
- Draw Buildings: Focus on different shapes and architectural styles.
- Add Streets: Include roads, pathways, or staircases to show perspective.
- Sketch Everyday Details: Incorporate lampposts, benches, or parked vehicles.
- Add Shadows: Highlight structural angles with light and dark shading.
- Incorporate People: Show figures walking or resting for a dynamic touch.
Urban landscapes help you practice geometric lines and complex perspectives.
Experimenting with these ideas will refine your pencil landscape drawing skills and spark new creativity.
Advanced Techniques for Skilled Artists
Enhancing your pencil landscape drawing requires mastering advanced methods. These techniques elevate your art to a professional level.
Using Layering for Realism
Layering adds richness and depth to landscapes.
- Start Light: Begin with soft, light strokes using hard pencils.
- Build Gradual Shading: Layer darker tones gradually for smooth transitions.
- Overlap Textures: Add layers to create realistic textures for grass, trees, or water.
- Enhance Colors: Experiment with colored graphite pencils for subtle natural hues.
- Blend Carefully: Use tortillons or tissues to merge strokes seamlessly.
Layering helps replicate real landscapes and enhances drawing dimension.
Combining Different Mediums with Pencils
Combining mediums adds versatility to your artwork.
- Use Watercolors: Paint light backgrounds and pencil over for detailed effects.
- Add Ink Details: Create bold outlines or sharp textures with ink pens.
- Experiment with Charcoal: Mix pencils and charcoal for dramatic contrasts.
- Try Pastels: Include soft pastel touches for glowing highlights or shadows.
- Mix Techniques: Blend mediums to achieve unique artistic styles.
Using various mediums expands creative possibilities and boosts visual impact.
Capturing Seasonal Atmospheres
Seasons bring unique moods and visuals into landscapes.
- Spring Blossoms: Draw blooming flowers and budding trees with vibrant strokes.
- Summer Glow: Highlight bright skies and lush greenery using rich tones.
- Autumn Leaves: Use layering to replicate falling leaves and earthy textures.
- Winter Frost: Depict snow and icy textures with light shading and delicate strokes.
- Color Transitions: Capture seasonal shifts to add emotion to your artwork.
Seasonal themes enhance storytelling and give life to your pencil drawings.
Final Thoughts and Next Steps
Mastering pencil landscape drawing is a fulfilling and artistic journey. It combines creativity with skillful techniques that evolve over time. As you advance, focus on consistent practice and explore new approaches to enhance your artwork further.
How to Keep Improving Your Skills
- Practice Regularly: Draw landscapes daily to strengthen your skills.
- Study Art Resources: Learn from tutorials, books, and workshops for fresh techniques.
- Experiment Boldly: Try unusual scenes and tools to develop unique styles.
- Seek Feedback: Share your work with peers for constructive advice.
- Analyze Masters: Study professional artists’ methods to inspire your growth.
- Set Goals: Create achievable milestones to track your progress.
Continuous improvement transforms your pencil drawings into refined and captivating pieces.
Sharing and Showcasing Your Artwork
- Use Social Media: Share your drawings on platforms to reach a wide audience.
- Build a Portfolio: Create an organized collection to display your best work.
- Participate in Exhibitions: Attend local showcases to connect with other artists.
- Sell Originals or Prints: Turn your art into an income source by selling pieces.
- Collaborate: Work with artists, businesses, or projects to diversify your creations.
- Start a Blog: Document your art journey and tips for others online.
Sharing artworks increases visibility and motivates improvement through audience appreciation.
Focus on growth and interactions to achieve artistic success in pencil landscape drawing.