What Is a Sealing Wax Stamp
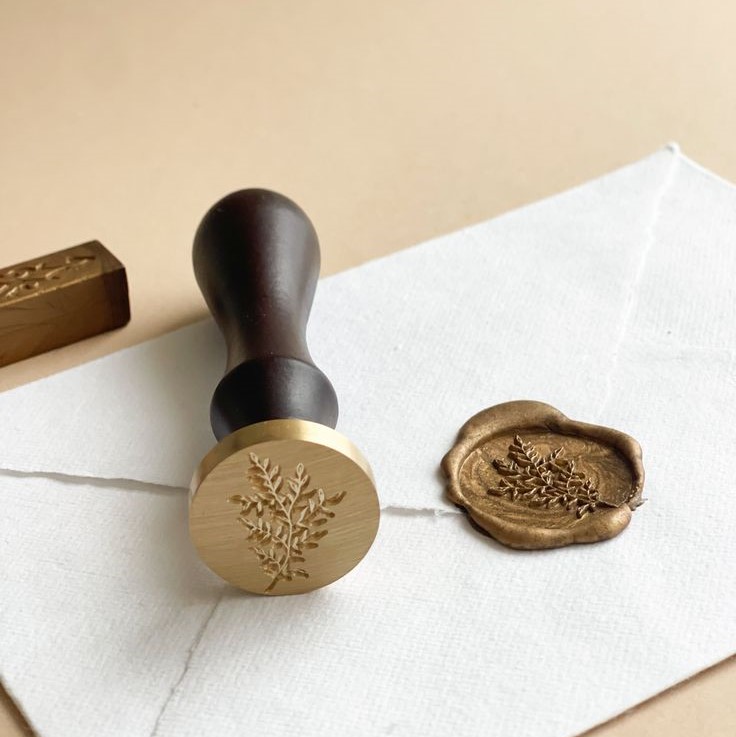
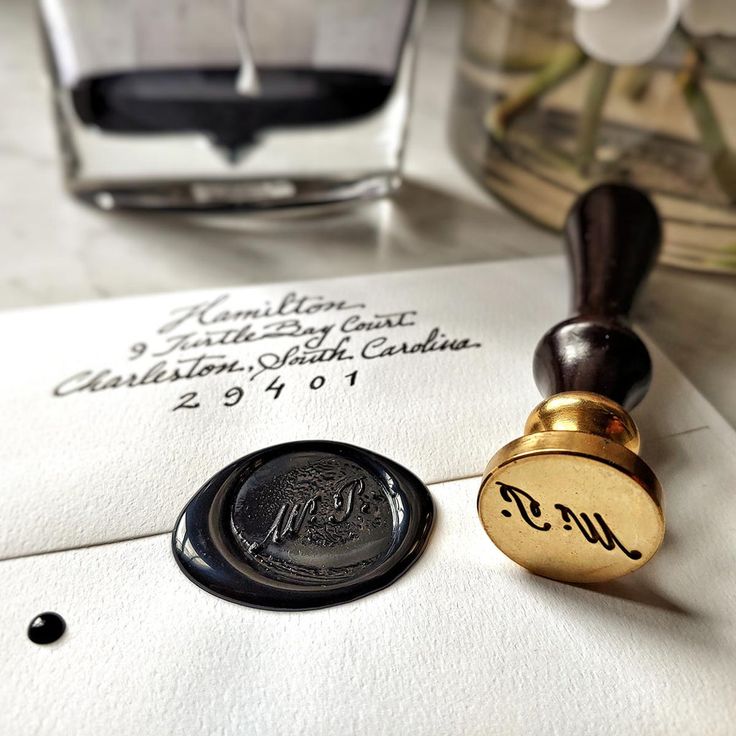
A sealing wax stamp is a tool used to create wax imprints. These imprints often serve as seals on envelopes, documents, or gifts. They add sophistication and a touch of tradition to items. Sealing wax stamps usually have engraved designs, often personalized with initials, logos, or symbols. The wax is melted, stamped, and left to cool, creating a lasting impression.
History and Tradition of Sealing Wax
The practice of sealing documents with wax dates back to ancient times. It was widely used in medieval Europe to secure letters and ensure their authenticity. Nobles and officials used personalized stamps, known as signets, to imprint their unique seals. Sealing wax served as both a functional and decorative element. Over time, the use of sealing wax became less about security and more about elegance. Today, it symbolizes tradition and refinement in correspondence and decoration.
Materials Used in Modern Sealing Wax Stamps
Modern sealing wax stamps are made using durable materials. Brass is a common choice for the stamp head due to its ability to hold fine details. The handle is often crafted from wood, resin, or metal for longevity and comfort. The wax itself has evolved from traditional beeswax and resin formulations. Modern sealing wax includes synthetic components that are flexible and less brittle. This ensures the seals remain intact during shipping or handling.
Choosing the Right Wax Stamp
Selecting the ideal sealing wax stamp can enhance your experience and results. There are several options regarding materials, functionality, and design. Your choice will depend on the purpose and style you want to achieve.
Types of Sealing Wax Stamps
There are several types of sealing wax stamps to consider:
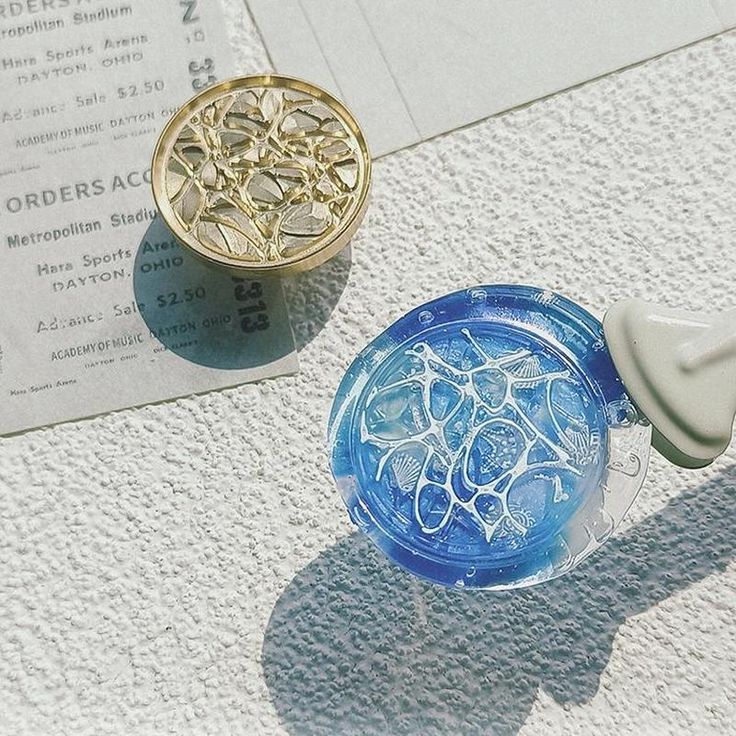
- Traditional Stamps: These feature fixed designs engraved on brass or other metals. They are durable and ideal for classic impressions.
- Interchangeable Stamps: These offer removable heads, allowing you to switch designs effortlessly. They are perfect for those who want variety in their impressions.
- Self-Inking Stamps: While less common, some modern designs include integrated ink pads. These eliminate the need for melted wax but lack traditional charm.
- Electric Wax Seals: These advanced tools melt the wax without the need for an external heat source. They are convenient but might lack the ritualistic feel of traditional methods.
Different types serve various needs, so choose based on your preferences and usage frequency.
Designs and Customization Options
Customization allows your sealing wax stamp to reflect your personality or brand. Here are a few ideas:
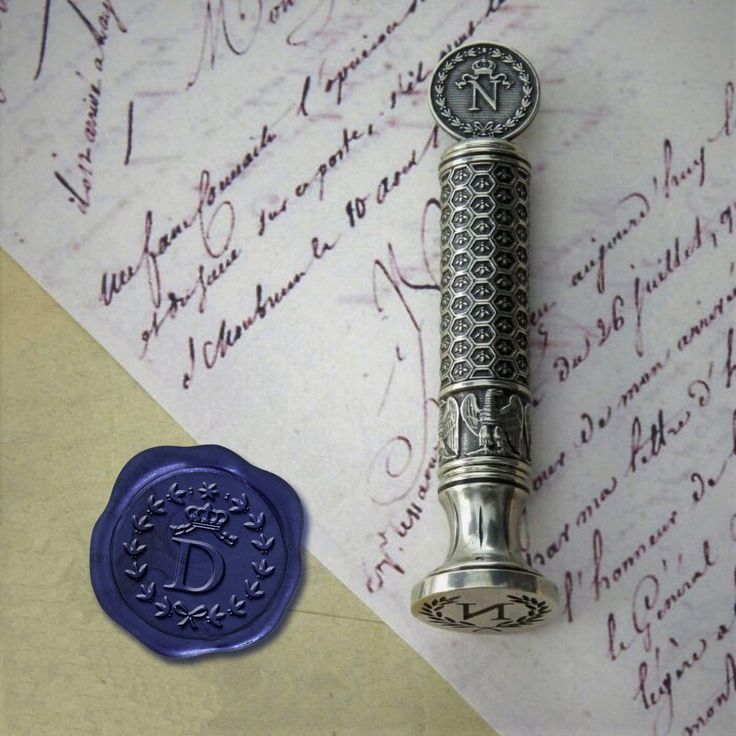
- Initials or Monograms: Adding letters can make the seal personal and elegant.
- Symbols or Logos: These are great for business branding or themed projects.
- Seasonal or Thematic Designs: Consider designs for holidays, weddings, or special events.
- Customized Artwork: You can work with artisans or companies to create unique, detailed engravings. This adds a distinct, one-of-a-kind aspect.
Choosing the right design ensures your wax seals leave a lasting impression. Combine type and customization to achieve the style and function best suited for your needs.
Preparing the Sealing Wax
Sealing wax plays a key role in achieving great impressions with your stamp. Choosing the right wax and handling it carefully ensures a smooth process. This section explains how to select the best wax and handle it safely for optimal results.
Selecting the Best Type of Wax for Your Stamp
Choosing the right type of wax depends on your project and preferences. Here are the common options:
- Traditional Wax: This wax is brittle and creates a classic, authentic finish. It works well for decorative purposes but may crack during mailing.
- Flexible Wax: Modern flexible wax contains synthetic components. It is durable and resists cracking during transit. It’s ideal for mailing envelopes or handling.
- Glue Gun Wax: This type is convenient and easy to use. It works with a glue gun, melting faster and reducing mess. It’s perfect for bulk projects or events.
- Bead Wax: Wax beads are pre-measured. They melt with precision and ensure consistent quantities. They suit beginners or those working with specific designs.
Before purchasing, consider your sealing wax stamp materials. Some waxes work better with intricate stamp designs or certain surfaces.
Melting and Handling Sealing Wax Safely
Using sealing wax requires proper preparation to avoid accidents. Follow these safety tips for better results:
- Use a Heat Source with Care: Candles, lighters, or wax warmers can melt the wax efficiently. Always supervise the process to prevent fire hazards.
- Maintain a Clean Workspace: Clear your workspace of flammable materials. Use a silicone mat or sturdy surface to hold the wax.
- Control the Wax Quantity: Avoid using excessive wax. A coin-sized amount usually suffices for one seal.
- Handle Tools Carefully: Metal tools, like spoons, may retain heat. Use oven mitts or handles to avoid burns.
- Work in Ventilated Areas: Melted wax and flames may release fumes. Ensure proper airflow to stay safe.
Melting and sealing wax safely ensures clean, professional-looking seals while protecting you from harm. Following these guidelines can help make your experience enjoyable and effective.
Step-by-Step Guide to Using
Using a sealing wax stamp may seem challenging, but it becomes effortless with the right guidance. Follow these simple steps to master the process and create beautiful, lasting wax seals.

Preparing Your Workspace
Start by choosing a clean and organized workspace. This ensures proper handling and avoids mess.
- Lay down a protective surface: Use a silicone mat or sturdy board to protect your table.
- Gather your tools: Place the sealing wax, stamp, lighter or candle, and melting spoon within reach.
- Choose a well-lit area: Work in bright lighting so you can see details and avoid mistakes.
- Ensure ventilation: Keep the workspace ventilated to manage fumes during wax melting.
A prepared workspace ensures safety and makes the sealing process smoother and faster.
Placing and Melting the Wax
- Decide where to place the wax: Choose the spot where you want your seal.
- Heat the sealing wax: Melt the wax using a candle, lighter, or wax warmer for even application.
- Control wax flow: Pour the wax gently onto your chosen spot using a melting spoon or glue gun.
- Work quickly: Move promptly to prevent the wax from hardening before stamping.
Properly melted and placed wax leads to neat and uniform seals.
Pressing and Removing the Stamp
- Position the stamp: Center your sealing wax stamp over the melted wax.
- Press firmly: Apply moderate pressure to ensure a clear imprint.
- Wait for the wax to cool: Leave the stamp in place until the wax sets completely.
- Lift gently: Carefully remove the stamp to avoid smudging or tearing the seal.
Following these steps ensures crisp and professional-looking impressions every time you seal.
Tips for Perfect Impressions
Achieving great results with your sealing wax stamp requires attention to detail and proper techniques. Here are suggestions to help you create crisp, professional imprints every time.
Achieving Crisp and Clear Imprints
- Ensure Proper Wax Amount: Use a small, coin-sized wax pool for clean impressions.
- Press Firmly Yet Gently: Apply moderate, even pressure to avoid smudging or incomplete designs.
- Cool the Stamp: Chill the stamp slightly before use by placing it on a cool, damp cloth. This helps the wax set better.
- Align Carefully: Position your stamp directly over the melted wax for balanced, centered impressions.
- Select High-Quality Wax: Flexible wax with good consistency ensures rich details in the final seal.
- Practice on Scrap Surfaces: Test your skills on spare paper or envelopes before working on final items.
Combining these practices results in sharp, clear seals that exude elegance and professionalism.
Avoiding Common Mistakes
- Don’t Overheat the Wax: Excessive heat can make the wax too runny, affecting your stamp impression.
- Avoid Excess Wax: Too much wax spreads unevenly and may cause messy, undefined seals.
- Work Quickly: Stamp the wax before it starts hardening to ensure clean imprints.
- Clean the Stamp Regularly: Wipe the stamp head frequently to remove residue and maintain clarity.
- Use Stable Surfaces: Work on a flat, sturdy area to prevent wobbling during the stamping process.
- Avoid Rushing: Take your time to align, press, and lift the stamp for the best results.
By steering clear of these missteps, you can create flawless wax seals with ease. Perfect impressions come down to preparation, quality materials, and a steady hand.
Creative Uses for Wax Stamps
Sealing wax stamps are not just for traditional correspondence. They offer many creative possibilities. Versatile and elegant, they can be used to enhance various personal and professional items. Below, we explore some popular and innovative ways to use them.
Adding Elegance to Invitations
Sealing wax stamps add a personal touch to invitations. They create a sense of refinement and sophistication.
- Wedding Invitations: Use custom seals with monograms or date designs for a romantic feel.
- Party Invites: Add themed stamps for birthday, holiday, or other events.
- Event Stationery: Impress guests with unique seals that match your event’s style.
- RSVP Envelopes: Seal response cards stylishly, ensuring a cohesive design.
Seals make invitations unforgettable, boosting their visual appeal and sentimental value.
Personalized Packaging and Gifts
Sealing wax stamps can transform ordinary gifts or packaging into something extraordinary.
- Gift Wrapping: Seal ribbons or paper with elegant wax imprints for a luxurious touch.
- Business Branding: Add your logo to product packaging for a professional and polished look.
- Homemade Goods: Decorate jars, bottles, or pouches with custom stamps. Perfect for soaps, candles, or jams.
- Seasonal Gifts: Use seasonal designs like snowflakes or autumn leaves for festive packaging.
- Thank You Notes: Enhance handwritten messages with beautiful, embossed seals.
Personalized seals show thoughtfulness, making your gifts and packaging truly stand out.
Creative uses for sealing wax stamps go beyond basic traditions. Let your imagination inspire innovative applications!
Caring for Your Wax Stamp
Proper care extends the lifespan of your sealing wax stamp. Regular cleaning and safe storage are essential. Follow these steps to maintain and protect your tools effectively.
Cleaning and Maintenance Tips
Keeping your sealing wax stamp clean prevents residue buildup that can affect impressions. Here is how you can clean and maintain it:
- Wipe After Each Use: Gently clean the stamp with a soft cloth to remove melted wax residue.
- Use Warm Water for Stubborn Wax: Dip the stamp in warm water and wipe with a towel to loosen wax.
- Avoid Harsh Chemicals: Stick to mild cleaners to protect the metal’s finish and engraved design.
- Polish Brass Stamps: If the stamp’s head is brass, polish it occasionally to maintain its shine.
- Inspect for Damage: Check for cracks or dents to fix issues before they worsen.
- Handle the Stamp Carefully: Prevent the engraved surface from getting scratched or damaged.
Cleaning ensures clear, crisp seals every time you use your stamp.
Storing Sealing Wax and Stamps Properly
Proper storage protects your sealing wax and stamps from damage. Follow these guidelines to keep them safe:
- Choose a Dry, Cool Location: Humidity can weaken the wax and tarnish the stamp materials.
- Use Protective Cases: Store stamps in cloth-lined cases or individual pouches to prevent scratches.
- Organize Your Stamps: Keep multiple stamps and waxes neatly organized to avoid misplacing them.
- Avoid Direct Sunlight: Heat and sunlight may cause the wax to warp or melt.
- Store Wax Upright: Keep wax sticks or beads upright to prevent deformation.
- Label Your Supplies: Clearly label custom designs for easy identification and organization.
Taking care of your sealing wax stamps ensures they remain in excellent condition over time.
Conclusion
The sealing wax stamp is a powerful tool that brings a sense of tradition, elegance, and personalization to creative projects. Whether you’re crafting handmade cards, designing wedding invitations, or making custom gifts, a wax seal adds a unique and meaningful touch.
As more people embrace handmade and vintage styles, the sealing wax stamp continues to gain popularity. Its versatility and beauty make it a valuable addition to any artist’s or crafter’s toolkit.
By learning how to use a sealing wax stamp and experimenting with different designs and applications, you can unlock a world of creative possibilities. So why not give it a try? With a little practice, you’ll be able to create stunning and personalized pieces that stand out from the crowd.
Remember, the sealing wax stamp is more than just a tool—it’s a way to express your creativity and leave a lasting impression.