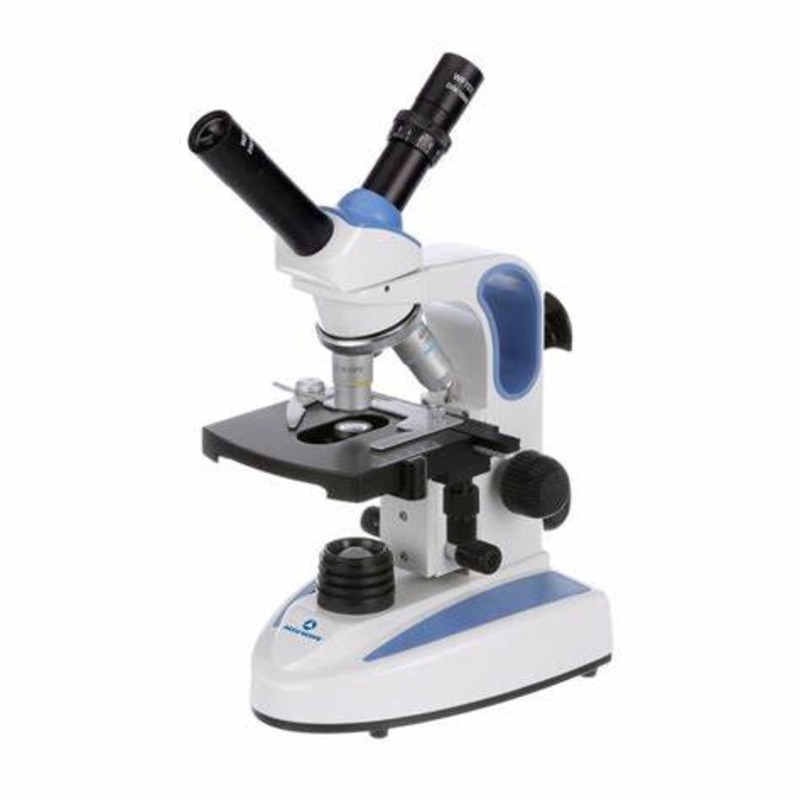
Introduction to Diaphragm Microscopes
The diaphragm microscope stands as a critical tool in scientific research. At its core, the diaphragm controls light passing through the specimen. It works like the aperture of a camera, adjusting brightness and contrast. This adjustment can enhance the image quality and detail you see through the eyepiece.
A diaphragm microscope may come with different diaphragm types. Each type serves a unique purpose in microscopy. For example, some diaphragms improve contrast in unstained samples. Others provide better resolution for complex structures.
When using a diaphragm microscope, one must bear in mind the significance of proper diaphragm adjustment. It shapes the light cone and influences image clarity. Misuse could lead to poor-quality images or even damage to the microscope.
Novices and experts alike must grasp how the diaphragm functions. Understanding its roles in contrast and resolution is essential. This understanding aids in choosing the right diaphragm setting for each observation. In the following sections, we’ll explore the key functions of a microscope diaphragm and the steps to use it properly.
Through this blog, you’ll learn not just to use a diaphragm microscope, but to master its potential. With the right techniques, you can unlock detailed views of the microscopic world.
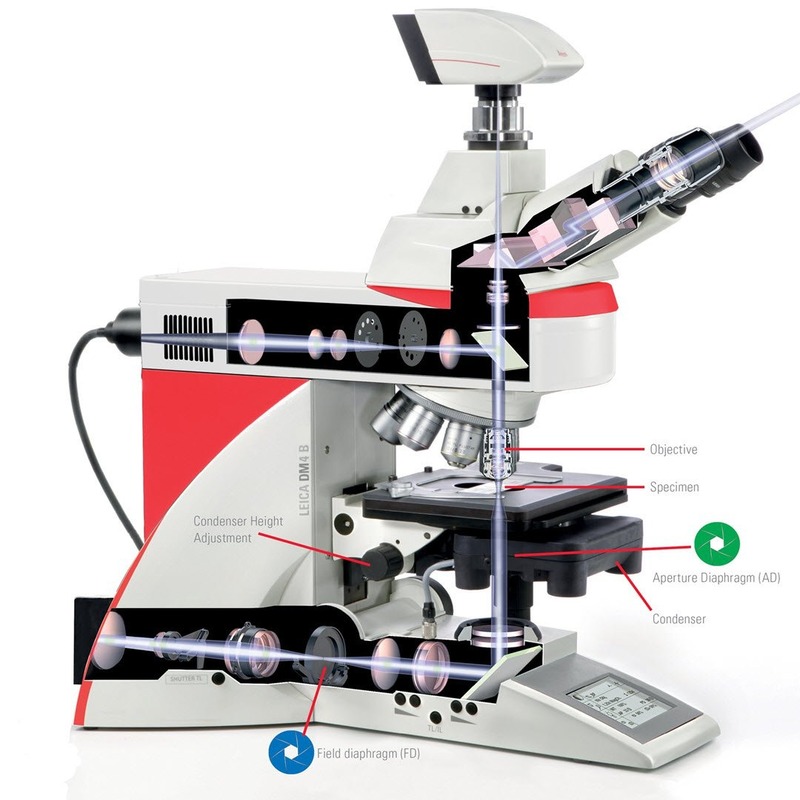
Key Functions of a Microscope Diaphragm
The diaphragm microscope is integral to achieving clear images. Its key functions, crucial for any researcher, come down to managing light and optimizing visibility.
Here are the primary roles of a microscope diaphragm:
- Controlling Light Intensity: The diaphragm helps to regulate how much light reaches the specimen. By adjusting it, you can prevent too much light from obscuring fine details.
- Improving Contrast: By modifying the size of the light cone, the diaphragm affects the contrast of the image. This is particularly important when viewing transparent or colorless samples.
- Enhancing Resolution: A proper diaphragm setting can sharpen image resolution. It allows for the observation of finer structure details within the sample.
- Reducing Glare: Excess light can cause glare, making it hard to discern details. The diaphragm system reduces this glare to produce clearer, more distinct images.
- Protecting Specimens: Intense light can damage sensitive specimens. The diaphragm helps in mitigating this risk by limiting light exposure.
- Extending Equipment Life: By preventing overexposure to bright light, the diaphragm can protect the microscope’s optical components from heat damage.
Overall, the diaphragm in a microscope is essential for controlling light and ensuring high-quality microscopic observations. Mastering its use is a fundamental skill in microscopy. As we proceed, we’ll delve into the practical steps for using a microscope with a diaphragm to enhance your expertise in this area.
Steps to Properly Use a Microscope with a Diaphragm
Using a diaphragm microscope with precision requires careful attention to detail and technique. Here are straightforward steps to ensure you are utilizing the diaphragm microscope correctly to achieve the best possible images:
- Turn on the Microscope: Before adjusting the diaphragm, ensure the microscope is on and properly lit.
- Start with Low Power: Begin observations using the microscope’s lowest magnification setting. This establishes a baseline for your sample’s appearance.
- Adjust the Diaphragm: Locate the diaphragm control, often found below the stage. Slowly adjust the diaphragm to find the right light intensity. Your goal is to have enough light to see the specimen clearly without washing out the details.
- Fine-Tune the Focus: After setting the diaphragm, use the microscope’s fine focus knob to sharpen the image. The correct diaphragm setting and focus will produce a crisp, detailed view.
- Increase Magnification: If needed, move on to higher magnification lenses. Adjust the diaphragm again with each increase to maintain image quality.
- Observe and Record: Take your time to closely observe the details of your specimen. Record any important findings or take photographs as needed.
- Turn Off and Store Properly: After use, turn off the microscope, remove the sample, and cover the device to protect it from dust and damage.
By following these steps, you can make the most of your diaphragm microscope’s capabilities. Remember, practice makes perfect, and with time, adjusting the diaphragm will become second nature. These procedures not only help create superior images but also prolong the lifespan of your microscope.
The Role of the Diaphragm in Image Contrast and Resolution
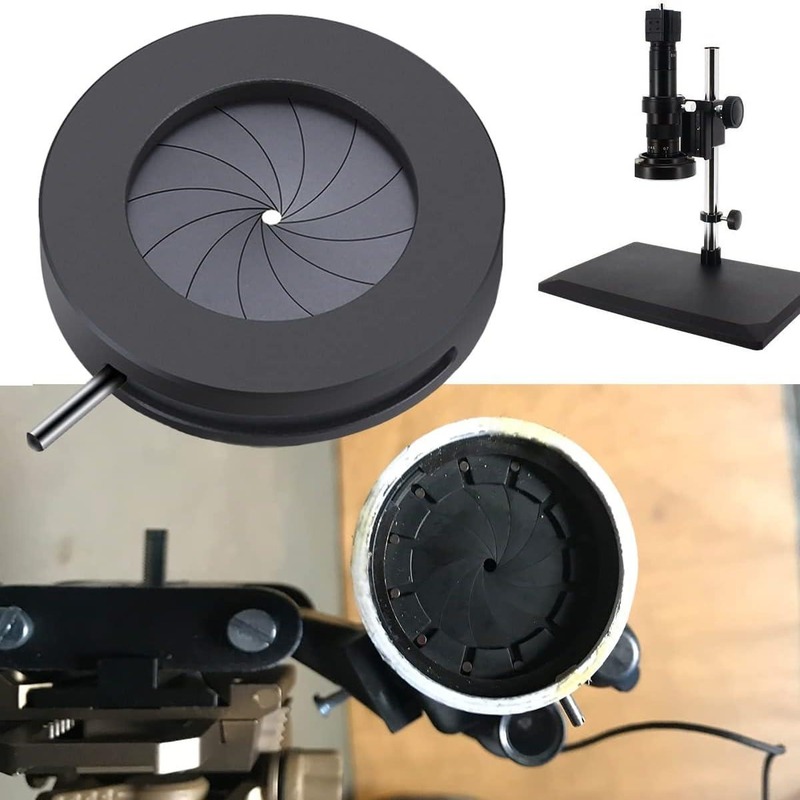
The diaphragm in a microscope is pivotal for quality imaging. It directly impacts image contrast and resolution, two factors critical for revealing sample details. In simple terms, image contrast is the difference in light intensity between the specimen and its background. High contrast helps distinguish features, especially in transparent or colorless specimens. The diaphragm adjusts the light cone size, which in turn affects contrast. A smaller light cone increases contrast, while a larger one decreases it.
Resolution refers to the ability to see two close points as distinct from each other. A well-adjusted diaphragm helps improve resolution by eliminating stray light. This sharpening effect allows scientists to observe tiny structures within their samples.
When you finely tune the diaphragm, you gain clearer images. This precision aids in identifying structures not seen at lower resolutions or contrasts. Thus, mastering the diaphragm’s role enhances your observation capabilities. Remember, a careful balance between light and darkness is key for best results. Keep adjusting until you get a sharp, contrasted view. Only then will you truly see the minute wonders of the microscopic world.
Types of Diaphragm in Microscopes and Their Uses
Different diaphragm types in microscopes suit various viewing needs. Here’s a look at common types and how to use them:
Iris Diaphragm
Frequently seen in high-end microscopes, the iris diaphragm has overlapping plates. It operates much like a camera aperture. You can fine-tune the amount of light with precision. Use it for high-contrast imaging in samples that are transparent.
Disk Diaphragm
Often found in entry-level microscopes, the disk diaphragm features several holes. Each hole has a different diameter. You rotate the disk to select the amount of light. It is simple to use and suits basic educational purposes.
Slider Diaphragm
Slider diaphragms have one or more slots with different widths. You slide to change the light passage. This type is less common but offers a quick way to adjust light for different samples.
Each diaphragm type brings unique benefits. The iris diaphragm offers the most control for delicate samples. Disk and slider diaphragms are more suited to straightforward applications. Choose the type based on your need for precision and the complexity of your samples. When using any diaphragm microscope, remembering these differences can help you achieve the best observation outcomes.
Maintaining and Cleaning the Microscope Diaphragm
Proper maintenance and cleaning are key to the longevity of a diaphragm microscope. Dust, oils, and other contaminants can degrade image quality over time. By keeping your diaphragm clean, you ensure it continues to control light effectively. Below are steps to maintain and clean your microscope’s diaphragm:
- Regularly Inspect the Diaphragm: Before and after use, check for any visible signs of dirt or damage. A routine inspection can prevent issues from escalating.
- Use Proper Cleaning Solutions: Employ only microscope-specific cleaning solutions. Harsh chemicals can harm the diaphragm and other delicate parts.
- Employ Soft Tools: Clean the diaphragm with gentle movements using soft, lint-free cloths or brushes. Abrasive materials could scratch the diaphragm, impairing its function.
- Avoid Direct Contact: Whenever possible, clean around the diaphragm without touching it directly. This minimizes the risk of accidental damage or misalignment.
- Follow the Manufacturer’s Guidelines: Adhere to the cleaning instructions provided by the microscope manufacturer. Each diaphragm microscope might have specific maintenance requirements.
- Keep a Dust Cover on: When not in use, place a dust cover over the microscope. This simple step can significantly reduce the accumulation of dust and debris.
By following these simple yet effective steps, you can keep your diaphragm microscope in top condition. A well-maintained diaphragm is crucial for producing high-quality microscopic images. Remember, handling the equipment with care will benefit both your research and the durability of the microscope.
Troubleshooting Common Diaphragm Issues
When utilizing a diaphragm microscope, users may encounter several common issues. Recognizing and resolving these problems is vital for maintaining image quality.
- Insufficient Light: If the image is too dark, the diaphragm may be overly constricted. Gradually widen it until sufficient lighting is achieved.
- Excessive Brightness: Conversely, an image that’s too bright may result from the diaphragm opening being too large. Narrow the diaphragm to reduce light and improve contrast.
- Poor Resolution: Blurry images often signal incorrect diaphragm use. Adjust the diaphragm slowly while concurrently fine-tuning the focus.
- Glare or Halos: Unwanted glare can occur if the diaphragm allows excess light. Reduce the diaphragm’s aperture to minimize this effect.
- Uneven Lighting: If lighting across the specimen is inconsistent, check for obstructions or clean the diaphragm to remove dust.
- Difficulty Adjusting Diaphragm: Should the diaphragm control move stiffly, it may need lubrication. Refer to manufacturer guidelines for safe lubrication practices.
By addressing these issues promptly, the diaphragm microscope can continue to produce clear, high-contrast images. Regular practice and upkeep help prevent common problems and enhance the functionality of the microscopy equipment. Remember to incorporate these troubleshooting steps as part of your routine microscope examination to maximize your instrument’s potential.
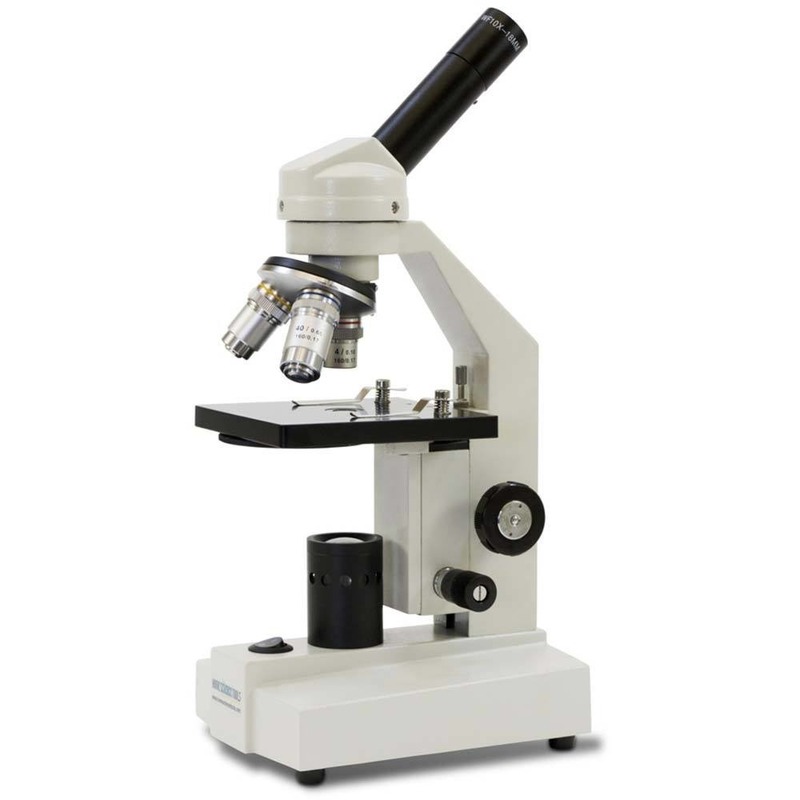
Advanced Techniques and Tips for Using Diaphragm Microscopes
Mastering the use of a diaphragm microscope involves more than just basic operations. It requires honing advanced techniques and applying useful tips to capture the best possible microscopic images. In this section, we delve into the lesser-known tactics that can further enhance your microscopy skills.
- Predict the Effect of Diaphragm Adjustment: Before tweaking the diaphragm, anticipate how changes will affect the light. With experience, you can predict how much to adjust for the perfect contrast.
- Utilize Diaphragm Memory: Many microscopes have a ‘diaphragm memory’ feature. Learn how to use it to quickly return to settings that worked well for similar specimens.
- Balance Light Sour?ces: If your microscope has multiple light sources, learn to balance them. Combining light sources can enhance clarity and contrast on difficult samples.
- Practice with Dyes and Stains: Colored samples often need less light. Practice on dyed specimens to master diaphragm adjustments that prevent color wash-out.
- Know When to Break the Rules: Sometimes, the standard diaphragm settings won’t do. Don’t be afraid to experiment with unconventional settings to achieve the best view.
- Create a Diaphragm Setting Log: Keep a record of diaphragm settings for different samples. This log can serve as a quick reference for future observations.
- Combine Diaphragm and Zoom: On zoom microscopes, adjust the diaphragm as you zoom. Fine-tune it at each level for consistently sharp images.
- Understand Depth of Field: A smaller diaphragm opening increases the depth of field. Use this knowledge to focus on multiple planes within translucent specimens.
By implementing these advanced techniques and tips, users of diaphragm microscopes can significantly improve their ability to discern detailed features in a diverse range of specimens. With effective diaphragm control, achieving high-quality, high-contrast images becomes a routine triumph in microscopy.
