The Essential Role of Microscope Slides in Lab Work
Microscope slides are at the heart of lab analysis and research. These thin flat pieces provide a platform for examining small specimens that cannot be viewed by the naked eye. With precise clarity, they allow scientists and students to study the minute details of cells, tissues, and microorganisms. Their transparency is critical as it ensures the maximum amount of light passes through, enhancing the view under the microscope. Over time, microscope slides have become indispensable in fields such as pathology, biology, and material science.
They also play a vital role in educational settings, where they aid in teaching about the microscopic world. Each slide serves as a window to an otherwise invisible universe, making them key tools for discovery and understanding. Using the right slide can make a significant difference in the quality of your microscopic observations. That’s why understanding the types of microscope slides, and their specific uses, is fundamental for anyone involved in laboratory work.
Types of Microscope Slides and Their Uses
Microscope slides vary depending on their material and application. Selecting the right type can be crucial for clarity and results.
Glass Slides
Glass slides are the most common type found in labs. Their transparency and non-reactive nature make them ideal for a wide range of applications. They resist scratches and can withstand chemicals used in staining. Users often prefer these slides for viewing biological samples, as they offer a clearer image without distortion.
Plastic Slides
Plastic slides are lightweight and less fragile than glass. They are a good choice for educational purposes or in field settings where breakage is a concern. However, they may offer less clarity than glass and can be prone to scratching. These slides are disposable, which can prevent cross-contamination between samples.
Specialty Slides
Specialty slides cater to specific research needs. They include coated slides for enhanced cell adhesion, charged slides that attract negatively charged particles, and frosted slides that are easier to label. Cavity slides, with a depression to hold liquid samples, and adhesion slides, designed to hold specimens firmly, are also available. These specialized slides support precise experiments and advanced research methods.
Preparing Microscope Slides: A Step-by-Step Guide
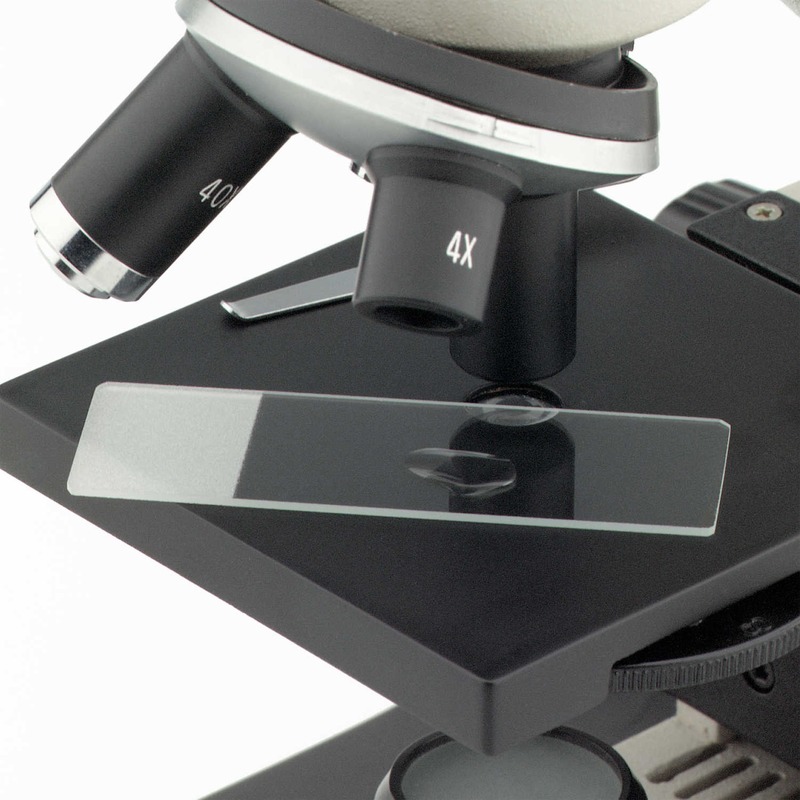
The right preparation of microscope slides can greatly affect the clarity and usefulness of the microscopic images. Before examining specimens, it’s crucial to properly clean, mount, and stain the slides. This guide provides step-by-step instructions to ensure the best results.
Cleaning
Cleaning is the first step in preparing slides and is vital to avoid contamination. Start by wearing gloves to prevent oils from your skin from getting on the slides. Use a lint-free cloth or a special slide-cleaning solution to wipe each slide gently, removing any fingerprints, dust, or debris.
Mounting Specimens
Once the slides are clean, it’s time to mount your specimens. Place the specimen on the slide gently. If using a cover slip, lower it at an angle to reduce air bubbles, which can obstruct the view. Ensure the specimen is centered and flat under the cover slip.
Staining Techniques
Staining enhanced the contrast and detail of the specimen. Choose the correct stain for your sample type. Apply a small amount of stain and wait for the required time. Then, rinse the slide with water if needed and remove any excess stain. Staining techniques vary, so follow the specific protocol for your specimen.
Best Practices for Handling and Storing Microscope Slides
Handling and storing microscope slides properly is essential for preserving their quality. To maintain the integrity of the slides and your specimens, follow these recommended practices:
Handling Microscope Slides with Care
Always handle slides by their edges to minimize contact with the surface area. This prevents the transfer of oils and dirt from your hands, which can interfere with sample visibility. Use gloves to provide a layer of protection and to further prevent contamination.
Storing Slides Effectively
Store slides in a dry, cool place away from direct sunlight. Use a dedicated storage box or a slide file to avoid physical damage and to keep them organized. Ensure that the storage environment is free from dust and other contaminants.
Avoiding Environmental Damage
Humidity and extreme temperatures can damage slides and samples. Control the storage environment to prevent these factors from affecting the quality of your microscope slides. Moisture-absorbing materials can help to keep the storage area dry.
Labeling for Future Reference
Label your slides clearly and legibly to avoid confusion. Use pencil or a permanent marker designed for glass to write on the frosted area. This makes it easy to identify and retrieve your slides for later use.
Following these best practices will extend the life of your microscope slides and ensure that your lab work maintains its precision and reliability.

Common Mistakes to Avoid When Using Microscope Slides
To achieve the best results in microscopy, it’s important to steer clear of common mistakes often made when using microscope slides. These errors can hinder the clarity of your observations and compromise your research. Here are some critical missteps to avoid:
Dirty or Smudged Slides
Always start with a clean slide. Any dirt or smudges can obscure microscopic details and affect the accuracy of your observations. It’s easy to overlook a fingerprint or dust, but these seemingly minor issues can majorly impact your results.
Improper Mounting of Specimens
Positioning the specimen incorrectly can result in slides that are difficult to analyze. Make sure specimens are flat and centered before adding a cover slip. Avoid trapping air bubbles under the cover slip as they can obstruct the view.
Using Damaged Slides
Inspect each slide for chips or cracks before using it. Even small imperfections can distort the image under the microscope and may even damage the objective lens if unnoticed.
Over or Under Staining
Staining must be done with precision. Too much stain can mask details, while too little may not highlight the features you’re trying to observe. Following the staining protocol exactly is crucial for the best results.
Ignoring Cover Slip Thickness
The thickness of the cover slip can affect the focus and quality of the image. Use a cover slip with the appropriate thickness for your microscope’s objective lens to ensure optimal viewing.
Inadequate Labeling
Label slides clearly to prevent mix-ups and confusion later on. Unclear labels can lead to misinterpretation of results or lost data.
Poor Storage
Store slides properly to avoid physical and environmental damage. Incorrect storage can result in contamination, which could compromise future analyses.
Avoiding these common errors when using microscope slides can greatly improve the accuracy and reliability of your lab work. By paying attention to these details, you can ensure your research yields the best possible microscopic images.
Innovations and Advances in Microscope Slide Technology
The field of microscopy has seen remarkable innovations in recent years. These advances have made microscope slides more efficient and specialized. New materials and coatings now improve the slides’ properties. They enhance interaction with specimens and offer better imaging results. Manufacturers have developed slides that resist breakage and scratching. They are also clearer and more durable. Some slides now have a digital aspect. They can store data or even link to digital resources. These high-tech slides support complex analyses in research. Innovative coatings have come into play too. They improve sample adhesion and make images clearer. All these developments lead to more accurate and reliable lab work. With better technology, microscope slides continue to push the boundaries of what’s possible in labs across the world.

Enhancing Microscopy with Proper Slide Selection and Preparation
Selecting the right microscope slides and preparing them correctly are key to better microscopy results. When choosing a slide, consider the material and the type of specimen. For instance, opt for glass slides for high clarity with biological samples, and plastic slides when handling fieldwork with a chance of breakage. Use specialty slides for their unique features like cell adhesion or ease of labeling.
The preparation process begins with cleaning the slides carefully. Wipe each one with a lint-free cloth, ensuring no dust or prints. Next, mount your specimen correctly. Gently place the specimen on the slide and cover it smoothly without trapping air bubbles. This step is crucial as air bubbles can block important details.
After mounting, apply the right stain to your specimen. The right amount of stain reveals more details, enhances contrast, and helps focus on the specific aspects of the specimen. Use staining protocols that match your sample type. Be precise with staining times and rinse the slide carefully, if required.
In summary, thoughtful slide selection paired with meticulous preparation can elevate the quality of your microscopic analysis. Making wise choices reduces mistakes and improves the detail and accuracy of microscope observations. By following these guidelines, professionals and students alike can significantly enhance their lab work and research outcomes.
