Introduction to the Art of Paper Folding
Origami is a fascinating art form that captures the imagination of children and adults alike. It involves transforming a flat sheet of paper into a three-dimensional object through folding techniques. Many young crafters start their journey by asking how to make a paper claw. This specific project is incredibly popular because it is simple yet impressive. It allows children to emulate their favorite superheroes or monsters. Furthermore, it requires very few materials. You only need a sheet of paper and your hands.

Consequently, it is an accessible activity for almost anyone. The appeal of the paper claw lies in its instant gratification. Within minutes, a plain piece of paper becomes a wearable accessory. This transformation sparks creativity and joy. Additionally, paper folding serves as an excellent educational tool. It teaches geometry, patience, and fine motor skills. Therefore, it is more than just a game. It is a developmental exercise disguised as fun. This guide will walk you through the process clearly. We will also explore the benefits and variations of this craft. By the end, you will be a master of the paper claw.
Essential Materials for Your Paper Craft
Before you begin your folding journey, you must gather the necessary supplies. Fortunately, the list is very short. This makes the project perfect for spontaneous crafting sessions. First, you need paper. Standard printer paper works best for beginners. It is sturdy enough to hold its shape. However, it is not too thick to fold. You can also use construction paper for colorful claws. Furthermore, origami paper is a great option if you have it. It is already cut into perfect squares.
If you use rectangular printer paper, you will need to cut it. You must transform the rectangle into a square. This is a simple process. You fold one corner across to the opposite edge. Then, you cut off the excess strip. Secondly, you need a flat surface. A table or a hard floor provides the stability you need. It ensures your folds are crisp and clean. Thirdly, you might need a ruler or a bone folder. These tools help you make sharp creases. However, your fingernail works just as well. Finally, bring your patience and attention to detail. These are the most important tools for success.
Step-by-Step Guide to the First Folds
Now, we begin the actual construction process. Learning how to make a paper claw starts with the basics. First, take your square piece of paper. Place it on the table with the colored side facing down. Then, fold the paper in half diagonally. You should now have a triangle. Make sure the corners align perfectly. A precise fold creates a better final product. Next, rotate the triangle so the long edge is at the bottom. The point should be facing away from you. Then, take the bottom right corner and fold it up to the top point.
You are essentially folding the triangle in half again. Crease this fold well. Consequently, you will have a smaller, more compact triangle. After that, open the last fold you made. You will see a crease running down the center. This crease is your guide for the next steps. It is crucial to follow these steps in order. Skipping a step or folding backwards will ruin the shape. Therefore, take your time with each movement. Precision now leads to success later.
Forming the Pocket and Shape
You have completed the initial folds. Now, the shape starts to become three-dimensional. This is the most critical part of the process. Take the bottom left corner of your triangle. Fold it up towards the top point. You should now have a diamond shape or a smaller triangle. Then, flip the paper over. The smooth side should be facing up. Next, you will create the pocket. Fold the bottom right corner up to the left edge. This creates a triangular flap. Then, you will see a small pocket has formed.
You need to open this flap slightly. It looks like a small envelope. Carefully insert your thumb or finger into this opening. Gently push the paper inside. This movement creates the “knuckle” of the claw. It might feel tricky at first. However, with a little practice, it becomes second nature. Ensure all the creases are sharp. This gives the claw its rigidity. If the claw feels floppy, you may have missed a fold. Therefore, go back and check your previous steps. The structure relies on tension and precise geometry.
Final Adjustments and Wearing Your Claw
You are almost finished with your creation. The structure is now recognizable as a claw. You must finalize the shape to fit your finger. Look at the base of the claw. There should be a small opening or a loop. This is where your finger goes. Gently slide your finger into this opening. It should fit snugly but not too tight. If it is too loose, you can adjust the folds. You can tighten the base by pressing the sides together. Conversely, if it is too tight, you can gently pull the sides apart. The paper is flexible.
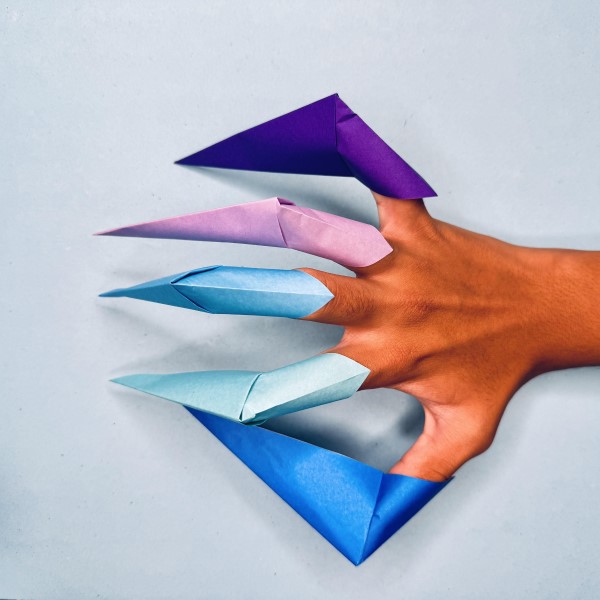
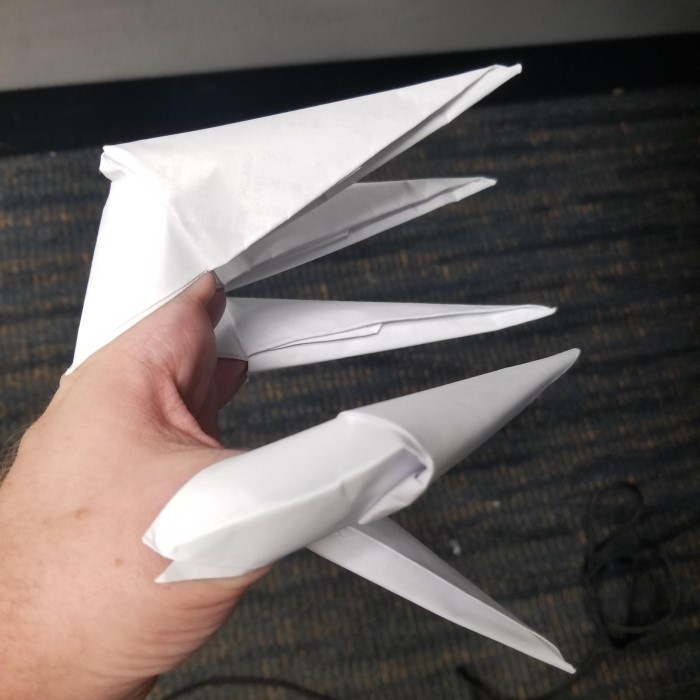
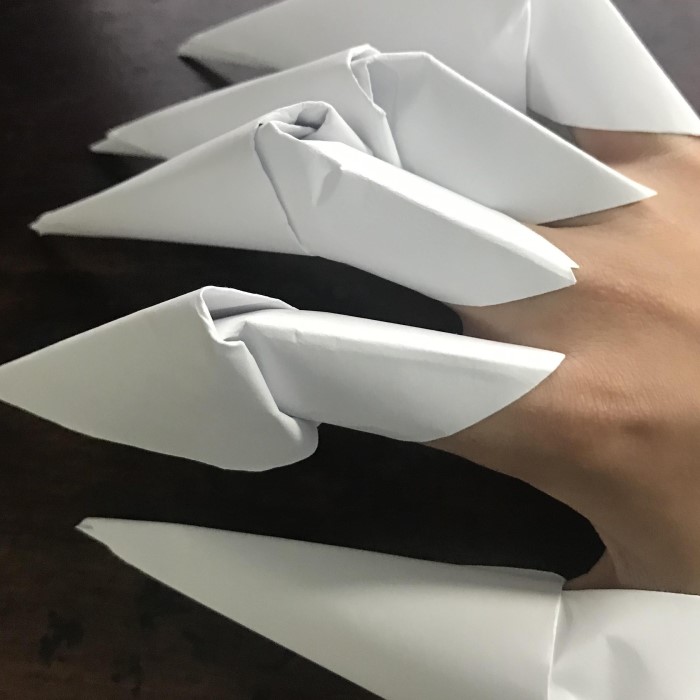
Therefore, you can customize the fit. Additionally, look at the tip of the claw. You can sharpen it by pinching the sides. This gives it a more menacing look. Alternatively, you can round it for a safer, cartoonish appearance. Once you are happy with the fit, your claw is ready. You can make multiple claws for all your fingers. Imagine a full set of ten paper claws. It transforms playtime completely. Consequently, you are now ready for role-playing games and costume parties.
The Educational Benefits of Paper Crafts
While making paper claws is fun, it is also educational. Parents often overlook the learning value of such simple activities. First, it enhances fine motor skills. Children must use their fingers to make precise folds. This strengthens the small muscles in their hands. Consequently, it improves their handwriting and dexterity. Secondly, it teaches geometry. The claw is made entirely of triangles. Children learn about angles and symmetry without realizing it. They see how shapes fit together to build structures.
Furthermore, the process boosts cognitive development. The child must follow a sequence of instructions. They must remember the order of the folds. This exercises their memory and attention span. Therefore, it is a brain-boosting exercise. Additionally, it fosters creativity. Once they learn the basic claw, they might invent variations. They might try different sizes or colors. This experimentation is the root of innovation. It encourages problem-solving. If the claw does not look right, they must figure out why. They must troubleshoot their folds. This resilience is a valuable life skill.
Creative Variations and Decorating Ideas
Once you master the basic technique, you can explore variations. The standard paper claw is usually white or solid colored. However, you can customize it to match your style. For instance, you can use patterned paper. Paper with animal prints creates a realistic tiger or leopard claw. Furthermore, you can draw on the claws after you finish them. Use markers to add scales, veins, or scary designs. Glitter glue is another fun option. It adds sparkle and texture. Just remember to let the glue dry completely before wearing the claws. Another variation involves the size of the paper. Using a smaller square results in a tiny claw. This is perfect for pinky fingers. Conversely, a large sheet of newspaper creates a giant monster claw.
You can also link multiple claws together. This creates longer, more complex finger extensions. Therefore, the possibilities are endless. You are limited only by your imagination. Encourage children to come up with their own themes. Perhaps they want to create a set of dragon claws for a play. Or maybe they want zombie claws for Halloween. This customization makes the craft unique to them.
Troubleshooting Common Mistakes
Many beginners struggle with their first few attempts. This is completely normal. There are several common mistakes that people make. One frequent issue is using the wrong paper size. If you start with a rectangle that is not cut into a square, the claw will look lopsided. Therefore, always ensure you have a perfect square. Another mistake is folding in the wrong direction. The paper claw relies on specific layers. If you fold the paper backward, the pocket will not form. Consequently, you must pay close attention to the diagrams or instructions. Additionally, some crafters make their folds too loose. Origami requires crisp, sharp creases. If your folds are soft, the claw will lack structure. It will collapse on your finger.
To fix this, run your fingernail along every edge. This technique is called “scoring.” It makes the fold permanent. Finally, some children get frustrated if the claw does not fit. They might think they did it wrong. However, the paper is adjustable. Show them how to widen or tighten the base. This empowers them to fix the problem themselves. Troubleshooting is part of the learning process.
Safety Tips for Playtime
Safety is always a priority when children are playing. Although paper claws are generally safe, there are a few things to keep in mind. First, the tip of the claw can be sharp. If a child pokes someone in the eye, it could cause injury. Therefore, teach children to keep their claws away from faces. They should not swing their arms wildly near others. Secondly, be careful with paper cuts. Sometimes the edge of the paper can slice the skin. This is more likely with thinner paper. If a child gets a paper cut, treat it with a bandage.
To prevent cuts, you can put a small piece of tape over the sharp tip. This blunts the claw effectively. Furthermore, do not use hard materials like cardboard or plastic. These materials are too difficult to fold. They can also cause more injury if used as a weapon. Stick to standard paper. Finally, supervise younger children during the folding process. They might try to eat the paper or put it in their mouths. By following these simple guidelines, playtime remains safe and enjoyable for everyone.
Frequently Asked Questions
How to make a paper gripper?
A paper gripper is different from a claw. It usually involves a folded mechanism that opens and closes. You can find specific origami diagrams for “paper fingers” or “mechanical paper hands” online. They function like a grabber tool.
How long does it take to make paper claws?
It typically takes about two to three minutes to make one claw. Beginners might take five minutes. Once you master the steps, you can make a full set of ten claws in under twenty minutes.
How are claws made?
In nature, claws are made of keratin. This is the same protein found in human fingernails and hair. In crafts, claws are made by folding paper or molding plastic. The paper version uses geometry to create a cone shape.
How to make paper nails by step by step?
To make paper nails, you fold a small strip of paper into a tight cone. Then, you cut the tip of the cone to create a flat edge. You can glue this onto your fingernail. It is a simpler process than making a full claw.
Conclusion
Mastering how to make a paper claw is a rewarding experience. It opens the door to a world of imaginative play. You start with a simple sheet of paper. Through a series of precise folds, you create a toy. This process teaches patience and dexterity. Furthermore, it provides a creative outlet for children and adults. You can make them for parties, costumes, or just for fun. The skills you learn here apply to other origami projects as well. Therefore, this simple craft is a stepping stone. We hope this guide has been helpful and clear. Now, gather your paper and start folding. Share your creations with friends and family. Enjoy the art of paper folding.