Introduction
In the world of home organization and decor, a DIY fabric pin board serves as a versatile and attractive solution. It is not just a practical tool for holding notes, photos, and reminders; it is also a creative outlet. By selecting fun patterns and styles, you can tailor your pin board to reflect your personal taste and home decor aesthetics. In this article, we’ll delve into the essentials of crafting your own diy fabric pin board, from materials needed to innovative design ideas that will inspire you to embark on this exciting project.
Why Create a DIY Fabric Pin Board?
1. Personalization Options
- Tailored to Your Style: A DIY fabric pin board allows you to choose fabrics, colors, and patterns that resonate with your unique style. Whether you prefer minimalist designs or vibrant prints, the possibilities are endless.
- Reflect Your Personality: Incorporating fabrics that depict your hobbies or interests can turn the pin board into a statement piece in your space, enhancing the overall ambiance of your room.
2. Functional Benefits
- Organization Made Easy: Having a dedicated space to pin important papers, notes, or mementos can drastically improve organization in your home. This is particularly useful in home offices, kitchens, or children’s rooms.
- Encouragement of Creativity: A fabric pin board can serve as a canvas for inspiration. Regularly updating it with new images or ideas can motivate you and encourage creativity in your day-to-day life.
3. Cost-Effective DIY Project
- Budget-Friendly Decor: Crafting a DIY fabric pin board can be a cost-effective alternative to purchasing pre-made pin boards. With a few materials and a little creativity, you can achieve a professional look without spending a fortune.
- Sustainability Aspects: Creating your pin board from recycled materials or leftover fabric is an eco-friendly way to enhance your space. This approach not only saves money but also contributes to sustainable living.
Essential Materials
Before starting your fabric pin board project, ensure you gather the necessary materials. Here’s a list of items you will need:
1. Core Material
- Cork Board or Foam Board: The base of your pin board can be made from cork board for easy pinning, or you could use foam board for a lightweight alternative. Choose a size that fits well in your intended space.
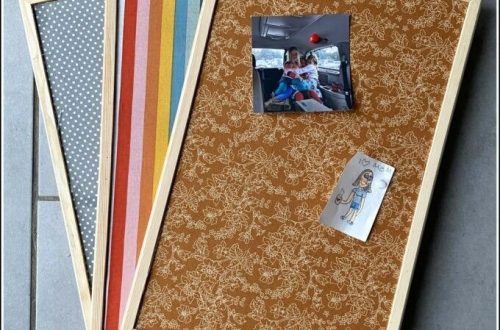
2. Fabric Choice
- Choosing Your Fabric: The fabric you choose will be the most prominent feature of your pin board. Consider using cotton, linen, or canvas in fun prints, solid colors, or patterns that harmonize with your room’s design.
- Pre-Washing Fabric: It’s a good idea to pre-wash your fabric to prevent any shrinking or color bleeding once the pin board is completed. This step ensures that your finished product retains its size and appearance.
3. Adhesives
- Spray Adhesive or Fabric Glue: A strong adhesive is vital for securing the fabric to the base. Spray adhesive provides an even application, while fabric glue can be easier to control in small areas.
4. Optional Decorative Items
- Trim or Ribbon: Adding decorative trim or ribbon around the edges of the pin board can enhance its appearance. Consider fabrics that complement your main fabric, providing a polished finish.
- Push Pins or Clips: Choose fun and decorative push pins or clips to match your design theme. These add an extra flair and can be a great conversation starter.
Step-by-Step Process for Creating Your DIY Fabric Pin Board
Now that you have gathered your materials, it’s time to create your fabric pin board. Follow these step-by-step instructions for a successful project.
Prepare Your Base
- Cut the Base Material: If using cork or foam board, cut it to your desired dimensions. Ensure that the edges are smooth to maintain a finished look.
- Test Fit Your Fabric: Lay the fabric over the board to check that it covers the entire surface adequately. You want enough excess fabric to fold over the edges for a clean finish.
Attach the Fabric
- Adhesive Application: If using spray adhesive, do this in a well-ventilated area. Apply a light, even coat over the surface of the board, and place your fabric on top, smoothing any creases or bubbles as you go.
- Alternative Fabric Glue Method: If using fabric glue, apply it around the edges of the board and press the fabric down. Allow it to dry as directed by the product instructions.
Fold and Secure the Edges
- Folding the Edges: Once the fabric is secured, fold the fabric edges approximately 0.5 inches inward towards the inside of the board. This fold creates a hem that strengthens the edges of your pin board.
- Ironing the Edges: Using an iron, press the folded edges down to maintain the crease. This step will ensure the fabric lies flat, making the next steps easier.
Finalize the Board
- Sewing or Gluing the Hem: If you choose to sew, use a straight stitch along the hem to secure the fabric firmly. If using glue, apply a line of adhesive along the fold and hold it down until it bonds securely.
- Adding Decorative Edges: If desired, attach trim or ribbon around the perimeter of the pin board using glue or stitches to enhance its aesthetic appeal.
- Attach Hanging Mechanism: Depending on where you want to place your pin board, consider adding hooks, clips, or even mounting it directly to the wall. Make sure it’s securely attached for durability.
Creative Patterns and Styles for Your Pin Board
Choosing a creative pattern can add personality to your fabric pin board. Here are some fun styles to consider:
1. Floral Prints
- Vibrant and Cheerful: Floral fabrics can bring warmth and brightness to any room. Whether you choose large, bold flower patterns or delicate prints, floral designs create an inviting atmosphere.
- Seasonal Themes: Switch out the fabric according to the seasons. Spring might call for bright blooms, while autumn could inspire choosing rich oranges and browns in a floral pattern.
2. Geometric Designs
- Modern Aesthetics: Geometric patterns lend a contemporary touch to your pin board. Look for fabrics featuring stripes, dots, or abstract designs to add interest and modernity.
- Color Coordination: Pair geometric prints with solid colors that match or complement your existing decor to create a balanced look.
3. Solid Colors with Textures
- Simplicity and Elegance: Sometimes less is more. Using solid colored fabrics with different textures can create a sophisticated and sleek look.
- Layering Textiles: For added depth, consider layering different textures, such as a soft velvet with a smooth cotton. This combination can add richness to your pin board.
Ideas for Personalizing Your Fabric Pin Board
Your DIY fabric pin board can also be personalized with additional elements to enhance its functionality and aesthetics.
1. Inspirational Quotes
- Adding Written Quotes: Consider incorporating inspirational quotes or affirmations that motivate you daily. This could involve writing directly on the fabric or adding printed quotes in decorative frames.
- Using Sticky Notes: Attach decorative sticky notes to the board to jot down reminders, making your pin board both aesthetic and functional.
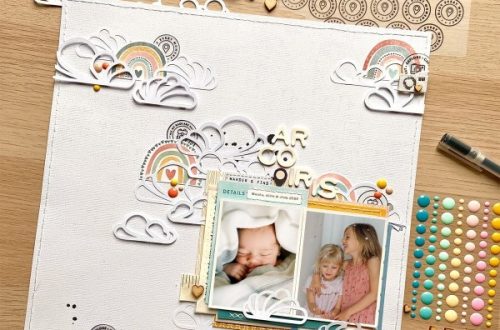
2. Photos and Memories
- Showcasing Memories: Use the pin board to display cherished photos, postcards, or mementos. This personal touch not only beautifies your space but also keeps your favorite memories on display.
- Rotating Displays: Regularly change out the items you display for a refreshing look. This allows your pin board to evolve with your interests and experiences.
FAQs
What materials do I need for a DIY fabric pin board?
To create a DIY fabric pin board, you will need a base material like cork or foam board, fabric of your choice, adhesive (spray or fabric glue), scissors, and pins or clips for securing items.
How do I choose the right fabric?
Select fabric that complements your home decor and aligns with your personal style. Consider the texture, pattern, and color, to create a pin board that is both functional and visually appealing.
Can I use a bulletin board instead of cork?
Yes, a traditional bulletin board can also work for a fabric pin board. Just ensure the surface adheres well to the fabric for optimal results.
How can I maintain my fabric pin board?
To maintain your fabric pin board, avoid placing heavy items on it. Clean it gently with a soft cloth to remove dust, and replace pinned items regularly to keep it looking fresh.
Conclusion: Create Your Unique Fabric Pin Board Today!
In conclusion, creating a diy fabric pin board is a fun, rewarding project that combines functionality with creativity. By following the steps outlined in this guide, you can craft a personalized pin board that enhances your home and reflects your style. With countless fabric patterns and styles available, your DIY pin board can serve various purposes—from organization to creativity, showcasing memories, and more. So gather your materials, unleash your creativity, and start your fabric pin board project today! You will find joy in the process and satisfaction in the final creation, adding a unique touch to your space that transforms it into a personal haven.