Introduction to Cute 3D Perler Bead Patterns
Crafting with Perler beads has become a delightful hobby for many people of all ages. Among the various styles and designs, cute 3D perler bead patterns stand out as a fun and engaging way to express creativity. Unlike traditional flat designs, 3D projects allow crafters to create stunning, sculptural pieces that can serve as home decor, gifts, or playful toys. This guide will walk you through the process of creating these adorable patterns step-by-step, ensuring you have all the necessary tips, tricks, and designs to embark on your crafting adventure.
Why Choose 3D Perler Bead Patterns?
- A Unique Crafting Experience:
- 3D designs provide a unique experience compared to traditional flat patterns. When creating 3D patterns, the process becomes more dynamic and rewarding.
- The satisfaction of watching your creations take shape into three dimensions can inspire you to experiment further with your designs, leading to greater creativity.
- Versatility in Designs:
- Cute 3D patterns can range from simple shapes to complex figures, including animals, characters, and more. This versatility allows crafters to choose projects that match their skill levels.
- You can create a variety of items for different purposes, such as decorative figurines, keychains, or cozy items for your home.
- Enhancing Motor Skills:
- As you work on 3D projects, you will develop fine motor skills and hand-eye coordination. This is especially beneficial for children, but adults can also enjoy the therapeutic aspects of crafting.
- The act of placing the beads and managing the melting process fosters mindfulness, allowing for relaxation and focus.
Gathering Your Supplies
- Essential Materials for 3D Patterns:
- To get started with your cute 3D Perler bead patterns, gather the necessary supplies. This includes Perler beads in various colors, a sturdy pegboard, parchment paper, and an iron.
- Additionally, scissor and a pair of tweezers can help in placing the beads accurately and managing your designs during the melting process.
- Choosing the Right Patterns:
- Select patterns that fit your skill level. While many designs are available online, starting with simpler 3D patterns can help you understand the process before tackling more complex projects.
- Many sources offer templates, which can assist in laying out your designs effectively.
- Workspace Preparation:
- Prepare a clean, well-lit workspace to encourage efficient crafting. Make sure you have enough room for all your materials and tools, allowing you to work comfortably without distractions.
- An organized workspace fosters a smoother crafting experience and helps you focus on your designs.
Step-by-Step Guide to Creating Cute 3D Patterns
- Designing Your Project:
- Begin by laying out your Perler beads on the pegboard according to your chosen pattern. Ensure you have a clear understanding of the design and color arrangement before you proceed.
- If required, refer to a visual guide or template to assist you with the specific placements.
- Melting the Beads:
- Once your pattern is set, cover it with parchment paper. Preheat your iron to a medium setting and gently press it over the beads in a circular motion for even melting.
- Be sure to heat each section adequately, allowing the beads to fuse together without losing their shape. This step is crucial for maintaining the integrity of the 3D design.
- Cooling and Removing the Design:
- After melting, carefully remove the parchment paper and let the pieces cool on the pegboard. Once they are cooled, gently lift them off to reveal your 3D creation.
- The cooling process allows the beads to set firmly, making it easier to manipulate the piece during assembly.
- Assembling 3D Elements:
- For projects that require multiple parts, use a hot glue gun or adhesive to bond the pieces together. This may involve placing sections at angles to achieve the desired 3D shape.
- Take your time during this process; ensuring precise alignment will result in a more polished final piece.
Tips for Success with 3D Perler Bead Patterns
Experimenting with Colors
- Embrace Color Combinations: When working on your 3D Perler bead patterns, feel free to experiment with a wide range of color combinations. Mixing and matching different hues can lead to exciting results that may surprise you. Don’t be afraid to stray from conventional palettes to find unique color relationships.
- Creating Unique Outcomes: The beauty of crafting with Perler beads lies in the ability to create distinct visual effects. By blending colors in unexpected ways, you can achieve stunning designs that capture attention and reflect your personal style. Let your imagination guide you as you mix colors that resonate with your artistic vision.
- Using Gradients: One of the most striking methods of achieving depth and dimension in your 3D patterns is by incorporating gradients. Gradients can create a smooth transition between colors, providing a captivating effect that adds sophistication to your work. Try arranging beads from light to dark shades or vice versa to enhance the visual interest of your designs.
- Incorporating Patterns: Consider creating patterns with your color combinations as well. Using alternating colors, stripes, or polka dots can introduce dynamic elements to your 3D projects. Experimenting with various patterns can elevate the creativity in your work and make your designs stand out.
Trying Different Shapes
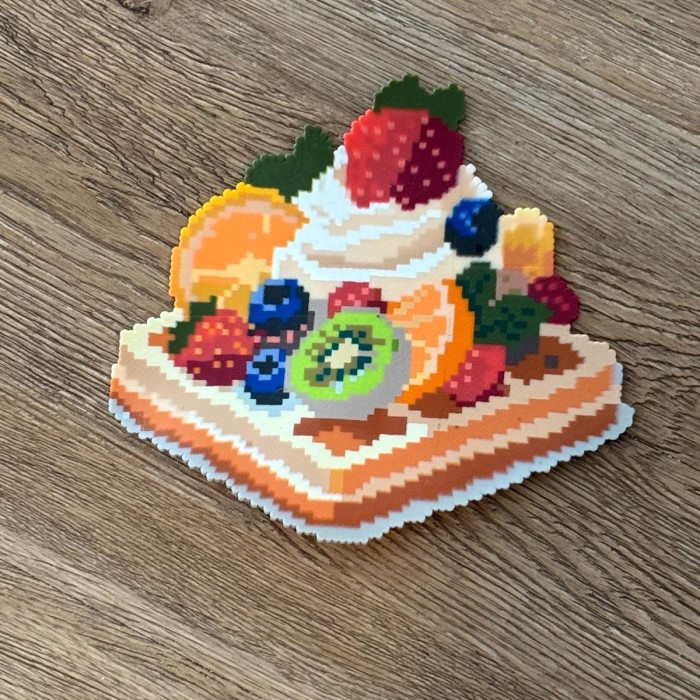
- Exploring Geometric Shapes: Step beyond the traditional designs by experimenting with various geometric shapes in your 3D Perler bead art. Incorporating squares, triangles, circles, and other shapes can add complexity to your projects. Each shape has its unique character and can contribute distinctly to the theme of your artwork.
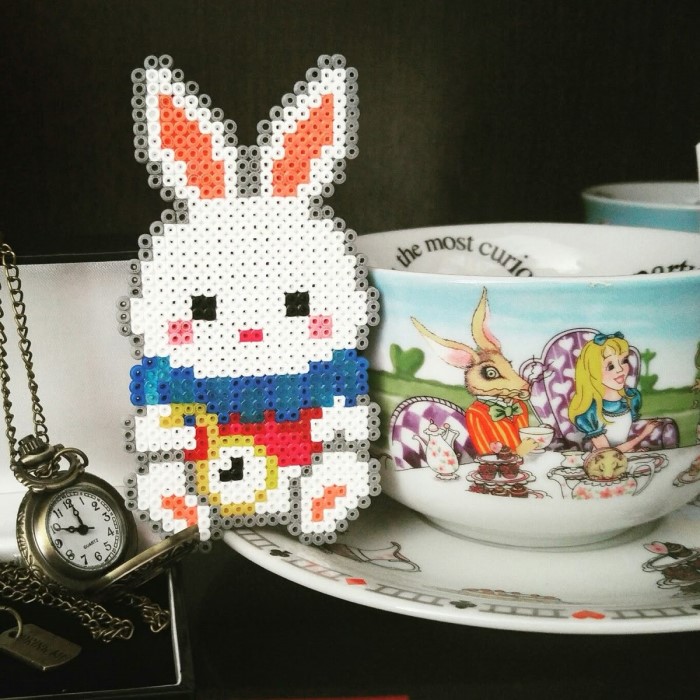
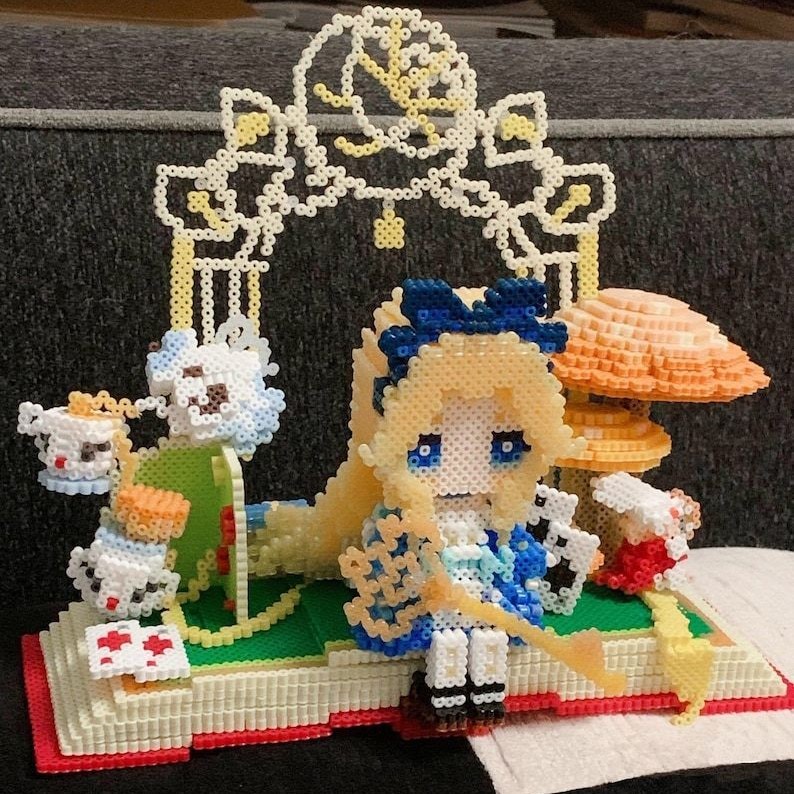
- Creating Characters: If you’re feeling adventurous, try sculpting recognizable characters using 3D patterns. Whether it’s animals, mythical creatures, or beloved figures from cartoons and games, the possibilities are endless. Using diverse shapes and forms can bring these characters to life in a lively and engaging manner.
- Using Multiple Pegboards: Some complex patterns may lure you to use multiple pegboards. This approach allows you to expand your creative horizons, as it offers more space to layer and arrange your designs in intricate ways. Utilizing multiple boards can also facilitate crafting larger pieces that are visually striking.
- Compatibility of Shapes: Understanding how different shapes fit together is crucial in creating cohesive designs. Familiarizing yourself with the compatibility of various geometrical shapes will enhance your overall creativity and help you develop intricate patterns that flow together harmoniously.
Making Adjustments
- Flexibility is Key: Throughout your crafting journey, maintain an open mindset towards making adjustments. If you find that a specific design isn’t coming out as planned, remember that it’s perfectly acceptable to take a step back and reassess your approach. Embracing changes can often lead to improved designs and better overall results.
- Rethinking Your Approach: Don’t hesitate to think creatively if something doesn’t feel right. Consider modifying the pattern by altering colors, changing shapes, or even redefining the overall concept. Fresh perspectives can inspire new solutions that enhance the final outcome of your project.
- Encouraging Innovation: Being flexible during the crafting process is essential for sparking innovation. When you allow room for experimentation and revisions, you may discover unexpected and delightful results that add personality to your projects. Each adjustment can turn into a new opportunity for creative exploration.
- Celebrating Unexpected Outcomes: Finally, embrace the outcomes of your adjustments, even if they differ from your initial vision. Sometimes, the best creations emerge from happy accidents or spontaneous changes. Celebrate the uniqueness of each piece you create, knowing that every project contributes to your growth as a crafter.
FAQs
How do I create cute 3D Perler bead patterns?
To create cute 3D patterns, gather your supplies, choose a design, melt the beads carefully, and assemble pieces as needed.
Are there beginner-friendly patterns available?
Yes, many online resources provide beginner-friendly 3D patterns, suited for crafters of all skill levels.
Can I come up with my own designs?
Absolutely! Once you gain confidence, designing your own patterns can be a rewarding creative outlet.
What are some tips for melting beads effectively?
Ensure your iron is set to medium heat, use parchment paper to prevent sticking, and apply even pressure for consistent melting results.
Conclusion: Unleash Your Creativity with 3D Perler Bead Patterns
In summary, cute 3D perler bead patterns offer a fun and exciting way to explore your artistic side and improve your crafting skills. With the right supplies and a step-by-step approach, you can create stunning 3D designs that showcase your creativity. Remember to experiment with colors, shapes, and personal designs to make your projects uniquely yours. By immersing yourself in this crafting journey, you’ll not only produce beautiful art but also gain valuable skills and joy from your creative process. So gather your beads and start crafting your next masterpiece today!