Benefits of Using a Scrapbook Organizer
A scrapbook organizer provides many benefits for crafting enthusiasts. It simplifies access to tools and materials, making the creative process smoother.
Keeps Supplies Neatly Arranged
A scrapbook organizer helps maintain order. You can store paper, stickers, and embellishments in designated compartments. This reduces clutter, saving you valuable time during projects.
Boosts Creativity
With supplies organized, you can focus on crafting without distractions. A tidy workspace often sparks new ideas, enhancing creativity.
Saves Time
Searching for tools and materials wastes time. A scrapbook organizer ensures everything is within reach, speeding up your process.
Protects Materials
Proper organization preserves delicate supplies. Scrapbook organizers are designed to prevent damage to paper and decorative items.
Reduces Stress
An organized workspace promotes calmness. A scrapbook organizer helps eliminate the frustration of misplaced items.
Maximizes Space
Whether crafting at home or on-the-go, organizers make efficient use of space. Compact designs fit easily into tight areas, keeping supplies accessible.
Using a scrapbook organizer enhances efficiency, creativity, and enjoyment in your projects.
Essential Materials for Scrapbook Organizers
To create an efficient scrapbook organizer, gather the right materials. These essentials will help you stay organized and ready for any craft project.
Sturdy Organizer or Storage Box
Choose a durable organizer with compartments. It should store all your scrapbooking supplies.
Dividers and Inserts
Use dividers to separate different items. Inserts help categorize materials neatly and efficiently.
Clear Resealable Bags
Store smaller items like stickers or embellishments. These bags keep them visible and secure.
Cardstock and Paper
Include a variety of paper and patterned cardstock. They are crucial for scrapbooking.
Adhesive Supplies
Have strong glue, double-sided tape, and adhesive dots. These are essential tools to hold pieces together.
Cutting Tools
Keep a pair of sharp scissors and a craft knife. A paper trimmer is also helpful.
Writing Tools
Include markers, pens, and colored pencils. Use them for journaling and decorations.
Embellishments
Add stickers, washi tape, and ribbon. They make your scrapbook pages more creative and unique.
Stencils and Templates
Use stencils for neat shapes or letters. Templates can guide your creative designs.
Photo Sleeves and Pockets
Protect precious photos with photo sleeves or pockets. These also keep them organized.
Labels or Tags
Use labels to classify sections in your organizer. It keeps everything easy to locate.
Having these materials ready ensures a smooth crafting experience. They help you start projects quickly and stay organized. Make your scrapbook organizer functional and easy to use with these essentials.
Different Types of Scrapbook Organizers
Scrapbook organizers come in various designs to suit every crafter’s needs. Choosing the right type ensures your supplies stay organized and accessible.
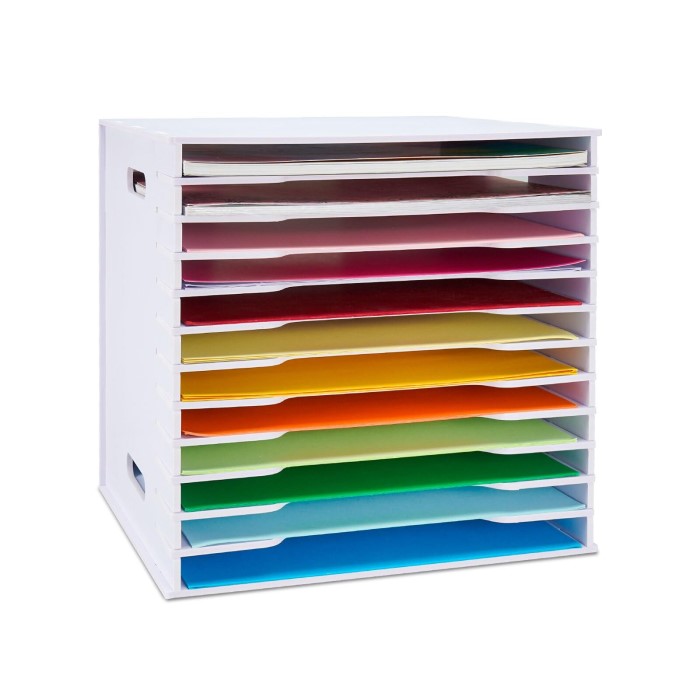
Desktop Organizers
These are perfect for small, dedicated crafting spaces. They come with compartments to hold scissors, pens, and paper. Desktop organizers keep tools within easy reach and maintain a tidy workspace.
Portable Organizers
For crafters on the go, portable organizers are ideal. These are lightweight and come with handles or straps for easy transportation. They often include compartments or pouches for organizing smaller items like stickers and embellishments.
Rolling Carts
Rolling carts are versatile and can be moved around easily. They have multiple tiers or baskets to fit large supplies like cardstock and paper trimmers. Rolling carts are perfect for those who need mobility in their crafting area.
Drawer Systems
Drawer organizers are great for larger collections of supplies. They offer multiple drawers that can be labeled for easy identification. This type is perfect for storing items like adhesive tools, papers, and stencils.
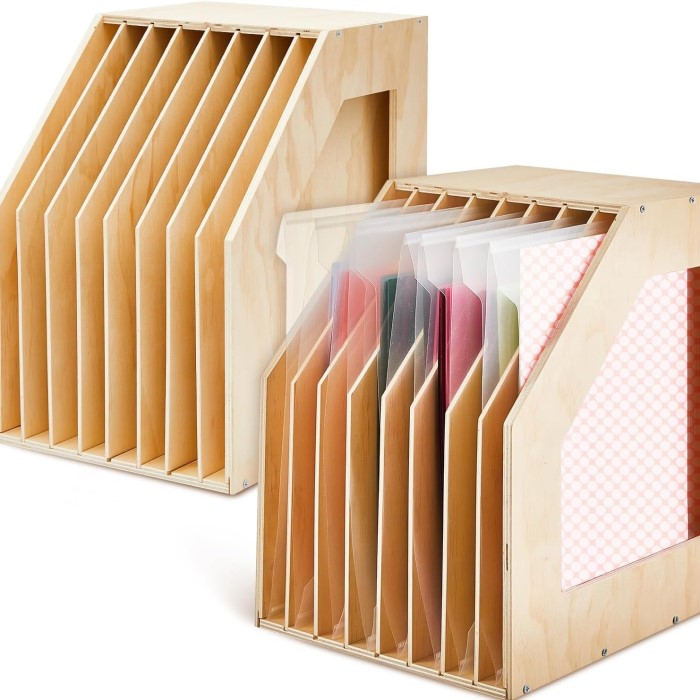
Storage Binders
Binders are compact and great for organizing scrapbook pages, photos, and templates. They usually come with plastic sleeves to protect delicate materials. Storage binders are perfect for keeping things flat and secure.
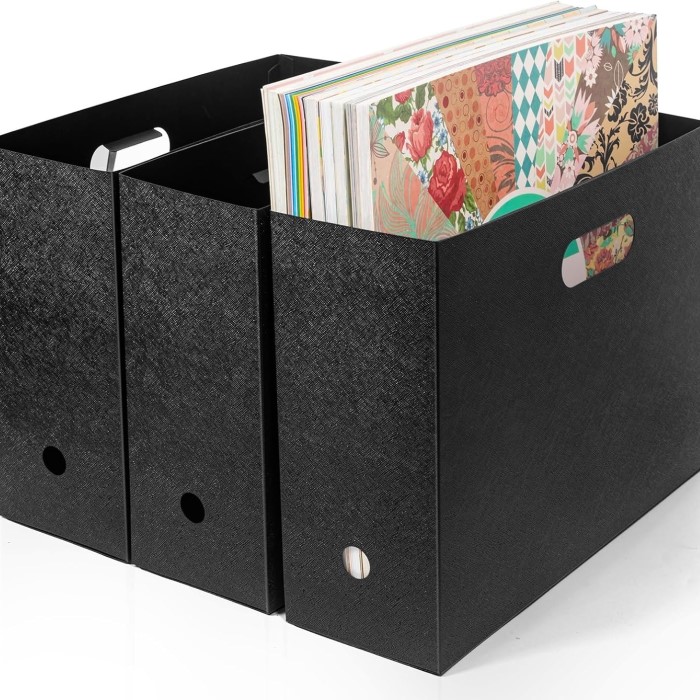
Storage Boxes with Dividers
These boxes have customizable dividers to fit your specific needs. They are great for sorting embellishments, markers, and small tools. Storage boxes are stackable and easy to store when not in use.
Hanging Organizers
Hanging organizers save space by utilizing walls or doors. They often include pockets and hooks to keep supplies visible and easily accessible. Hanging organizers are ideal for small spaces.
Tote Bags
Tote bags are stylish and functional. They often include pockets and compartments to organize supplies. These are great for crafting events or classrooms.
Choosing the right scrapbook organizer depends on your space and crafting habits. Each type offers unique benefits, helping you keep your supplies neat and ready for creativity.
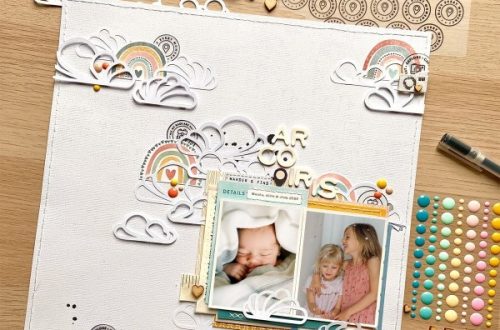
Creative Layouts for Scrapbook Organizer Pages
Designing layouts for scrapbook organizer pages keeps your crafting supplies neat and accessible. Creative layouts can simplify organization and make your scrapbook organizer visually appealing.
Categorize by Supply Type
Group similar items together within your organizer pages. Separate papers from embellishments or tools. This makes everything easy to locate when you’re crafting.
Use Color-Coded Sections
Assign specific colors to different supply categories. For example, blue for adhesives and green for paper. This simple technique enhances readability and speeds up access.
Include Labels and Tags
Label each section clearly so you know where everything belongs. Use tags or stickers for a quick overview. Labels help eliminate guesswork during busy crafting sessions.
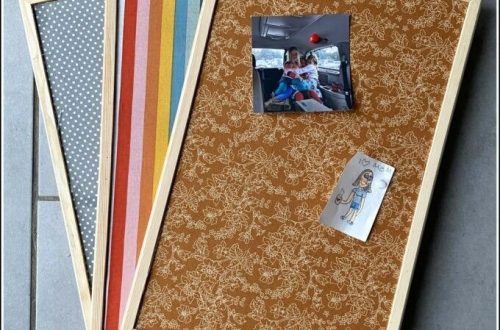
Introduce Protective Pockets
Add clear sleeves or pockets for delicate supplies like stickers or photos. Protection prevents damage to items while keeping them visible and organized.
Add a Calendar Section
Create a calendar layout to note deadlines or craft events. This helps you stay on track with projects.
Incorporate Space for Ideas
Reserve a section in your organizer for sketches or creative notes. Jot down inspirations for your next scrapbook design.
Use Dividers for Better Separation
Add dividers to separate larger sections. For example, use dividers between seasonal themes or project types. Dividers ensure everything stays neat and structured.
Try Flexible Designs
Choose adjustable layouts that fit your changing needs. Use removable pages or modular inserts. Flexibility allows the organizer to grow with your collection.
Make It Decorative
Decorate your scrapbook organizer pages with stickers, washi tape, or doodles. Personal touches make your organizer enjoyable to look at and use.
Creative layouts not only keep your supplies in order but also inspire your crafting sessions. An organized setup saves time and makes scrapbooking more enjoyable.
Tips for Organizing Scrapbook Supplies
Organizing scrapbook supplies simplifies crafting and enhances creativity. Follow these practical tips to keep everything tidy and accessible.
Sort and Categorize Supplies
Group your items by type. Separate paper, stickers, cutting tools, and embellishments. Sorting ensures you can find what you need quickly.
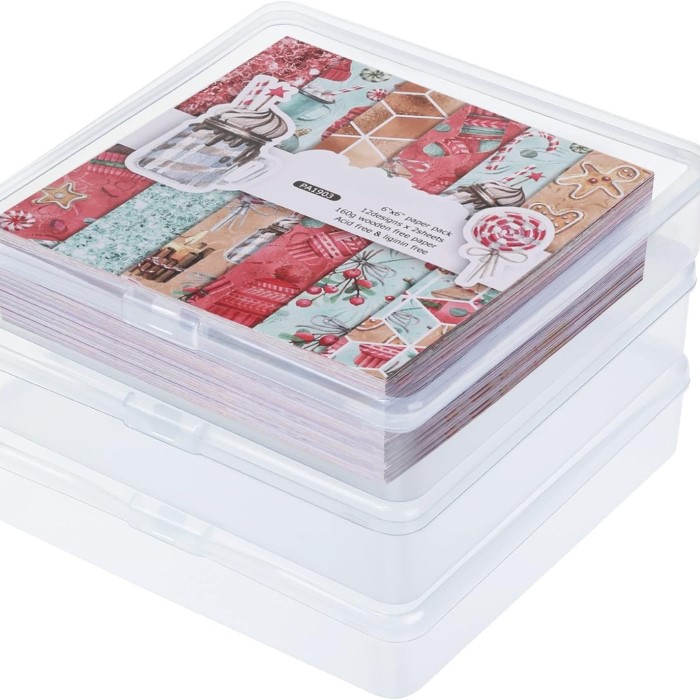
Use Clear Storage Containers
Store smaller items in transparent containers. Clear boxes make it easy to see contents without opening them.
Label Everything
Add labels to boxes, drawers, and compartments. Labels help you identify items instantly, avoiding confusion.
Utilize Vertical Space
Use shelves or wall hooks for storage. Vertical organization saves workspace and keeps items off your desk.
Invest in Drawer Dividers
Separate tools and supplies in drawers with dividers. Efficient categorization prevents clutter and mixes.
Create a Dedicated Workspace
Have a specific area for scrapbooking. Keeping your supplies there avoids displacement and mess.
Store Seasonal Supplies Separately
Organize materials by season. For example, store winter-themed supplies separately from regular ones.
Rotate Unused Items
Check your supplies regularly. Remove unused items to free up space for new ones.
Keep Frequently Used Items Nearby
Position essential supplies within easy reach. This saves time when working on projects.
Use Hanging Organizers
Hang pockets or compartments on walls or doors. They are perfect for smaller tools and embellishments.
Maintain Regular Cleaning
Clean and reorganize your space weekly. This keeps your scrapbook supplies orderly and ready for use.
A well-organized scrapbook setup saves time and reduces stress. Following these tips ensures a smoother and more enjoyable crafting process.
DIY Scrapbook Organizer Projects
Creating your own scrapbook organizer is a rewarding and creative task. It allows customization to fit your specific needs, making organization fun and functional. Here are simple DIY projects to get you started.
A Shoe Box Organizer
Reuse an old shoe box to make a simple organizer. Divide the box using cardboard partitions. These compartments can hold paper, pens, and smaller tools. Decorate the box with paint, stickers, or patterned paper for a unique touch.
Hanging File Organizer
Transform a basic hanging file folder into a scrapbook organizer. Label each folder for different types of supplies like cardstock, stickers, or templates. Hang it on a hook or wall-mounted rack. This option saves space while keeping supplies accessible.
Mason Jar Storage
Use mason jars to store embellishments, pens, and small tools. Decorate the jars with ribbons or paint to match your crafting style. Arrange them on shelves for easy access and a decorative touch to your workspace.
Magnetic Board Organizer
Create a magnetic board for organizing small metal tools like scissors and paper clips. Attach magnets to the board and to your tools. Mount this board on the wall for convenient use. Pair it with small hanging baskets for additional storage.
Custom Drawer Dividers
Craft personalized dividers using foam sheets or cardboard to organize drawers. Adjust the dividers to fit specific items like adhesives, papers, or stencils. This keeps the drawer neat and tailored to your supplies.
Portable Tote Bag
Design a tote bag organizer with separate pockets for tools and materials. Use durable fabric to make sure it lasts. This portable option is great for scrapbooking on the go.
Pegboard System
Install a small pegboard on your wall to hang tools and supplies. Add hooks and baskets to customize your storage. Pegboards are versatile and help keep items visible.
Binder Organizer
Create a scrapbook storage binder with plastic sleeves to store pages, photos, and embellishments. Use tabs to separate sections for added organization.
DIY Rolling Cart
Convert a regular rolling cart into a scrapbook organizer. Add plastic bins or baskets to hold supplies. Label bins clearly for easy organization. This mobile option is perfect for flexible crafting spaces.
Practical Tips for DIY Projects
- Use durable materials for long-lasting organizers.
- Keep designs simple and functional.
- Test layouts to ensure easy access to supplies.
- Personalize decorations to match your style.
DIY scrapbook organizers are flexible and cost-effective. They provide a great sense of accomplishment and enhance your creative space.
Best Storage Solutions for Scrapbooking Tools and Materials
Keeping your scrapbooking tools and materials organized is essential for an efficient crafting process. Below are some of the best storage solutions to help you stay tidy and productive.
Drawer Units for Supplies
Drawer units are perfect for organizing large collections. Use separate drawers for paper, adhesives, and tools. Label each drawer for easy identification, saving time during projects.
Clear Plastic Bins
Transparent bins allow you to see what’s inside immediately. Use them for embellishments, markers, and small tools. Stackable bins save space and keep your workspace neat.
Rolling Carts
Rolling carts provide mobility in your crafting area. Multiple tiers can store paper, trimmers, and bulk supplies. Choose carts with lockable wheels for stability during use.
Hanging Organizers
Utilize wall space with hanging organizers. Pockets can store stickers, scissors, and small materials. This solution keeps items visible while saving tabletop space.
Pegboard Systems
Install a pegboard for versatile storage. Add hooks and small baskets to hold tools like scissors and rulers. Pegboards keep items accessible and declutter your desk.
Storage Bags and Totes
Use storage bags with compartments for organizing supplies on the go. Totes work great for crafting events and make portability easy.
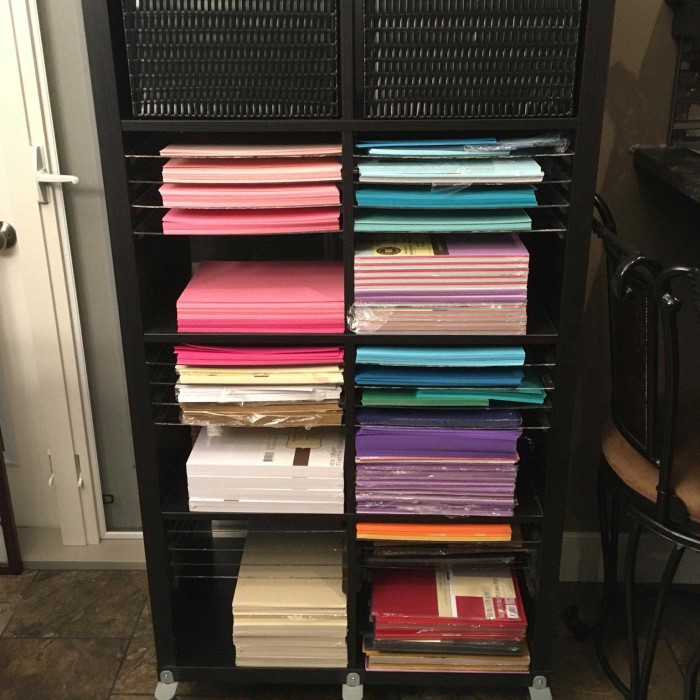
Modular Shelving Units
Adjustable shelves adapt to growing collections. Store heavier items like albums and cutting tools on sturdy shelving. Modular designs maximize vertical space.
Binders and File Systems
Organize scrapbook pages, templates, and stickers in binders with sleeves. Label sections for quick access. Use file folders to separate paper themes or project types.
Magnetic Boards
Magnetic boards are excellent for organizing metal tools like clips or scissors. Pair them with small baskets to hold additional materials.
Over-the-Door Storage
Make use of door space with over-the-door racks. Multi-pocket organizers can store ribbons, pens, and lightweight tools. This method is ideal for limited craft spaces.
Choosing the right storage solution depends on your space and supply needs. Mixing multiple options can maximize organization and make crafting more enjoyable.
Personalizing Your Scrapbook Organizer
Adding a personal touch to your scrapbook organizer makes it unique and more enjoyable to use. Customizing the design helps reflect your style and creativity. Here are some simple and fun personalization ideas.
Decorate with Stickers and Washi Tape
Enhance your organizer’s appearance with stickers and colorful washi tape. Choose designs that match your theme or crafting style. Use them to decorate the edges or compartments of your organizer.
Label Sections with Creative Fonts
Use decorative fonts for labeling each section of your organizer. Handwrite or use printed labels. This makes your organizer artistic and practical at the same time.
Add Photos or Artwork
Include small photos or pieces of your artwork on the outside of your organizer. Personal mementos make the organizer more meaningful and inspire creativity.
Use Fabric Covers or Wrapping Paper
Cover your scrapbook organizer with patterned fabric or wrapping paper. Secure it with glue or tape, and finish with a protective layer. This instantly upgrades its look and makes it visually appealing.
Incorporate Your Favorite Colors
Paint or customize the organizer using your favorite colors. It will make your organizer stand out and bring joy every time you use it.
Create a Themed Design
Choose a theme, like vintage, floral, or minimalistic, for your scrapbook organizer. Add details that highlight your theme, such as ribbons, stamps, or cut-outs.
Use Name Tags or Monograms
Add your name or initials in bold, creative designs. It adds a personal element and avoids mix-ups.
Include Inspirational Quotes or Artwork
Add your favorite quotes or designs to the organizer. Create these with hand lettering or print them out. Display them to keep yourself motivated during crafting.
Utilize Different Materials
Incorporate different materials like felt, burlap, or decorative paper. These add texture and a unique look to your organizer.
Experiment with Embellishments
Use buttons, jewels, or fabric flowers as embellishments. Stick them onto your organizer for a fun and creative look.
Personalize Dividers or Inserts
Decorate dividers and inserts with designs or annotations. Color-coordinate them to make your organizer more organized and visually attractive.
Add a Pocket or Elastic Band
Attach a pocket or an elastic band to hold extra tools or notes. This helps with both storage and personalization.
Customizing your scrapbook organizer reflects your personality and keeps you motivated. A visually appealing tool can inspire creativity and make your crafting sessions more enjoyable.