Introduction
Creating your own soap is both a fun and rewarding hobby. With the right soap making equipment, you can craft beautiful, fragrant bars for personal use or gifts. This guide will introduce you to the essential tools you need to start your soap-making journey successfully. From beginner supplies to advanced equipment, we’ll cover everything to set you up for success in 2025.
If you’ve ever wanted to dive into the world of DIY soap making, understanding the necessary equipment is crucial. Not only does it make the process smoother, but it also enhances the quality of your final product.
Basics of Soap Making
Soap making is a rewarding and creative activity. It allows you to craft custom products for yourself or as gifts. There are various methods to make soap, each with its own tools and processes.
What is Soap Making?
Soap making is the process of combining oils or fats with an alkali, such as lye, to create soap. This chemical reaction is called saponification. Homemade soaps are unique and can be tailored with different colors, scents, and ingredients.
You can choose from different methods: melt and pour, cold process, or hot process. Melt and pour is ideal for beginners, as it skips the chemical reaction. Cold process involves curing the soap over time. Hot process uses heat to speed up curing.
Benefits of Making Your Own Soap
Making your own soap has many advantages. It lets you control the ingredients, ensuring natural and skin-friendly products. Homemade soaps can be free of synthetic additives and harmful chemicals.
It also enables creativity. You can experiment with colors, fragrances, and designs to produce unique soaps. Additionally, it is cost-effective in the long run, especially if you make soap regularly.
Soap making also offers an eco-friendly solution. It reduces packaging waste and promotes sustainable practices. Crafting soaps can be a relaxing and fulfilling hobby. It lets you turn basic supplies into functional products.
Essential Tools for Soap Making
To start soap making, having the right tools is crucial. These tools improve safety and efficiency. Let’s explore the essential equipment needed for soap making success.
Must-Have Equipment for Beginners
Beginners should focus on basic tools to get started. Here are the must-have items:
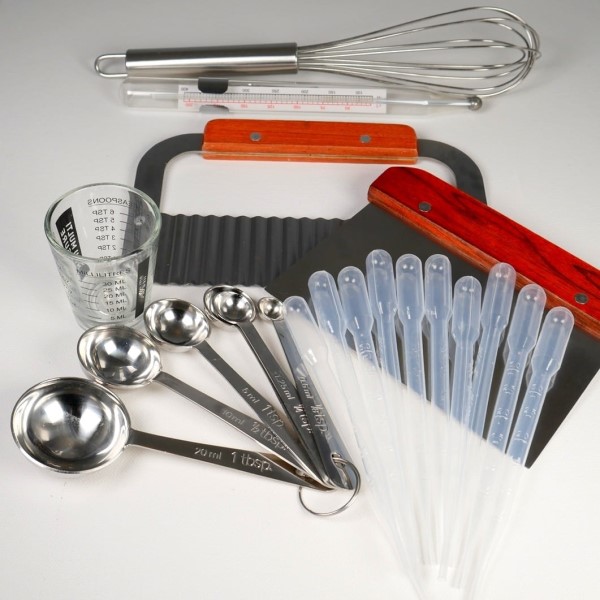
- Mixing Bowls: Use heat-resistant bowls for mixing soap ingredients. Glass or stainless steel works best.
- Measuring Cups and Spoons: Essential for precise ingredient measurements.
- Stick Blender: Speeds up mixing and ensures good saponification.
- Soap Molds: Silicone molds are beginner-friendly and easy to use.
- Digital Scale: Accurate measurements are vital in soap making to ensure proper balance.
- Spatulas and Spoons: Use non-metallic utensils for safe mixing.
These tools ensure you get started on the right foot while maintaining efficiency and safety.
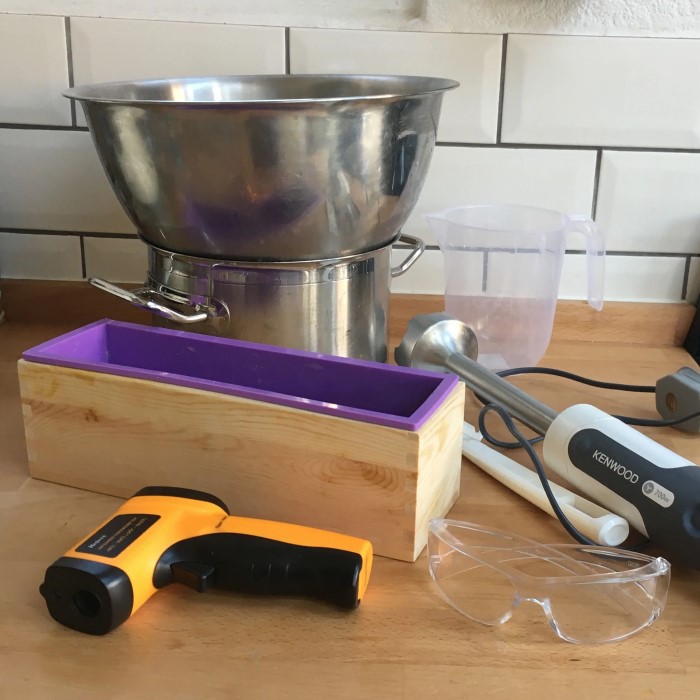
Safety Gear for Soap Making
Safety is important because soap making involves lye. Equip yourself with these safety essentials:
- Safety Goggles: Protect your eyes from splashes.
- Rubber Gloves: Guard your hands while handling lye and oils.
- Long-Sleeved Clothing: Minimize skin exposure to chemicals.
- Vapor Mask: Prevent inhaling lye fumes.
- Apron: Keep your clothes clean and prevent stains.
- Well-Ventilated Workspace: Work in an area with good ventilation to avoid lye fume exposure.
Investing in proper safety gear ensures a safe and enjoyable soap-making experience. Always prioritize safety precautions and handle equipment responsibly.
Equipment for Different Soap Making Methods
Different soap making methods require specific equipment. Using the right tools ensures smooth soap crafting. Let’s explore the tools needed for each method.
Tools for Melt and Pour Soap Making
Melt and pour soap making is beginner-friendly. The process involves melting a pre-made soap base and adding personal touches. Here are the essential tools:
- Microwave or Double Boiler: Melts the soap base gently without burning.
- Heat-Resistant Measuring Cups: Used to pour melted soap base into molds.
- Silicone Soap Molds: Easy to use and clean, great for various designs.
- Stirring Utensils: Use silicone or non-metallic for mixing colors or fragrances.
- Add-Ons Containers: Small bowls to hold colorants, mica powder, or essential oils.
These tools keep the process mess-free and straightforward, ideal for beginners.
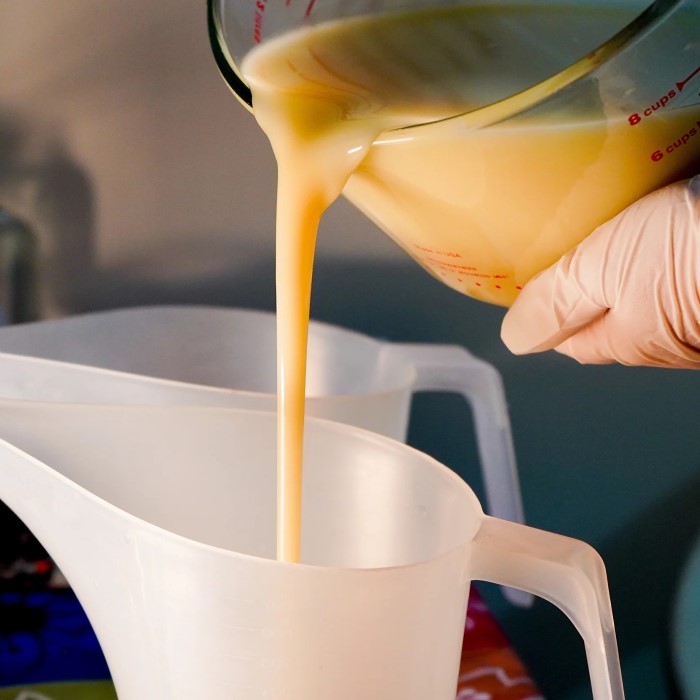
Tools Required for Cold Process Soap Making
Cold process soap making is more advanced. It involves handling lye and waiting for the soap to cure. Essential tools include:
- Heat-Resistant Mixing Bowls: Mix lye solution and oils without reacting.
- Digital Kitchen Scale: Measures precise amounts of ingredients.
- Stick Blender: Speeds up the saponification process.
- Silicone or Wooden Molds: Shapes the soap and allows easy removal.
- Lye-Resistant Containers: Safe for mixing lye and water.
- Thermometer: Monitors and maintains the right temperature.
- Rubber Gloves and Goggles: Provides protection while working with lye.
Following safety guidelines is crucial for this method to avoid accidents during the lye process.
Equipment Necessary for Hot Process Soap Making
Hot process soap making involves cooking the soap mixture. This method creates soap ready to use much faster. Necessary tools include:
- Slow Cooker or Double Boiler: Heats and cooks the soap evenly.
- Stainless Steel or Heat-Proof Mixing Bowls: Holds hot soap mixtures.
- Stick Blender: Helps mix oils and lye efficiently.
- Thermometer: Maintains proper temperature during cooking.
- Silicone Molds: For easy removal and attractive soap shapes.
- Rubber Gloves and Goggles: Ensure safety while handling lye and hot soap.
Hot process soaps are great for those wanting faster results with a rustic look.
Using the right soap making equipment ensures better results and an enjoyable experience across all methods.

Measuring and Mixing Tools
Measuring and mixing tools are vital for successful soap making. They ensure precise ingredient proportions and consistent results. Using the right tools improves safety and enhances the quality of your soap creations.
Scales for Accurate Measurements
Accurate measurements are essential for balanced soap recipes. Here’s why scales are important:
- Digital Scales: These provide precise measurements essential for oils, lye, and additives.
- Accuracy: Even slight measurement errors can affect the soap’s texture and effectiveness.
- Features: Opt for scales with a tare function and capacity up to 5 kilograms.
- Durability: Choose sturdy and easy-to-clean scales for repeated use.
A digital scale ensures your soap recipe proportions remain accurate and well-balanced.
Thermometers for Temperature Control
Temperature control is crucial, especially in cold and hot process soap making. Here’s what to know about thermometers:
- Type: Use a candy or infrared thermometer for exact readings.
- Range: Ensure the thermometer covers temperatures from 80°F to 200°F.
- Purpose: Monitor temperatures of oils, lye solution, and the soap mixture.
- Safety: Avoid extreme temperature differences to prevent dangerous reactions.
Proper temperature monitoring leads to better soap consistency and prevents mishaps.
Mixers and Blenders
Mixers and blenders help achieve uniform soap mixtures efficiently. Here’s why they matter:
- Stick Blenders: These speed up the saponification process.
- Manual Whisks: Useful for mixing fragrances, colors, or light blending tasks.
- Material: Always use stainless steel or silicone to avoid reactions with lye.
- Ease of Use: Stick blenders save time compared to manual stirring.
Using the right mixing tools ensures your soap ingredients blend perfectly, enhancing texture and quality.
Investing in reliable measuring and mixing tools is key to mastering soap making. Accurate scales, precise thermometers, and efficient blenders improve both safety and results, ensuring you create excellent soaps every time.
Soap Molds and Their Variations
Soap molds play a critical role in shaping and designing your homemade soaps. Choosing the right mold affects both the look and functionality of your soap. Let’s explore the common types of molds and their variations.
Silicone vs. Wooden Molds
Silicone and wooden molds are popular choices for soap making. Each type offers unique benefits:
- Silicone Molds:
- Flexible and easy to use.
- Require no lining, making cleanup faster.
- Best for intricate designs like floral or themed shapes.
- Perfect for beginners due to their ease of handling.
- Wooden Molds:
- Offer sturdy support for large soap batches.
- Require lining with parchment to prevent sticking.
- Create traditional, rustic soap shapes.
- Durable and ideal for professional soap makers.
Choose silicone molds for creativity, and wooden molds for larger, simpler batches.
Creative and Decorative Molds
Creative molds bring your soap designs to life with unique shapes and patterns. Here’s how they add more variety:
- Decorative Silicone Molds:
- Available in countless designs, from intricate flowers to geometric shapes.
- Great for gifting or special occasions.
- Customized Molds:
- Personalize with text, logos, or names for special soaps.
- Perfect for business branding or themed soaps.
- Seasonal Molds:
- Feature designs for holidays like Christmas or Halloween.
- Help make festive soaps to celebrate occasions.
- Novelty Molds:
- Use fun designs like animals, fruits, or characters.
- Perfect for kids or hobbyist creations.
Creative molds let you experiment with designs, making your soap unique and appealing.
Cutters and Finishing Tools
Cutters and finishing tools are essential for giving your handmade soap a polished look. These tools help shape, trim, and refine the final product for a professional appearance.
Cutting Tools for Soap Bars
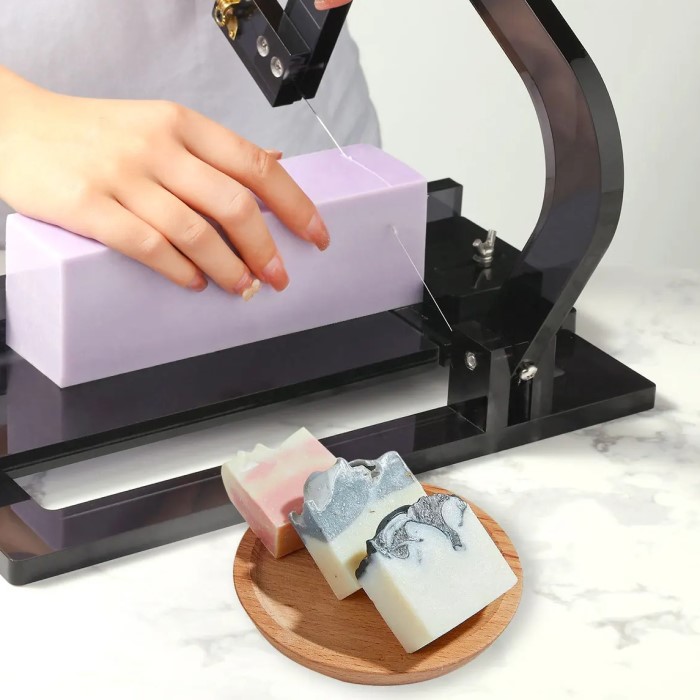
Cutting tools are necessary to divide your soap batch into uniform bars. Here are common options:
- Soap Cutter or Wire Cutter: Creates clean, even slices for consistency in size and shape.
- Straight Blade or Bench Scraper: Ideal for straight cuts or trimming rough edges.
- Crinkle Cutter: Adds decorative ridges for a unique look.
- Miter Box: Helps guide cuts for precise angles and measurements.
- Embossing or Imprinting Tools: Used to add logos or designs while cutting.
Ensure your cuts are clean to maintain a professional and attractive finish.
Polishing and Shaping Equipment
Polishing and shaping tools elevate your soap’s aesthetics. They remove imperfections and enhance smoothness:
- Beveler and Planer: Smooths edges and surfaces for a refined look.
- Sanding Pads: Removes rough spots and evens out surfaces.
- Soap Shaping Tools: Allows customization of unique shapes and designs.
- Buffing Cloth or Brushes: Adds shine and a smooth finish to soap bars.
Investing in proper cutting and finishing tools ensures high-quality results for your soap. Neatly cut and well-polished bars leave a lasting impression and make your handmade soaps stand out.
Cleaning and Maintenance of Soap Making Equipment
Proper cleaning and maintenance of soap making equipment are crucial for safety and product quality. Soap residue and oils can harden on tools, reducing their efficiency over time. Routine care ensures that your equipment lasts longer and works effectively. Follow these steps to keep everything in top shape.
Steps for Proper Cleaning
- Rinse Immediately After Use:
- Rinse tools with warm water to remove soap residue.
- Avoid letting soap harden as it becomes difficult to clean.
- Use Mild Detergent:
- Wash equipment with mild detergent and warm water.
- Avoid harsh chemicals that might damage the tools.
- Scrub Gently:
- Use non-abrasive sponges or brushes for cleaning.
- Avoid scratching delicate surfaces like silicone molds.
- Soak for Stubborn Residue:
- Soak items in warm, soapy water if residue hardens.
- Let tools sit for 10–15 minutes before scrubbing.
- Thoroughly Dry Equipment:
- Dry all tools completely to avoid moisture build-up.
- Use microfiber cloths for effective drying.
- Inspect for Remaining Residue:
- Check for leftover oils or soap films.
- Repeat cleaning if necessary to remove all buildup.
Tips to Maintain Soap Making Tools
- Avoid Metal Reactions:
- Use non-reactive materials like stainless steel or silicone.
- Prevent lye or oils from corroding tools.
- Store in a Dry Place:
- Keep tools in a moisture-free environment.
- Use airtight containers for smaller items.
- Regularly Check for Damage:
- Inspect molds for cracks and scales for accuracy.
- Replace damaged tools quickly.
- Apply Protective Coatings:
- Apply oil to wooden molds to prevent warping.
- Maintain tools to withstand frequent use.
- Organize for Easy Access:
- Keep tools in designated spaces to prevent loss.
- Label containers for better organization.
- Dedicate Tools for Soap Making:
- Avoid using soap tools for other household tasks.
- Prevent contamination and ensure safe usage.
Routine cleaning and maintenance preserve your soap making equipment’s quality. Proper care guarantees safe and effective soap crafting every time.
Storing Soap Making Equipment
Proper storage of soap making equipment keeps your tools organized and extends their lifespan. By following the right storage practices, you can maintain the efficiency and safety of your materials.
Organizing Your Tools
Organizing your soap making equipment helps save time and prevents loss. Here are some tips:
- Designate a Storage Area: Choose a clean, dry spot for storing your tools.
- Use Labels: Label all containers and shelves for quick identification.
- Categorize Tools: Group similar items, like molds, measuring tools, and safety gear.
- Invest in Storage Containers: Use airtight bins to keep smaller items like spatulas and measuring spoons.
- Hang Larger Tools: Use hooks for items like aprons and gloves to save shelf space.
- Dedicate Separate Space: Avoid mixing soap making tools with household items to prevent contamination.
Storage Tips to Prolong Equipment Lifespan
Proper storage extends the life of your soap making equipment. Follow these tips to maintain durability:
- Keep Dry: Moisture can damage tools, especially scales and molds. Store all items in a dry space.
- Avoid Sunlight: Direct sunlight may cause silicone molds to degrade over time.
- Protect Wooden Tools: Use oil to condition wooden molds and keep them from cracking.
- Stack Molds Carefully: Place molds in a way that prevents bending or warping.
- Wrap Delicate Tools: Use bubble wrap or soft cloths for fragile items like thermometers.
- Inspect Regularly: Check all tools for wear and tear and fix or replace damaged ones promptly.
Keeping your soap making equipment well-organized and properly stored ensures long-term usability. Organized tools improve efficiency and create a safer, more enjoyable soap making experience.