Introduction to Liquid Soap Making
Liquid soap making is a fascinating craft that combines creativity and science. It involves transforming oils and fats into a usable, versatile product suitable for home or commercial use. With modern techniques and simplified methods, anyone can master the art of soap making liquid.
What is Liquid Soap?
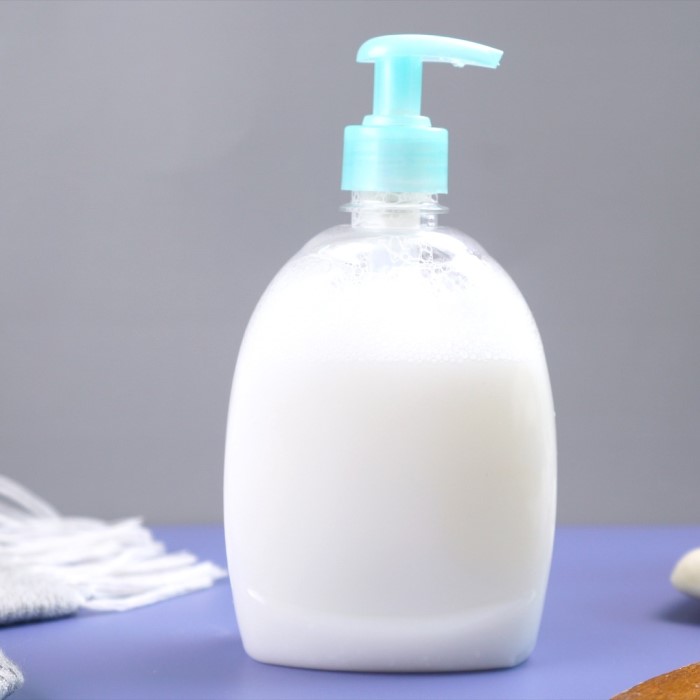
Liquid soap is a cleaning product that is easy to use and store. It is made by combining oils, fats, water, and a liquid alkali like potassium hydroxide. Unlike solid bar soap, liquid soap has a smooth, pourable consistency and is highly versatile. It can be used for cleaning hands, dishes, or even as a base for other products like body washes.
Benefits of Liquid Soap Over Bar Soap
Liquid soap offers several advantages over bar soap:
- Convenience: Liquid soap is easy to dispense, making it more hygienic than bar soap.
- Customizable: You can add scents, colors, or ingredients to suit your preferences.
- Less Waste: Liquid soap minimizes leftover bits compared to bar soap.
- Versatility: It can be used in pump bottles, refills, or even as cleaning solutions.
- Better for Shared Spaces: Liquid soap reduces the risk of cross-contamination, making it ideal for public restrooms.
From its characteristics to its benefits, soap making liquid is a rewarding craft that combines practical use with the freedom of creativity.
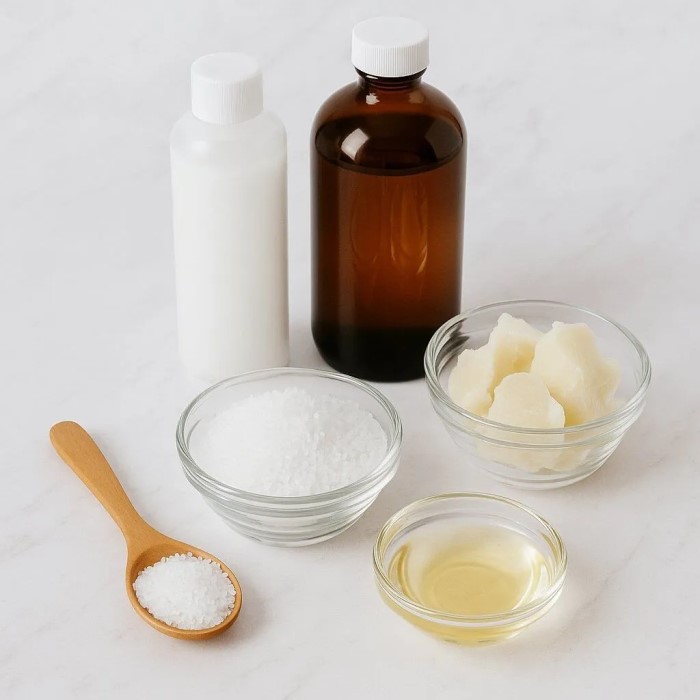
Essential Ingredients for Liquid Soap Making
Key Components of Liquid Soap Base
Liquid soap requires specific ingredients to create a stable, effective base. Key components include:
- Potassium Hydroxide (KOH): This liquid alkali helps turn oils into soap during the saponification process.
- Distilled Water: Used to dissolve potassium hydroxide and combine with oils and fats.
- Glycerin: Adds moisture and ensures that the soap is gentle on the skin.
- Oils and Fats: These act as the foundation for the soap, providing cleansing properties.
These basic ingredients ensure a smooth, pourable consistency and proper cleaning ability. The quality of these components influences the final product.

Choosing Quality Oils and Fats
Selecting high-quality oils and fats is essential for soap making liquid. Common choices include:
- Coconut Oil: Provides excellent foaming and cleansing properties.
- Olive Oil: Adds moisturizing effects and softness to the soap.
- Castor Oil: Contributes to a richer lather and stable texture.
- Palm Oil: Improves soap hardness and durability (opt for sustainable sources).
Quality oils enhance the soap’s performance, scent, and skin-friendly characteristics. Always ensure oils are fresh and free from impurities.
Step-by-Step Guide to Liquid Soap Making
Creating your own liquid soap can be enjoyable and rewarding. Follow these simplified steps to ensure success.
Preparing the Workspace and Equipment
Clean the Area
- Keep Workspaces Clutter-Free: Before beginning any soap-making project, take a moment to declutter your workspace. This not only improves safety but also enhances your ability to work efficiently.
- Sanitize Surfaces: Wipe down countertops and tables with appropriate cleaning solutions to eliminate any potential contaminants. This is particularly important as you will be handling ingredients that can react negatively if mixed with impurities.
- Organize Supplies: Arrange all your materials and supplies logically. Group similar items together, and ensure that everything is easily accessible throughout the process to minimize distractions and prevent accidents.
Gather Tools
- Essential Equipment: Before you start, make sure to collect all necessary tools for the soap-making process:
- Stainless Steel Pot: A non-reactive pot is essential for heating your oils. Stainless steel is preferred due to its durability and resistance to corrosion from alkaline substances.
- Thermometer: An accurate thermometer will help you monitor the temperatures of your oils and lye solution, which is critical for successful saponification.
- Immersion Blender: This tool simplifies the mixing process, allowing you to combine your soap ingredients quickly and thoroughly, ensuring a smooth consistency.
- Additional Tools: Other useful items may include a scale for measuring, a spatula for scraping, and molds for shaping your soap.
Safety Gear
- Wear Protective Clothing: Safety should always be your top priority. Opt for long sleeves and pants to protect your skin from splashes.
- Use Gloves: Don’t forget to don latex or nitrile gloves to safeguard your hands against harsh chemicals, particularly while handling lye, which can cause severe burns if it comes in contact with skin.
- Eye Protection: Always wear safety goggles or glasses to shield your eyes from any potential splashes of caustic solutions. Eye protection is key when working with lye, as damage can occur swiftly.
Measure Ingredients
- Weigh Ingredients Accurately: Take the time to precisely weigh all your ingredients, including oils, water, and potassium hydroxide (lye). Reliable measurements are critical for achieving the correct chemical reaction.
- Use a Digital Scale: To ensure accuracy, it’s best to use a digital scale that can measure in grams. This helps in achieving a perfect balance between your ingredients for the desired soap quality.
- Keep a Record: Document your measurements and any variations you make to your recipe. This will help you replicate successful batches in the future and troubleshoot any inconsistencies.
Ventilation
- Ensure Airflow: Proper ventilation is crucial when working with potassium hydroxide and other chemicals. Open windows or use exhaust fans to promote airflow and keep the workspace comfortable.
- Reduce Fumes: By ensuring good ventilation, you minimize the buildup of fumes that could be harmful when inhaled. Using a fan to circulate air can aid in keeping breathable air in the workspace.
- Designate a Safe Space: If possible, conduct your soap-making in an area away from other people or pets. This helps reduce exposure to any fumes while you work and keeps your environment safe.
Proper preparation sets the stage for a smooth soap-making process.
Mixing the Ingredients
- Dissolve Potassium Hydroxide: Mix potassium hydroxide with distilled water until fully dissolved.
- Heat Oils: Warm oils in a stainless steel pot to prepare them for saponification.
- Combine Alkali and Oils: Slowly pour potassium hydroxide solution into heated oils while stirring.
- Blend Until Trace: Use an immersion blender to mix until the soap reaches a creamy consistency, called trace.
Accurate mixing ensures the base starts forming correctly.
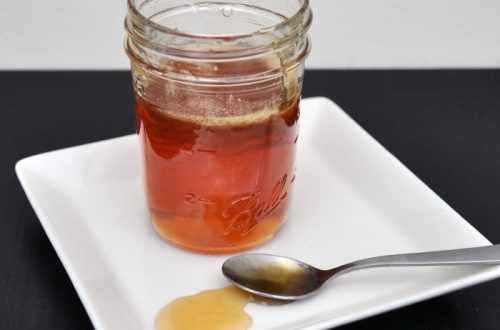
Cooking and Saponifying the Soap
- Low Heat Cooking: Cook the soap mixture on low heat to start the saponification process.
- Check Progress: Stir regularly and observe changes in texture and color.
- Test pH Levels: Use pH strips to ensure the soap reaches neutral levels.
- Dilute the Soap: Gradually add distilled water to reach the desired liquid consistency.
Cooking completes the transformation, creating a usable liquid soap product.
By carefully following each step, you can master the art of liquid soap making. This hands-on process combines science with creativity, offering versatile cleaning solutions tailored to your needs.
Tips and Tricks for Perfect Liquid Soap
Enhance your liquid soap by applying some essential tips and tricks. Perfecting your soap-making skills ensures better results, consistency, and satisfaction.
Achieving Ideal Consistency
- Control Water Content: Gradually add distilled water while mixing. This ensures the desired thickness.
- Blend Thoroughly: Use an immersion blender for seamless blending. This prevents clumps or uneven texture.
- Monitor Cooking Temperature: Maintain a low, steady heat while cooking the soap base. Avoid overheating.
- Use Thickeners: Add ingredients like guar gum or xanthan gum if the soap feels too watery.
- Let It Set: Allow the soap to rest overnight. This gives it time to stabilize.
Following these tips ensures a smooth, pourable consistency for your liquid soap. Proper control over consistency enhances user experience and usability.
Adding Scents and Colors Safely
- Choose Skin-Safe Dyes and Scents: Opt for cosmetic-grade additives to avoid irritation or reactions.
- Add After Cooking: Incorporate scents and colors once the soap base cools down to maintain their effectiveness.
- Measure Accurately: Use precise amounts to avoid overwhelming scents or streaky coloring.
- Experiment in Small Batches: Try combinations on small quantities first to test the results.
- Store Properly: Keep soaps with added ingredients in airtight containers to preserve quality.
By following these tricks, you can personalize liquid soap without compromising safety or quality. Utilize creative techniques to craft unique soaps for your needs.
Troubleshooting Common Issues
While making liquid soap, challenges may arise. Identifying and fixing these issues ensures high-quality results.
Handling Separation and Cloudiness
Separation and cloudiness are common in liquid soap. Here’s how to address them effectively:
- Check for Incorrect Measurements: Ensure precise weighing of oils, alkali, and water. Imbalances can cause separation.
- Improve Mixing: Blend the ingredients thoroughly using an immersion blender to avoid uneven texture.
- Use Proper Ratios: Maintain correct oil-to-alkali ratios during soap formulation.
- Inspect Water Quality: Use distilled water. Impurities in tap water may cause cloudiness.
- Adjust Cooking Duration: Prolong slow cooking if the soap remains cloudy or separates.
- Add Solubilizers: Ingredients like polysorbates can stabilize emulsions and reduce separation.
Understanding the root causes helps resolve these issues and ensures a smooth, stable soap base.
Correcting pH Imbalances
pH levels determine your soap’s safety and effectiveness. Fix imbalances with these methods:
- Test Regularly: Use pH strips or meters during creation. Ideal liquid soap pH is around 7-10.
- Add Citric Acid: For high pH levels, dilute citric acid and mix it carefully into the solution.
- Add Potassium Hydroxide: For low pH, add more potassium hydroxide. Ensure careful measurement and mixing.
- Dilute with Water: Reducing pH can also be achieved by adding more distilled water slowly.
- Avoid Harsh Chemicals: Stick to soap-safe ingredients to prevent extreme pH fluctuations.
- Retest After Adjustments: Confirm pH stability before using or packaging your soap.
Managing pH ensures your soap is safe for skin and effective for cleaning tasks.
Creative Variations of Liquid Soap
Liquid soap can be customized to suit individual tastes and preferences. Exploring creative variations makes it exciting and unique.
Crafting Custom Blends with Essential Oils
- Select Essential Oils: Choose high-quality essential oils for fragrance and therapeutic properties.
- Mix Carefully: Blend oils thoughtfully to create a harmonious scent profile.
- Adjust for Skin Safety: Test small quantities to ensure the mix is safe for skin.
- Add After Saponification: Incorporate oils when the soap base cools to preserve their benefits.
- Experiment with Combinations: Try blends like lavender and peppermint or citrus and eucalyptus.
- Maintain Balance: Avoid overpowering scents; aim for subtle, soothing fragrances.
Custom blends enhance the soap’s appeal and provide tailored aromatherapy benefits.
Making Organic and Natural Liquid Soap
- Choose Organic Ingredients: Use organic oils, fats, and potassium hydroxide for a greener product.
- Avoid Synthetic Additives: Exclude artificial dyes, fragrances, and preservatives.
- Incorporate Natural Colors: Add herbs like turmeric or spirulina for subtle coloring.
- Preserve Skin Health: Include natural moisturizers like honey or aloe vera.
- Support Sustainability: Opt for sustainably sourced palm oil or alternatives.
- Label Clearly: Indicate organic certification on packaging for transparency.
Organic liquid soap is eco-friendly and gentle on sensitive skin, offering a natural alternative for users.
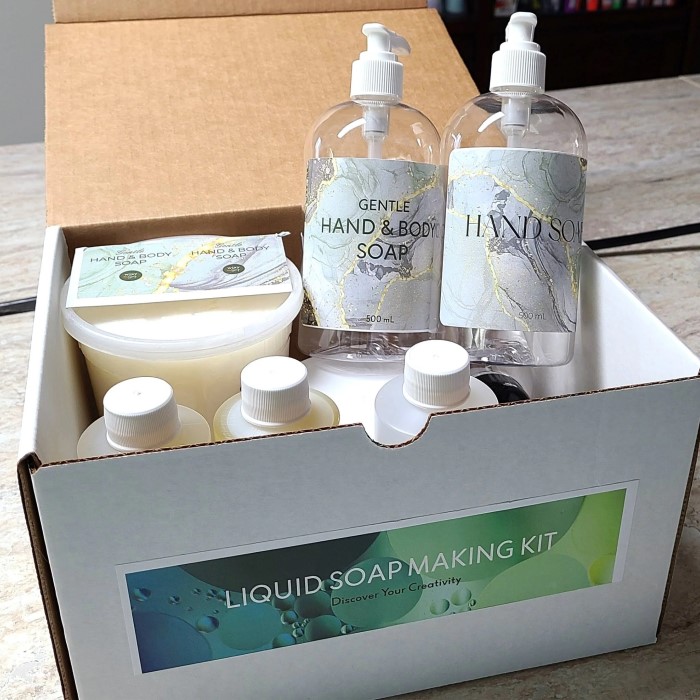
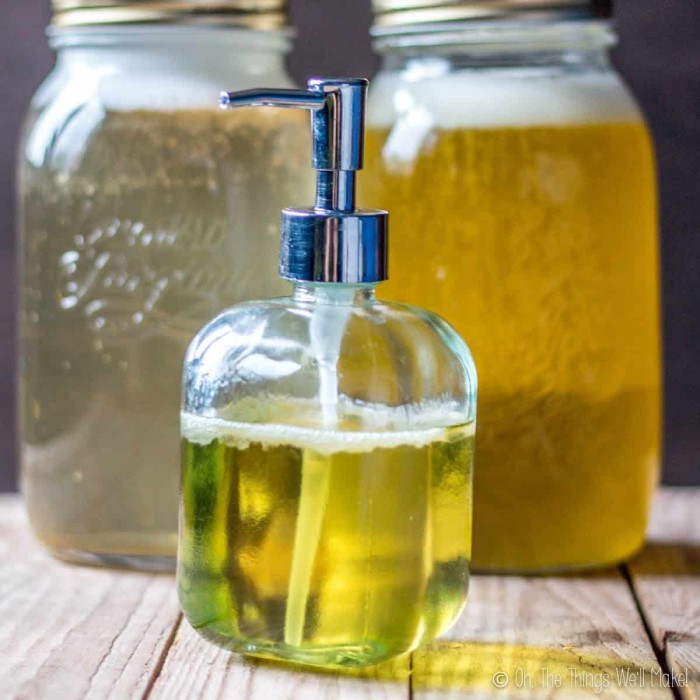
Storage and Packaging of Liquid Soap
Proper storage and packaging of liquid soap ensure its longevity and maintain its quality. Careful selection of containers and adherence to storage practices are crucial for protecting your handcrafted product.
Choosing the Right Containers
- Use Airtight Containers: Airtight containers prevent contamination and protect liquid soap from exposure to air.
- Opt for Pump Bottles: Pump bottles are hygienic and control the amount of soap dispensed.
- Choose Durable Materials: Use containers made of glass or high-quality plastic to avoid leaks or breakage.
- Select Opaque Containers: Opaque bottles prevent light from degrading the soap’s quality over time.
- Label Clearly: Add labels with details like ingredients, date of production, and usage instructions.
Choosing the right container ensures user convenience and keeps the liquid soap safe and effective.
Ensuring Long Shelf Life
- Store in Cool, Dry Places: Keep liquid soap away from direct sunlight and heat to avoid spoilage.
- Use Preservatives: Add natural preservatives like vitamin E or commercial stabilizers to extend shelf life.
- Avoid Contaminants: Always use clean tools and sterilized containers during the packaging process.
- Seal Properly: Ensure caps and lids are tightly secured to prevent leaks and exposure to air.
- Monitor for Spoilage: Check regularly for changes in color, scent, or texture over time.
Proper storage practices help maintain the quality and usability of liquid soap for an extended period.
Conclusion: Mastering the Art of Soap Making Liquid
In conclusion, mastering the art of soap making liquid involves understanding the techniques and ingredients necessary for success. Whether using the hot process, cold process, or rebatching, having the right knowledge equips you to create beautiful and functional liquid soaps.
Soap making is not just a craft; it’s a form of art that allows for creativity and personalization. Armed with this guide, you are now ready to embark on your soap-making journey. Whether for personal use or for selling, mastering soap making liquid techniques opens up a world of possibility and satisfaction. Enjoy the process, experiment, and create with confidence!