Introduction: What is Iridescent Spray Paint?
As a popular choice among artists and DIY enthusiasts, iridescent spray paint adds a unique, shimmering quality to a variety of projects. This type of paint is known for its ability to reflect light, creating a stunning color shift depending on the angle of view. Whether you’re looking to spruce up your home décor, add a special touch to crafts, or engage in a professional art project, understanding how to use iridescent spray paint effectively can elevate your creative output. In this guide, we will explore everything you need to know about iridescent spray paint usage, including techniques, applications, and tips to achieve the best results.
What is Iridescent Spray Paint?
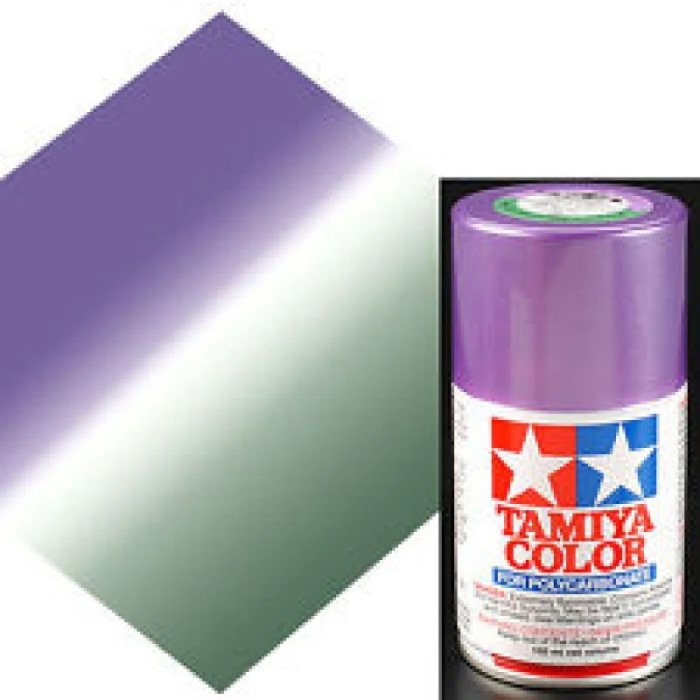
Iridescent spray paint creates shimmering finishes, changing colors when viewed from different angles. It provides a unique aesthetic appeal, mimicking the hues of a rainbow or metallic shine.
Characteristics of Iridescent Paint
Iridescent paint offers a dynamic, multi-color effect. The finish shifts colors depending on light and angle. It creates vibrant results, with metallic tones and pearlescent highlights. The paint is versatile, suitable for various materials like wood, metal, and plastic. It typically dries quickly, making it a convenient option for creative projects.
How it Differs From Regular Spray Paint
Unlike regular spray paint, iridescent options feature color-shifting pigments. Regular paint usually has a single, static color with no optical change. Iridescent spray paint emphasizes depth and texture, adding visual interest. It is ideal for decorative and artistic uses, enhancing the uniqueness of the painted surface.
Popular Applications and Uses
Iridescent spray paint is versatile and adds beauty to various projects. It excels in artistic, decorative, and commercial uses. The shimmering effect makes surfaces unique and grabs attention.
Artistic Projects and Crafts
Artists love using iridescent spray paint to create vibrant and dynamic effects. It enhances paintings, sculptures, and handmade items with its color-shifting hues. Crafters often spray it on jewelry, ornaments, and other small projects. The paint works well with different materials like wood, metal, and plastic.
Home Decor Enhancements
Iridescent spray paint is perfect for personalizing home items. You can enhance furniture, picture frames, and mirrors. Use it to transform old vases, lamps, or wall art into striking accents. Its metallic finish pairs well with modern and minimalist designs. This paint adds elegance and custom charm to any space.
Commercial Uses and Branding
Businesses use iridescent spray paint for eye-catching displays and signage. It helps brands stand out with vibrant visuals. Retail shops use it for polished product packaging and storefront designs. It is also popular for promotional materials. The unique finish catches light and draws attention to logos, making them memorable.
Choosing the Right Iridescent Spray Paint
Iridescent spray paint comes in various options, making it essential to choose the right one. The right choice ensures you achieve the desired effect while meeting your project’s specific needs.
Factors to Consider When Selecting Paint
- Surface Compatibility: Ensure the paint works well with the material you’re painting, whether wood, metal, or plastic.
- Color Range: Look for paints that offer the desired color shift and intensity for your project.
- Durability: Consider paints with long-lasting finishes that resist wear, fading, and scratches.
- Application Type: Choose between spray cans for small projects and spray systems for larger surfaces.
- Drying Time: Opt for paints with quick drying times if you’re working on time-sensitive projects.
- Safety and Odor: Select low-VOC options for safer indoor use and reduced strong odors.
Recommended Brands for Quality Results
- Rust-Oleum: Offers affordable, high-quality iridescent spray paints with excellent color-shifting effects.
- Krylon: Known for vibrant, durable finishes and a wide range of iridescent shades.
- Montana Cans: Ideal for artists and crafters, providing professional-grade paints with unique effects.
- Dupli-Color: Perfect for automotive projects, featuring heat-resistant and chip-proof finishes.
- Pinty Plus: A great choice for DIYers, delivering smooth applications and metallic results.
By considering these factors and choosing a reliable brand, you’ll achieve striking and lasting results.
Preparation Before Painting
Proper preparation is essential for achieving excellent results with iridescent spray paint. Getting the right tools and preparing the surface beforehand ensures smooth application and durability.
Tools and Materials Needed
To start your iridescent spray paint project, gather the following:
- Iridescent Spray Paint: Select a paint compatible with your project material, such as wood, metal, or plastic.
- Primer (Optional): Use if the surface requires better adhesion or uniform color application.
- Drop Cloth or Newspaper: Protect your workspace from overspray and paint splatters.
- Masking Tape: Cover areas you don’t want to paint to keep edges clean.
- Sandpaper: Use fine-grit sandpaper to smooth uneven or rough surfaces.
- Soft Cloth or Tack Cloth: Clean the surface to remove dust, dirt, or residues.
- Protective Gear: Wear gloves, goggles, and a face mask to ensure safety from paint fumes.
- Paint Stirrer or Shaker: Ensure the paint is well-mixed before use.
- Good Lighting: Guarantee clear visibility of the surface for an even application.
Surface Preparation Tips
- Clean Thoroughly: Wash the surface with mild soap and water to remove grime or grease. Let it dry completely.
- Smooth the Surface: Sand uneven or glossy areas for better paint adhesion. Wipe away sanding dust.
- Test Compatibility: Apply a small amount of paint on a hidden area to check the finish.
- Apply Primer if Needed: If the material is porous or uneven, use a primer for smoother results.
- Mask the Area: Protect parts that should not be painted using masking tape and drop cloths.
- Choose the Right Temperature: Ensure the painting area is well-ventilated and within 50-85°F.
Proper preparation reduces mistakes and enhances your final iridescent spray paint finish.
Techniques for Applying
Proper application of iridescent spray paint is key to achieving a stunning, flawless finish. Following the right techniques helps ensure even coverage and enhances the paint’s unique shine and color effects.
Best Practices for Even Coating
- Shake the Paint Well: Shake the spray can for at least 2-3 minutes before use. This ensures the pigments mix evenly.
- Test on Scrap Material: Spray a small amount on scrap material to check spray flow and color effect.
- Maintain Proper Distance: Hold the spray can 8-12 inches away from the surface for even application.
- Use Smooth, Steady Strokes: Move the can in even, sweeping motions to avoid paint buildup or uneven spots.
- Start and End Off the Surface: Start spraying before reaching the surface and stop past the edge. This prevents pooling.
- Apply Thin Coats: Use multiple light layers instead of one heavy coat to prevent drips and ensure better results.
- Allow Drying Time: Let each layer dry before applying the next. Follow the manufacturer’s drying recommendations.
- Work in a Ventilated Area: Ensure proper ventilation to avoid inhaling fumes and improve drying conditions.
Layering and Effects for Optimal Shine
- Base Coat Preparation: Apply a solid base coat (e.g., black or white) for enhanced iridescent effects.
- Experiment with Angles: Adjust the spray angle to create unique shifts in color and intensity.
- Blend Colors if Desired: Use multiple iridescent shades to achieve gradient or rainbow effects.
- Add Extra Highlights: Apply light layers on specific areas to emphasize metallic or pearlescent accents.
- Finish with a Clear Coat: Protect your project with a clear topcoat for added durability and shine.
By mastering these techniques, you’ll achieve a smooth, vibrant, and professional-looking iridescent finish every time.
Troubleshooting Common Issues
Even with the best preparation, problems can occur during iridescent spray paint application. Understanding these issues and their solutions helps you achieve flawless results.
Preventing Uneven Coverage
Uneven coverage is a common problem with spray paint projects. Follow these tips to avoid it:
- Shake the Can Properly: Shake for at least 2-3 minutes to ensure even pigment distribution.
- Test the Spray First: Spray on scrap material to check if the nozzle is functioning properly.
- Use Consistent Distance: Keep the spray can 8-12 inches away for steady application.
- Apply Light Layers: Avoid heavy coats by using multiple thin layers for better control and results.
- Overlap Each Stroke: Slightly overlap each spray pass to prevent gaps and streaks.
- Control Your Speed: Move the can in smooth, even strokes without pausing over one spot.
- Work on a Clean Surface: Ensure the surface is free of dust, oil, or residues to prevent adhesion problems.
Following these practices will minimize uneven finishes and improve the outcome.
Fixing Mistakes Without Restarting
Mistakes happen, but they don’t always require starting over. Here’s how to fix them:
Drips or Runs
- Allow the paint to dry completely before taking any further action.
- Once dry, inspect the area for any drips or runs that may have formed.
- Use fine-grit sandpaper to lightly sand the affected area, ensuring you do not sand too aggressively.
- After sanding, clean the area to remove any dust residue.
- Reapply thin coats of paint to the smoothed area, allowing each coat to dry before adding the next for a more even finish.
Uneven Coverage
- Identify the areas where the paint coverage is uneven or insufficient.
- Prepare to add more light coats by ensuring the original layer is dry.
- Use a clean brush or roller, and apply thin layers of paint, focusing specifically on the uneven areas.
- Maintain smooth and steady strokes to ensure consistency in the coverage.
- Allow each layer to dry before applying additional coats until the coverage is even.
Blotches or Spots
- Check if the paint is still wet in the areas with blotches or spots.
- If wet, gently wipe the affected spots using a damp cloth, being careful not to smudge the surrounding paint.
- After wiping off any inconsistency, let the area dry.
- Once dry, repaint the area to blend it with the surrounding paint, ensuring a seamless finish.
If Dust Settles
- After your paint job is complete, allow the surface to dry completely before inspecting it.
- Look for any dust particles that may have settled into the wet paint.
- Take fine-grit sandpaper and lightly sand the affected areas, focusing on the uneven spots caused by dust.
- Clean the surface after sanding to remove any dust created from the sanding process.
- Once cleaned, add another layer of paint to restore the finish and cover any imperfections.
To Blend Overlaps
- While painting, be attentive to any overlapping areas where multiple coats may have been applied.
- If you notice overlaps, do this while the paint is still tacky for the best results.
- Use a soft cloth to gently dab or rub the edges of the overlapped paint areas.
- Feather the edges of the paint to create a blended transition between layers.
- Allow the paint to dry completely after blending to ensure a smooth finish.
Patience and careful adjustments can save most projects from mishaps. Always allow adequate drying time before fixing issues.
Maintenance and Care for Painted Surfaces
Taking care of iridescent spray-painted surfaces ensures their beauty lasts for a long time. Proper maintenance can preserve the vibrant color-shifting effects and protect the finish.
Cleaning and Preserving Iridescent Finishes
- Use Gentle Cleaning Products: Choose mild soaps and non-abrasive cleaners for cleaning painted surfaces.
- Avoid Harsh Chemicals: Chemicals like bleach or ammonia can damage the iridescent coating.
- Dust Regularly: Use a soft cloth to remove dirt and dust without scratching the paint.
- Avoid Pressure Washing: High-pressure water can peel or fade the finish. Use low-pressure methods instead.
- Dry the Surface Properly: Make sure the surface is completely dry after cleaning to prevent water spots.
- Protect from Sunlight: Avoid prolonged exposure to direct sunlight to reduce UV damage or fading.
Regular cleaning keeps iridescent finishes vibrant and prevents surface degradation.
Tips for Long-Lasting Results
- Add a Protective Topcoat: Apply a clear coat to shield against scratches and environmental wear.
- Prevent Moisture Damage: Keep painted items away from areas with excessive moisture or humidity.
- Handle with Care: Avoid rough handling to prevent chipping or damage to the painted areas.
- Store Correctly: Store painted objects indoors or cover them to protect against weather exposure.
- Touch Up as Needed: Fix small chips with matching paint to preserve a flawless finish.
- Inspect Regularly: Check for signs of wear or damage and address them promptly.
These care tips ensure your iridescent spray paint projects maintain their striking appearance over time.
Conclusion: Unleash Your Creativity
In conclusion, the iridescent spray paint has opened pathways for creative exploration. By understanding the advantages, mastering application techniques, and experimenting with colors, you can bring your artistic visions to life. Remember to prepare adequately and practice patience as you work on your projects. Whether you’re a seasoned artist or a DIY newbie, iridescent spray paint offers endless possibilities for enhancing your creative expressions. So gather your supplies, embrace your imagination, and unleash your creativity with iridescent spray paint today!