Introduction to DNA Extraction
DNA extraction is a fascinating process that allows us to isolate the genetic material within a cell. This procedure is widely used in scientific research and educational experiments to observe DNA. By doing this, we can better understand genetic characteristics and molecular biology of strawberry dna extraction.

What is DNA Extraction?
DNA extraction refers to the process of separating DNA molecules from other cellular substances. It involves breaking the cells open, removing proteins and fats, and isolating the DNA strands. Scientists often use this method to study genetic material and understand living organisms in detail.
DNA molecules carry the instructions for organisms to develop, grow, and function. Extracting DNA helps researchers analyze genetic makeup, investigate heredity, and carry out molecular experiments.
Why Strawberries are Ideal for DNA Extraction
Strawberries are perfect for DNA extraction due to their unique genetic traits and cellular structure. They have eight sets of chromosomes, making their DNA easier to isolate and observe. Additionally, strawberries contain enzymes that naturally break down cell walls, aiding the extraction process.
Another factor is their soft flesh, which helps during cell lysis, where cells are broken down. Their abundance of water-soluble components simplifies the steps needed for DNA isolation. This makes strawberries an excellent choice for hands-on experiments, especially for students or beginners.
Materials Needed
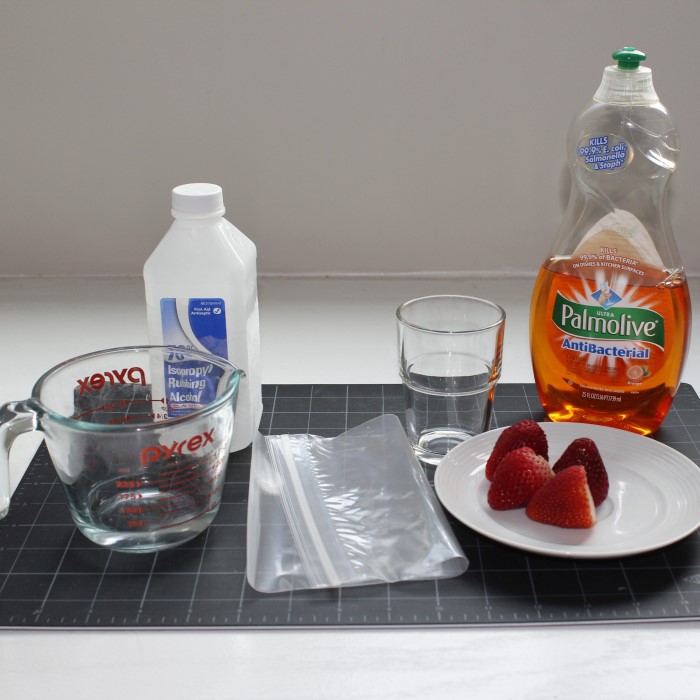
Before starting the strawberry DNA extraction process, gather all necessary materials and tools. Having the right tools ensures a smooth and successful experiment.
List of Tools and Supplies
- Fresh Strawberries: One or two ripe strawberries are perfect for this experiment.
- Ziplock Bags: Used for mashing the strawberries to break their cells.
- Liquid Dish Soap: Helps to break down cell walls and membranes.
- Table Salt: Essential for separating DNA from proteins and other cell debris.
- Rubbing Alcohol (Chilled): Makes the DNA strands visible by precipitating them.
- Filter or Cheesecloth: Used to strain the crushed mixture and separate solid residues.
- Small Glass or Plastic Container: For mixing the materials and observing the results.
- Wooden Stick or Toothpick: Helps to spool and lift the DNA strands for observation.
Common Household Items Used in DNA Extraction
Many items for strawberry DNA extraction can be found at home. You don’t need specialized lab equipment.
- Measuring Spoons: To accurately add salt or liquid detergent.
- Mixing Bowls: To prepare the extraction solution.
- Spoons or Forks: To mash the strawberries effectively.
- Tissues or Napkins: For cleaning up spills during the procedure.
- Plastic Cups: An alternative to small glass containers when working with children.
By using these simple tools and household items, you can effectively isolate strawberry DNA. These materials make the experiment accessible and fun for everyone.
Preparing for the Experiment
Before starting the strawberry DNA extraction, preparation is essential to ensure smooth execution. Setting up your workspace correctly and following safety measures will make the process safe and effective.
Setting Up Your Workspace
- Choose a Clean Area: Work in a space free of clutter and dirt.
- Use a Flat Surface: A counter or table works best for stability.
- Gather All Materials: Assemble all tools and ingredients beforehand for easy access.
- Protect the Surface: Lay down old newspapers or plastic sheets to avoid stains.
- Keep Extra Supplies Nearby: Have tissues or napkins ready for unexpected spills or cleanup.
By organizing your workspace, you ensure an efficient and enjoyable experiment.
Safety Precautions to Keep in Mind
Handle Alcohol Carefully
Ensure that you use chilled rubbing alcohol in a responsible manner.
Avoid pouring out more than necessary to minimize waste and reduce risk.
Always recap the alcohol bottle promptly after use to prevent spills.
Store rubbing alcohol in a secure, high cabinet or locked area away from children’s reach.
Avoid Contact with Eyes and Mouth
Be mindful and do not touch your face while handling extraction materials, especially during the process.
If any extraction materials accidentally contact your eyes or mouth, rinse thoroughly with water and seek medical attention if irritation persists.
To minimize the risk of accidents, consider wearing safety goggles while conducting the experiment.
Use Gloves if Possible
It is highly recommended to wear disposable gloves when handling substances like dish soap, rubbing alcohol, and other extraction materials.
Gloves act as a barrier, protecting your skin from potential irritants and chemicals.
Ensure that gloves fit properly and are disposed of safely after use to avoid cross-contamination.
Supervise Young Participants
An adult should always supervise children or young participants during the experiment.
Explain safety procedures clearly and ensure that they understand the importance of following the guidelines.
Keep an eye on their actions to prevent careless handling of materials or accidents.
Dispose of Waste Properly
After completing the experiment, ensure that all leftover materials and liquids are disposed of responsibly.
Follow local regulations for the disposal of chemical waste, especially for substances like rubbing alcohol.
Seal any waste in containers before discarding them in designated waste bins to minimize environmental impact.
By following these simple steps, you ensure safety for everyone involved while getting ready for an exciting DNA extraction experiment.
Step-by-Step Procedure for Extracting DNA from Strawberries
DNA extraction from strawberries is an easy and engaging experiment. By following these steps, you can successfully isolate DNA and observe it.
Breaking Down the Strawberry Cells
- Start with one or two ripe strawberries. Place them in a ziplock bag.
- Mash the strawberries until the mixture is smooth and pulpy.
- Add two tablespoons of liquid dish soap and half a teaspoon of table salt.
- Mix the contents gently to combine. The detergent breaks cells open while the salt helps separate DNA.
- Continue mashing to ensure thorough breakdown of the strawberry cells.
Filtering the Mixture
- Place a filter or cheesecloth over a bowl or cup.
- Slowly pour the strawberry mixture onto the filter.
- Allow the liquid to pass through while capturing the solid residues.
- Collect the filtered liquid in the bowl below. This liquid contains DNA elements.
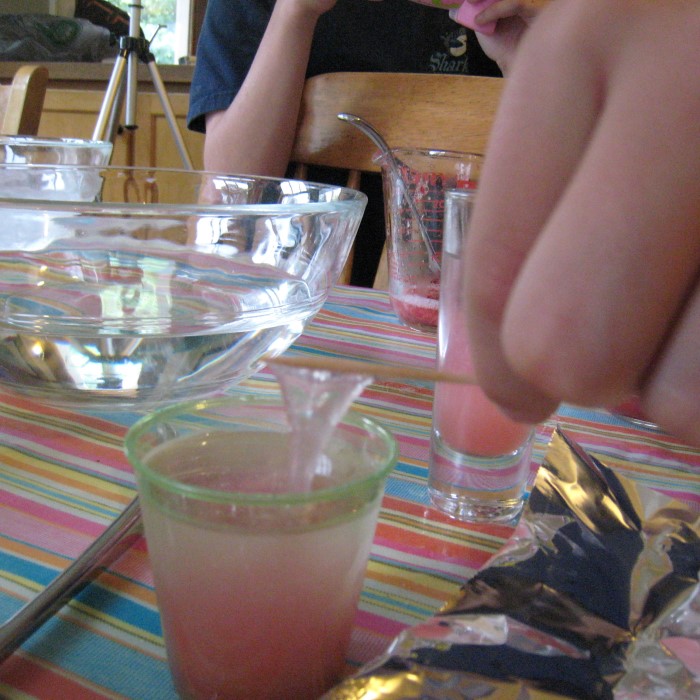
Isolating the Strawberry DNA
- Take a small portion of chilled rubbing alcohol in a separate container.
- Pour it gently onto the filtered liquid without mixing them.
- Wait as the DNA strands start to precipitate and form visible clumps.
- Use a wooden stick or toothpick to spool the clumped DNA for observation.
This step-by-step procedure shows how simple and fascinating strawberry DNA extraction can be. By understanding each step, you can improve the outcome of the experiment.
Observing and Analyzing the DNA
Observing the extracted DNA is an exciting part of the experiment. It allows you to see genetic material with the naked eye. The DNA strands you isolate provide insight into molecular biology concepts and make this hands-on activity rewarding.
What Does DNA Look Like?
Strawberry DNA appears as a white, cloudy substance. It can clump together and resemble thin cotton fibers. The strands are often sticky and may attach to the wooden stick or toothpick used for lifting them. While the DNA may seem fragile, its appearance clearly shows molecular structures.
To enhance your observations:
- Lift the DNA strands gently to inspect them closely.
- Hold the strands against a dark background for contrast.
- Note their texture and consistency for better understanding.

These observations reveal the physical properties of DNA and highlight its extractability from strawberries.
Troubleshooting Cloudy or Thin DNA Samples
If your DNA sample appears thin or unclear, certain factors may have impacted the extraction process. Here are common causes and solutions:
Low Alcohol Temperature
- Chilling the Alcohol: Start with rubbing alcohol (isopropyl alcohol) that has been chilled in the freezer or refrigerator. A temperature below -20°C (-4°F) is often recommended for optimal results.
- Effect on DNA Precipitation: Cold alcohol is crucial for DNA precipitation because it helps the DNA strands clump together. When the alcohol is too warm, it can hinder this process, resulting in lower yields of DNA.
- Timing the Cooling: Ensure that the alcohol remains chilled until just before use. Letting it warm up before adding it to the mixture can negatively impact the efficiency of the precipitation.
Insufficient Salt Addition
- Role of Salt: Salt plays a critical role in the DNA extraction process by facilitating the separation of proteins from the DNA. It helps neutralize DNA’s negative charge, allowing it to aggregate.
- Checking Measurements: It is essential to double-check that the correct amount of salt has been added to the solution. Insufficient salt can lead to incomplete protein separation and lower DNA yield.
- Recommended Ratios: Typically, a ratio of around 1 to 2 teaspoons of salt per 100ml of solution is suggested. Adjusting this ratio can improve DNA extraction outcomes.
Overmixing
- Gentle Mixing Required: When combining the alcohol with the filtered liquid containing DNA, use gentle stirring to avoid overmixing. Vigorous mixing can break apart the DNA strands and disrupt the precipitation process.
- Impact on DNA Formation: Overmixing can lead to the formation of smaller, fragmented DNA clumps rather than the desirable, longer strands. This fragmentation makes it challenging to isolate intact DNA.
- Technique for Mixing: Use a smooth, circular motion with minimal force when mixing. This method will help maintain the integrity of the DNA while still encouraging its precipitation.
Poor Filtering
- Importance of Proper Filtering: Filtering the mixture is necessary to remove any solid residues, such as pulp or plant material, that might interfere with the DNA extraction process.
- Recommended Filtration Tools: Use a fine filter, coffee filter, or cheesecloth for effective separation. These tools can efficiently trap the solid residues while allowing the liquid containing DNA to pass through.
- Ensuring Clean Filtrate: After filtering, check the clarity of the liquid. A clear filtrate is indicative of successful separation and readiness for the subsequent precipitation step.
Mashing Levels
- Thorough Mashing Techniques: Mashing the strawberries thoroughly is critical to opening up the cells and releasing the DNA. Use a fork, potato masher, or blender to achieve this.
- Cell Disruption: The goal is to break down the cell walls completely, releasing the cellular contents. Insufficient mashing can leave intact cell walls, which limits the amount of DNA that can be extracted.
- Consistency Matters: Aim for a smooth, even consistency in the mashed fruit. This uniformity helps maximize the efficiency of the extraction process by ensuring that more cells are disrupted, leading to a higher yield of DNA.
Adjusting these aspects ensures clearer, more visible DNA strands. With minor corrections, observing the DNA becomes simpler and enjoyable.
Applications of Strawberry DNA Extraction
Strawberry DNA extraction is not just fun but also useful in various applications. Its simplicity makes it practical and highly educational.
Educational Purposes for Students
Strawberry DNA extraction is a great activity for teaching students about molecular biology. It demonstrates how genetic material exists in all living organisms. Handling real DNA makes science more relatable and engaging for children. Students gain hands-on experience in following scientific procedures. This exercise also introduces concepts of cell structure and DNA programming. It encourages curiosity and lays a foundation for future biology studies. Schools and science clubs often use this as an introductory lab experiment.
Demonstrating Scientific Concepts
This experiment helps visualize complex biological processes. It showcases DNA’s role in heredity and cell functioning. Scientists use similar methods in advanced genetic research. Demonstrating this at home simplifies how DNA behaves under specific conditions. Learning about DNA isolation teaches the importance of precise lab techniques. It also shows how substances like alcohol and detergent affect molecules. These applications make the strawberry DNA extraction an excellent tool for communicating science effectively.
Frequently Asked Questions About DNA Extraction
Can This Be Done with Other Fruits?
Yes, you can extract DNA from other fruits. However, strawberries are especially good for this experiment. Fruits like bananas, kiwis, or peaches are also great options. These fruits have soft textures, which make cell lysis easier. They may not yield as much DNA as strawberries, though. Strawberries have more chromosomes, leading to a higher DNA concentration. If you use other fruits, adjust procedures slightly for best results.
How Long Can the Extracted DNA Last?
Extracted DNA can last for a short time. For best observation, examine it immediately after extraction. If you need to store it, keep it in a sealed container. Place the container in a cool place, like a refrigerator. However, stored DNA may deteriorate after a day or two. Avoid contamination by handling it with care. Proper storage can extend visibility but not indefinitely.

Conclusion and Next Steps
Recap of the Process
Strawberry DNA extraction is a simple and exciting scientific experiment. You start by smashing the strawberries to break their cells. Adding detergent and salt helps release DNA by breaking down membranes. Filtering the mixture removes solid debris, leaving behind DNA-rich liquid. Chilled alcohol makes the DNA clump together, making it visible. Finally, you can lift and examine the DNA strands with a stick or toothpick.
This process is straightforward and uses easy-to-get materials. It helps to understand DNA’s structure and presence in all living organisms. By following these steps, you can observe and analyze DNA firsthand. This fun activity makes molecular biology accessible for everyone.
Encouraging More Hands-On Science Experiments
Hands-on experiments like this make science fun and engaging. They allow you to learn by doing, not just reading. Strawberry DNA extraction shows real-life applications of scientific concepts. It also inspires curiosity and a love for discovery.
Encourage children and students to try similar experiments. Use fruits like bananas or kiwis to see differences in DNA yields. Explore how varying salt, alcohol, or detergent amounts affect results. These small changes teach scientific inquiry and experiment design.
Expand to other exciting experiments, such as observing plant cells under a microscope. Conducting such activities fosters creativity and builds confidence in understanding science. Science at home can inspire future scientists and innovators. Start with small experiments but aim for big discoveries!
Conclusion
In conclusion, strawberry DNA extraction is not just a simple experiment; it’s an entry point into the fascinating world of genetics. Through this step-by-step guide, you’ve learned how to extract and observe DNA using strawberries. The skills and insights gained through this process are applicable in various fields, from education to scientific research.
This engaging hands-on activity allows individuals to connect with science and better understand the fundamentals of molecular biology. So gather your materials and start your journey into the world of DNA extraction, and who knows what fascinating discoveries await you! Enjoy exploring the genetic building blocks of life right in your kitchen!


