Introduction
A 100 ml beaker is a commonly used tool in labs and educational settings. Its compact size makes it ideal for small-scale experiments or measuring small liquid volumes. These beakers are essential for precise liquid handling.

What is a 100 ml Beaker?
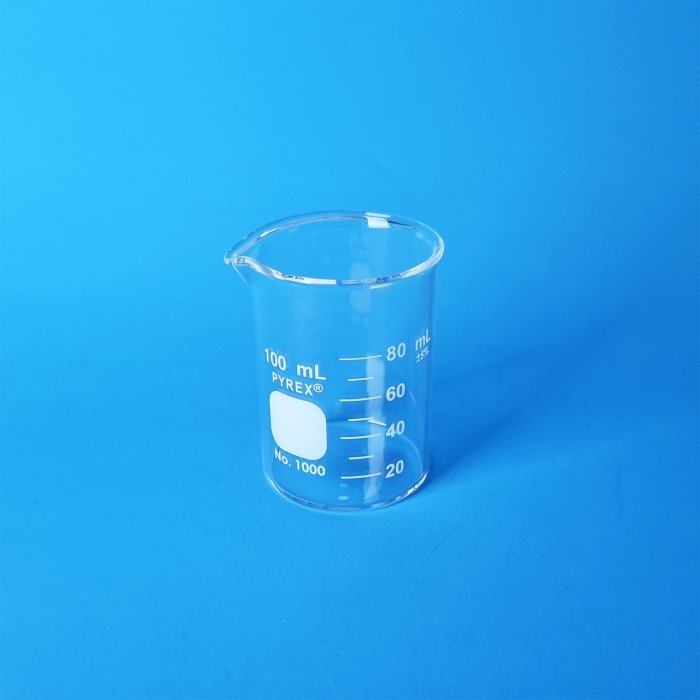
A 100 ml beaker is a cylindrical container with a flat base. It holds up to 100 milliliters of liquid. It is often transparent and has graduated measurement markings on its side. These markings make it easy to measure liquid volumes accurately. Beakers have a lip or spout for pouring and reducing spills.
Common Materials Used in 100 ml Beakers
100 ml beakers are made from various materials for different uses. Glass beakers are made from borosilicate glass, which resists heat and chemicals. They are preferred for experiments with high temperatures or corrosive substances.
Plastic beakers are lightweight and less prone to breaking. They are made from materials like polypropylene or polystyrene. These beakers are best for casual experiments or for use in environments where durability is important. Stainless steel and other metal beakers are rare but useful under specific conditions, such as experiments with strong acids.
Key Features
A 100 ml beaker is designed for precise and efficient liquid handling. Its features ensure accuracy, durability, and reliability for diverse applications. Below are the key details about its design and functionality.
Design and Markings
The design of a 100 ml beaker is simple yet functional. It has a cylindrical shape with a flat base, ensuring stability during use. The beaker includes graduated markings along its sides, which allow accurate measurement of liquid volumes. These markings are essential for experiments requiring precision. Beakers often have a lip or spout, which makes pouring liquids easier and minimizes spills.
Durability and Heat Resistance
Durability is a significant feature of a quality 100 ml beaker. Glass beakers are often made from borosilicate glass, which is highly resistant to heat and chemicals. This makes them ideal for experiments with high temperatures. Plastic beakers, created from materials like polypropylene, are lightweight and less likely to break, providing durability in casual or educational settings. Both types are built to withstand frequent use without compromising their functionality.

Laboratory Applications
A 100 ml beaker has many uses in laboratory settings. Its compact size and precise measurements make it an essential tool for various experiments. Below are some of its key laboratory applications.
Mixing Solutions
A 100 ml beaker is ideal for mixing small quantities of solutions. Its cylindrical shape allows for even mixing. The beaker’s flat base keeps it stable, reducing the risk of spills. Whether combining chemicals or dissolving substances, it ensures accuracy and control.
Measuring Liquids
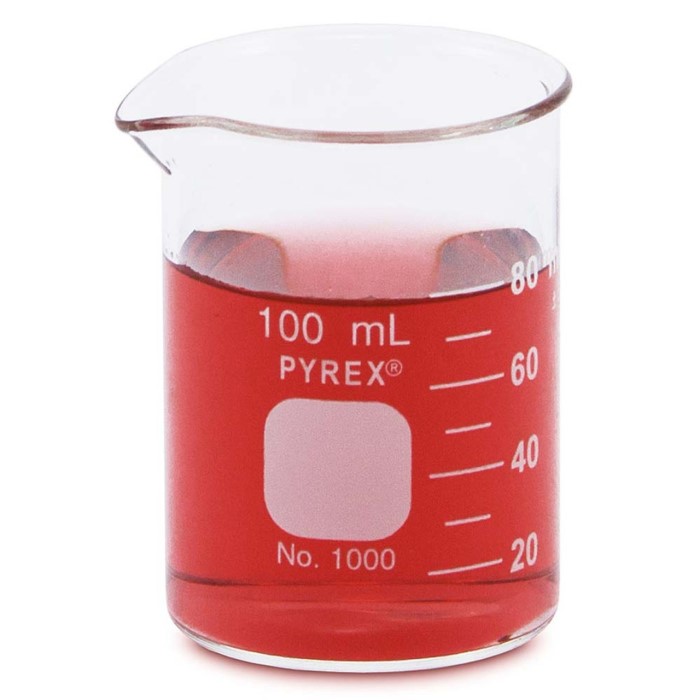
Accurate liquid measurement is crucial in experiments. The graduated markings on a 100 ml beaker make it easy to measure liquids. These markings help monitor quantities and ensure the right proportions. The beaker’s spout also helps with precise pouring.
Heating and Cooling Substances in Experiments
100 ml beakers made of borosilicate glass can withstand extreme temperatures. They are perfect for heating solutions on a hot plate or under a flame. Similarly, they can handle rapid cooling in ice baths. This heat resistance ensures safety and reliability during thermal experiments.
Non-Laboratory Uses
A 100 ml beaker is not limited to lab settings. It is versatile and useful for various tasks outside laboratories. Its convenient size and measurable markings make it an excellent tool for everyday creative and educational activities.
DIY and Home Science Projects
A 100 ml beaker is perfect for DIY and home science experiments. Its markings allow precise liquid measurements, making it essential for chemical reactions. It is ideal for creating homemade solutions like detergents, cleaners, or even simple slime recipes. The beaker’s spout also ensures controlled pouring, preventing spills and waste. Its compact size and clarity make it a handy tool for personal experiments and family science fun.
Arts and Crafts Applications
Artists and crafters can greatly benefit from a 100 ml beaker. It is excellent for mixing paints, dyes, and other liquids. Accurate markings help measure the right proportions for color blending. The beaker’s lip facilitates neat pouring, which is useful for resin art or candle making. Its durable design ensures reusability across various creative projects, reducing the need for disposable measuring cups.
Educational Demonstrations
A 100 ml beaker is an essential tool for educational purposes. Teachers use it to conduct science demonstrations in classrooms. Its small size makes it manageable for young students during hands-on experiments. Demonstrations like mixing solutions, measuring liquids, or observing reactions are simpler with this beaker. Its clarity helps students see the contents clearly, enhancing understanding and engagement.
A 100 ml beaker stands out as a skillful accessory for fun, learning, and creativity. Its adaptability ensures it has uses far beyond professional labs.
Factors to Consider When Choosing a 100 ml Beaker
Selecting the right 100 ml beaker depends on its intended use and specific tasks. Carefully evaluate the material, accuracy, and compatibility before purchasing to ensure it meets your needs.
Material Type: Glass vs. Plastic
The material of the beaker greatly impacts its functionality. Glass beakers, often made of borosilicate glass, are heat and chemical resistant. They are suitable for heating solutions or handling corrosive substances in the lab. However, they are heavier and prone to breaking.
Plastic beakers are more durable and light. They are ideal for educational or casual experiments. Materials like polypropylene and polystyrene make them less likely to crack or shatter. However, they are not heat resistant and may warp under high temperatures. Choose glass when heat resistance is key and plastic for durability and affordability.
Accuracy of Measurement Markings
Accurate measurements are crucial for both lab and non-lab tasks. Check the quality of the graduated markings on your beaker. Clear and precise markings ensure reliable measurements. Faded or unclear lines can lead to errors in experiments. Beakers with etched or painted markings often provide better visibility and long-lasting accuracy.
Compatibility with Specific Tools or Equipment
Consider the tools you’ll use alongside the beaker. Glass beakers should fit safely on hot plates or heating devices without wobbling. Ensure plastic beakers are compatible with stirring rods or other tools you plan to use. Also, check if the beaker’s spout aligns with your pouring needs. Compatibility prevents mishaps and ensures efficient performance in your tasks.
Tips for Proper Care and Maintenance
Proper care and maintenance can extend the lifespan of a 100 ml beaker. Regular cleaning and careful handling are essential to preserve its functionality and accuracy.
Cleaning and Storing Beakers
Wash After Each Use:
It is crucial to clean your beaker immediately after each use to prevent any residue from building up.
For glass beakers, start by rinsing them with warm water to remove any leftover substances.
Next, apply a mild detergent to a soft sponge or cloth, making sure to clean the interior and exterior surfaces of the beaker thoroughly.
For plastic beakers, first check the manufacturer’s recommendations to ensure that dish soap is appropriate for the material, as some plastics may degrade with harsh cleaners.
Pay special attention to the lip and the bottom of the beaker, as these areas can retain residues if not cleaned properly.
Avoid Abrasive Materials:
When cleaning, it’s essential to avoid using abrasive scrubbing pads or steel wool, as these can scratch the surface of the beaker.
Scratches can compromise the clarity of glass or plastic beakers and may interfere with the readability of measurement markings.
Instead, opt for soft sponges or cloths that will clean effectively without damaging the surface.
Additionally, consider using non-abrasive cleaners specifically designed for laboratory glassware and plasticware to maintain their integrity.
Rinse Thoroughly:
After washing, make sure to rinse the beaker thoroughly with clean water to remove any soap residue.
Leftover soap can interfere with the results of future experiments, potentially contaminating samples.
To ensure complete rinsing, you may need to fill the beaker with water and shake it gently or use a wash bottle to direct a stream of water into the beaker.
Rinse until you can no longer detect any soapy smell or suds; this is a good indication that the beaker is clean and ready for use.
Dry Completely:
Once rinsed, it is important to dry the beaker completely to prevent water stains or residue from forming.
Ideally, let the beaker air-dry in a clean, upright position. Find a safe spot where it won’t be easily knocked over.
Alternatively, you can use a lint-free cloth to wipe the beaker, ensuring that no fibers get left behind that might contaminate future experiments.
If using a cloth, dry the inside and outside of the beaker gently, being careful not to rub too hard, which could lead to scratches.

Store Properly:
Proper storage of clean beakers is vital to prevent damage when they are not in use.
Store beakers in secure cabinets designed for laboratory equipment, which can help lower the risk of accidents.
Avoid keeping beakers in direct sunlight, as this can fade markings and degrade materials over time, especially for plastics.
Always place beakers upright to prevent spills and minimize the risk of breakage; do not stack them, as this can lead to chipping or cracking.
Ensure that the storage area is clean and dry, providing a safe environment for your beakers.
Preventing Damage During Use
Handle with Care:
When using glass beakers, always approach them with caution to prevent accidents.
It is essential to hold the beaker by the base, which provides a secure grip and decreases the risk of dropping it.
Avoid gripping the beaker by the lip or rim, as this can make it unstable and more prone to slippage.
Remember to keep your hands dry while handling the beaker, as moisture can cause a slippery grip.
When passing the beaker to someone else, make sure to hand it over by the base for safety.
Limit Heat Exposure for Plastic Beakers:
Plastic beakers are versatile; however, they can be sensitive to high temperatures.
When conducting experiments, refrain from placing plastic beakers directly over flames or heat sources, as this can cause them to warp or melt.
Instead, use them for room temperature liquids or in experiments where temperatures do not exceed the manufacturer’s guidelines.
If you need to heat substances, choose glass beakers that are designed for high-temperature tolerance.
Always consult the specifications for the plastic materials to determine their heat limits.
Use Compatible Tools:
When working with beakers, it’s important to use compatible tools to maintain their integrity.
Stirring rods or spatulas should be used gently to prevent scratching the interior surfaces of the beaker.
Consider using materials like silicone or plastic for stirring, as these are less likely to cause damage compared to metal tools.
Always ensure that the tools you use are clean and free from contaminants that could compromise your experiment.
After use, clean any tools properly to ensure they don’t introduce unwanted substances into future experiments.
Monitor Pouring Techniques:
When pouring liquids from a beaker, take your time and do so slowly and steadily.
A controlled pour helps minimize spills and prevents unnecessary stress on the spout, which can lead to cracking or chipping.
Position the beaker so that the spout is directed toward the receiving container accurately to avoid excess splashing.
If you’re pouring a viscous liquid, consider tilting the beaker gradually to maintain a steady flow.
Always use a funnel if the receiving vessel has a small opening to further reduce the risk of spills.
Avoid Sudden Temperature Changes:
Glass beakers are susceptible to thermal shock, which can lead to cracking or breaking.
To protect your glass beakers, avoid exposing them to sudden temperature changes.
For instance, do not transfer a hot beaker directly into a cold environment, as the rapid change can put stress on the glass.
Instead, allow the beaker to cool slightly before making the transition.
When heating liquids, gradually increase the temperature to help avoid any shock.
Always be mindful of the temperature of the environment where your glass beaker is placed to ensure safety.
Taking these steps ensures your 100 ml beaker remains reliable and efficient for long-term use.
Frequently Asked Questions
Can a 100 ml Beaker Be Used with Chemicals?
Yes, a 100 ml beaker is ideal for handling many chemical substances in laboratories. Glass beakers, particularly borosilicate ones, are highly resistant to chemicals. They are suitable for experiments involving acids, bases, or corrosive solutions. Plastic beakers, made of materials like polypropylene, can handle non-corrosive chemicals well. However, they are less resistant to extreme reactions and may deform when exposed to strong acids or solvents. Therefore, choose the beaker material based on the chemical type and experimental conditions.
How Accurate Are the Measurement Markings?
Measurement markings on a 100 ml beaker are usually reliable for most tasks. They are designed to provide precision but may vary slightly depending on the brand or manufacturing process. For optimal accuracy, select beakers with clearly etched or painted graduated lines. These markings last longer and remain readable even after frequent use. Avoid beakers with faded or poorly printed markings, as they can lead to errors. Regularly inspect the markings to ensure accuracy during your experiments and applications.
Conclusion
In summary, the 100 ml beaker is a valuable tool for various DIY projects. Its ability to measure accurately, mix substances safely, and serve as a creative outlet makes it indispensable. By leveraging the versatility of this classroom staple, you can enhance your projects, whether they involve science, art, or everyday tasks.
With understanding and creativity, the 100 ml beaker can lead to expansive possibilities. From organizing small items to experimenting with scientific concepts, its uses remain boundless. Ultimately, the key takeaway is to explore these options, embrace the beaker’s potential, and watch your DIY experiences flourish.
So next time you find yourself wondering how to make your projects more efficient, remember to reach for that trusty 100 ml beaker! Its multifunctionality can transform how you approach various tasks and ignite your creativity.


