Introduction to Easy Pencil Flower Drawing
Drawing flowers can be a delightful and rewarding experience, especially when you focus on easy pencil flower drawing techniques. Whether you’re a budding artist or someone who enjoys sketching as a hobby, learning to draw flowers can significantly enhance your abilities. Understanding the fundamentals of flower drawing can help you create beautiful artwork that reflects your personal style. In this guide, we will delve into simple techniques that make drawing flowers accessible and enjoyable for everyone.
Getting Started with Pencil Flower Drawing
Flower drawing is an enjoyable and rewarding hobby. With the right tools and approach, anyone can master it. Starting easy pencil flower drawing requires understanding basic supplies and techniques. Knowing which pencils to use helps improve your sketches further.
Essential Supplies and Tools for Beginners
Before starting, gather essential supplies for successful flower drawing. First, choose a sketchbook or sheets of drawing paper. Look for smooth texture and good thickness to hold pencil marks well. Next, pick a set of pencils ranging from hard (H) to soft (B). Erasers, like kneaded erasers, work great for corrections and cleanups. A sharpener ensures the pencils stay ready for precise lines.
Other helpful tools include blending stumps for smooth shading. Rulers can assist in aligning shapes, while brushes help remove pencil dust without smudging. Having a clean workspace and good lighting also improves focus and results.
Choosing the Right Pencils for Flower Sketching
Picking suitable pencils is crucial for creating stunning flower sketches. Hard pencils (H grades) are perfect for light outlines. They create neat, crisp lines without smudging. Soft pencils (B grades) are ideal for shading and textures. They offer rich, dark tones to add depth to petals and leaves.
A versatile pencil set containing HB, 2B, and 4B pencils covers most tasks. Mechanical pencils can be used for precise detailing in smaller areas. Experimenting with pencils helps find what best complements your flower drawing style. Remember, the right tools make the process easier and more enjoyable.
Basic Techniques for Pencil Drawing
Mastering simple pencil techniques is crucial for flower drawing. Basic methods help create captivating sketches. Focus on understanding light and dark shading and improving your overall drawing skills.
Understanding Light and Dark in Pencil Art
Light and dark contrast is the foundation of pencil art. To start, observe how light hits flowers. Study shadows and highlights to define shapes and details better. Use hard pencils (H grades) for light outlines and subtle shading. For darker areas, switch to soft pencils (B grades) to create rich tones.
Layering pencil strokes enhances depth. Begin lightly and gradually build darker tones. Experimenting with cross-hatching adds texture. Blending with a stump softens shadows, creating smooth gradients. These techniques improve realism and flower sketch quality.
Practicing Shading Techniques for Flowers
Shading gives flowers lifelike appearance. Start by practicing gradients to blend light into dark smoothly. Place shadows where petals overlap or curve. This technique adds dimension to your sketch.
Use directional shading to show the texture of petals and leaves. Apply stroke patterns that follow the forms of the flower. Use different pencil grades to enhance contrast and clarity.
Try shading exercises like creating a sphere. This builds confidence in handling light and shadow transitions. By practicing regularly, you’ll improve your ability to draw beautiful, realistic flowers.
Step-by-Step Guide to Drawing Flowers with Pencil
Mastering flower drawing with pencils begins with understanding basic steps and techniques. Breaking it down into clear phases simplifies the process for beginners, encouraging gradual improvement.
Outlining the Basic Shapes of Flowers
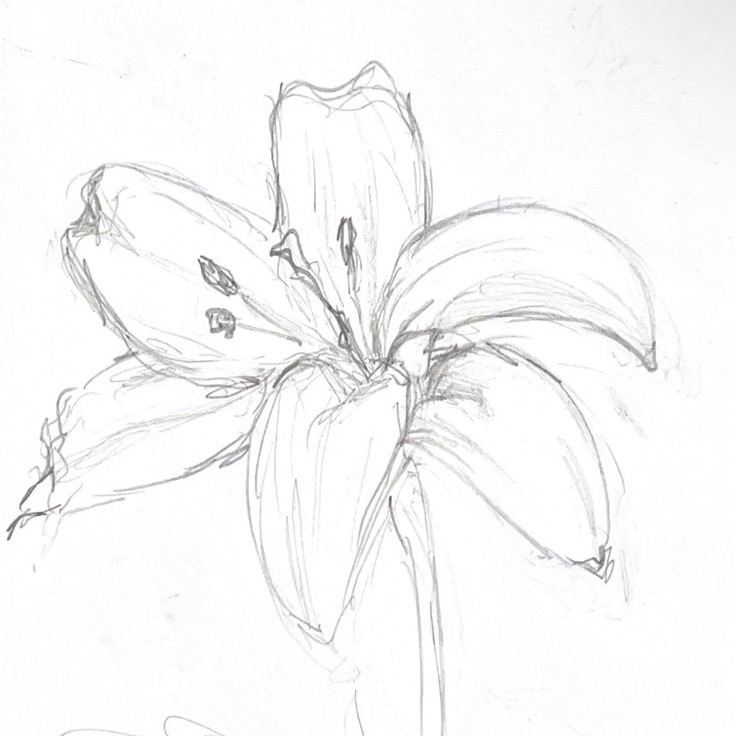
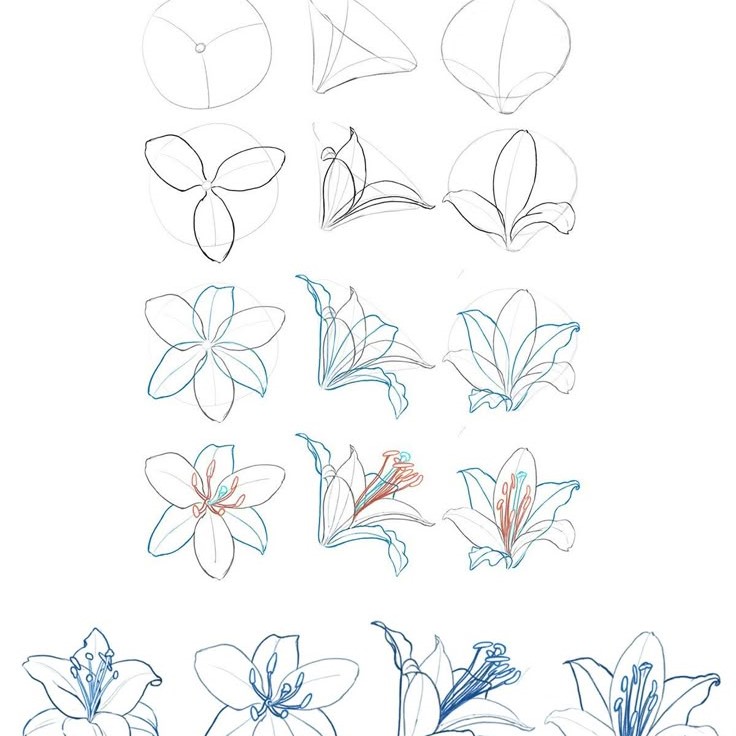
Start by observing the flower’s overall structure. Identify its basic shapes like circles, ovals, or triangles. Use light pencil strokes to sketch these foundational shapes. These help create the framework for petals, stems, and leaves.
Focus on proportions. Ensure the flower’s parts like petals, leaves, and stems align. Hard pencils (H grades) work well for outlining shapes. Avoid pressing too hard as this makes erasing tougher.
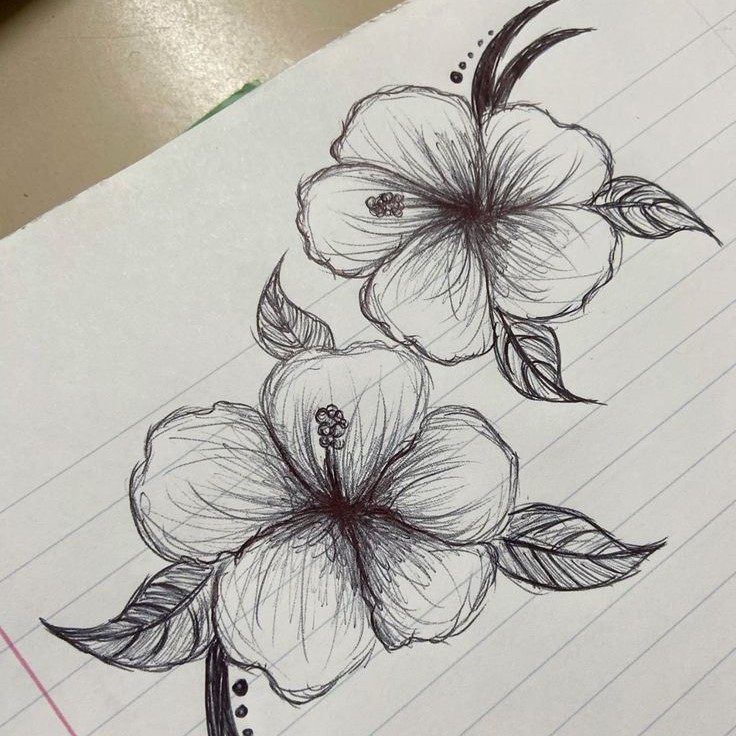
Adding Details to Petals and Leaves
Next, refine the outline by focusing on details in the petals and leaves. Observe their curves, edges, and textures closely. Use softer pencils (like 2B or 4B) to add prominent details.
For petals, trace over the outline, giving them wavy or sharp edges based on the flower type. Add lines inside the petals to mimic natural vein patterns. For leaves, draw fine veins and uneven textures for a realistic touch.
Use reference images or real flowers to capture these details accurately. Keep your hand steady to avoid messy lines.
Creating Depth and Texture with Shading
Shading enhances the realism of your flower drawing. Identify areas where light hits and shadows form. Use a soft pencil (like 4B) for darker shadows and a hard pencil (like HB) for lighter tones.
Apply cross-hatching or circular strokes to create texture. Blend shadows gently with a blending stump for softer gradients. Add darker tones under overlapping petals and leaves to build depth.
Experiment with layering by starting light and increasing pressure gradually for dark tones. Avoid over-shading, as this can make the flower look unnatural. Practice consistently to improve your shading skills.
Following these steps will make drawing flowers with pencils easier and more enjoyable!
Popular Flower Sketches to Try
Creating easy pencil flower drawings becomes even more enjoyable by sketching popular flowers. Let’s explore some classic options and how to approach them for stunning results.
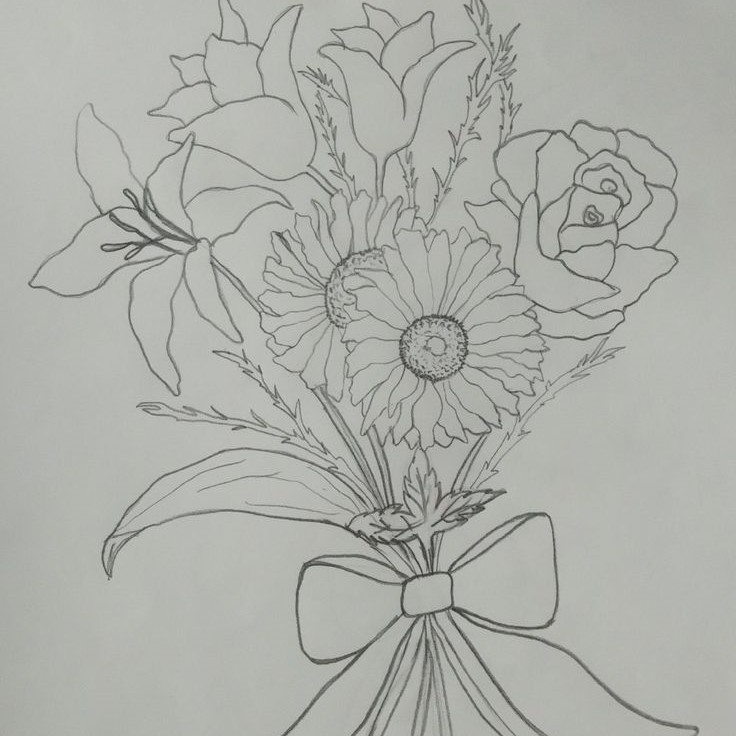
Drawing Roses with Simple Pencil Strokes
Roses are a favorite subject for artists due to their elegant structure. Start by sketching a small spiral for the rose’s center. Add curved shapes around it to form the petals. Use light pencil strokes so corrections are easy.
As you expand the petals outward, make their edges wavy to match a rose’s natural look. For depth, shade the overlapping parts of the petals with a soft pencil (like 2B). Focus on layers to enhance the bloom’s texture.
For the stem and leaves, draw elongated shapes. Add jagged edges for a realistic touch. Use darker shading to create shadows and veins. Practice refining the details gradually to complete your rose sketch.
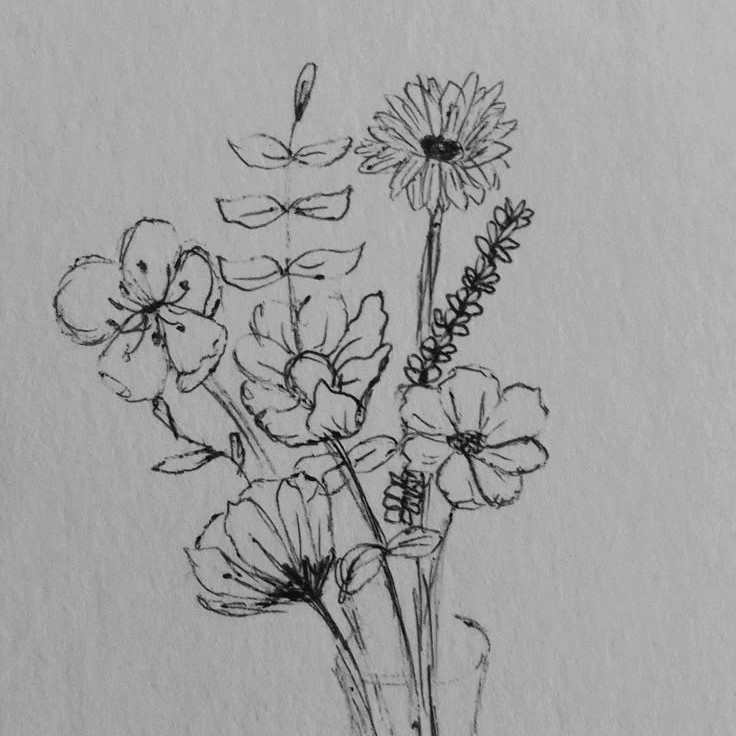
How to Sketch a Daisy Effortlessly
Daisies are simple yet charming flowers to draw. Begin by sketching a circle for the center. Around it, add oval-shaped petals that are equally spaced. Keep the petals slightly uneven for a natural feel.
Darken the center of the daisy with soft pencil strokes. Use circular shading to add texture. For the petals, apply light shading at the base and transition outward. This creates dimension and realism.
For the stem, draw a single straight line. Add thin, elongated leaves on either side. Lightly shade these to highlight their texture. Daisies are forgiving, making them great for beginners.
Creating Tulip Designs with Minimal Effort
Tulips are elegant and simple to sketch. Start with a U-shaped outline for the flower’s bloom. Add three or four overlapping curves to form the petals.
For the stem, draw a straight line extending below the bloom. Add long, pointed leaves on each side. Use light pencil strokes for the outlines.
Shade the base of the petals and stem with soft pencils for depth. Use short, upward strokes on the petals to add texture. Blend lightly for a smooth look. Tulips are ideal for mastering basic forms and shading.
Tips for Improving Your Flower Drawing Skills
Enhancing your flower drawing skills takes practice and attention to detail. By focusing on common challenges and using effective techniques, you can see steady improvement. Whether working with easy pencil flower drawings or more complex designs, consider the following tips.
Common Mistakes to Avoid in Pencil Drawing
Avoiding certain mistakes can improve your results significantly. Here are common errors beginners should watch for:
- Overusing Erasers: Erasing too often can damage your paper and disrupt your workflow. Use light strokes initially.
- Pressing Too Hard: Hard pencil strokes are difficult to erase. They leave indentations on the paper.
- Ignoring Proportions: Pay attention to sizes of petals and leaves. Incorrect proportions make drawings appear unrealistic.
- Skipping Layers in Shading: Build shadows gradually. Jumping directly to dark tones leads to uneven shading.
- Rushing the Process: Drawing flowers takes time. Avoid hurrying through details, as this can compromise quality.
Focus on correcting these missteps with deliberate practice. Gradual progress will make your flower sketches more refined and lifelike.
Practicing with Real-Life Flowers vs. Photos
Both real-life flowers and photos serve as excellent references, but each comes with unique benefits:
- Real-Life Flowers: Drawing from life improves observation skills. You can study shapes, shadows, and textures better.
- Observe flowers at different angles to understand 3D structure.
- Study subtle light changes and apply them to your shading.
- Photos: Photos offer a static reference. You can pause and examine intricate details closely.
- Photos allow consistent access to rare or seasonal flowers.
- Digital images let you zoom into specific areas for accuracy.
To improve, try practicing with a mix of both approaches. Compare results to note what works best for you. By alternating between real-life flowers and photos, you can develop versatility as an artist.
Preserving and Showcasing Your Pencil Artwork
Once you’ve created beautiful pencil flower drawings, preserving and showcasing them enhances their longevity and impact. Protecting your artwork ensures it remains in pristine condition over time.
Fixative Options for Pencil Drawings
Fixative sprays prevent smudging and fading in pencil artworks. Choose between workable and final fixatives. Workable fixatives allow further edits by keeping pencil marks intact. Final fixatives protect finished pieces permanently.
Before applying a fixative, test it on scrap paper. Ensure compatibility with your drawing materials. Hold the spray at least 12 inches away for even application. Use light, quick strokes to avoid over-saturating your artwork.
Ventilate your workspace when using fixative sprays. Some sprays emit strong odors. Choose archival-quality products to maintain your drawings longer. Fixatives preserve the details and shading you’ve worked hard to create.
Creative Ways to Display Your Flower Sketches
Displaying your flower sketches creatively enriches their visual appeal. Consider these methods:
Framing Your Artwork
- Choose Simple Frames: Opt for minimalist frames that complement your artwork without overshadowing it. Simple designs help to keep the focus on the art itself, allowing viewers to appreciate the details.
- Glass-Front Frames: Select frames with glass fronts to enhance durability and protection. These frames safeguard your artwork from dust, dirt, and potential damage while also providing a polished finish that elevates the overall presentation.
- Consider Matting Options: In addition to the frame, consider using a mat to create a border around your artwork. This can add depth and dimension, giving your piece a professional appearance.
Creating Wall Collages
- Curate an Arrangement: Design a visually appealing collage by arranging various sketches of different styles and themes on a single wall. This can tell a story and create a more dynamic viewing experience.
- Mix Different Sizes: Incorporate sketches of various sizes to add interest and variety to your display. Larger pieces can serve as focal points, while smaller ones can provide context and detail around them.
- Experiment with Layouts: Try different arrangements before hanging your artwork. Use painter’s tape to outline the shape on the wall, allowing you to visualize the layout, adjust spacing, and find the perfect composition.
Utilizing Portfolios
- Clear Plastic Sleeves: Invest in high-quality clear plastic sleeves to protect each sketch while maintaining visibility. These sleeves prevent smudging and tearing, ensuring that your artwork remains in pristine condition over time.
- Organize in a Binder: Use a binder or portfolio case to organize your sketches methodically. You can categorize them by date, theme, or technique, making it easy to locate and showcase specific pieces when needed.
- Portability: The use of a portfolio makes it convenient to travel with your artwork. You can easily carry your sketches to exhibitions, critiques, or workshops, facilitating sharing and feedback.
Achieving a Gallery Style
- Mount on Foam Boards: For a more polished, professional look, adhere your sketches to foam boards. This gives the artwork a structured appearance and provides a sturdy backing that can be easily displayed.
- Create a Cohesive Theme: When showcasing sketches in a gallery style, ensure that they are related thematically or stylistically. This enhances the overall presentation and captivates viewers with a unified vision.
- Use Display Stands: Consider using display stands for foam-mounted sketches. This will allow you to feature your artwork on tables or shelves, maximizing visibility and accessibility.
Embracing Digital Displays
- Scan Your Artwork: Digitally scanning your sketches preserves their details and allows for high-quality reproduction. This process is crucial for sharing your artwork with a broader audience.
- Share Online: Utilize social media platforms and personal websites to share scanned versions of your artwork. This increases visibility and engagement, attracting a larger audience interested in your creations.
- Create Prints: Explore printing options to produce copies of your sketches. This not only makes artwork accessible for purchase but also allows for gift-giving or personal keepsakes for friends and family, expanding appreciation for your work.
Experiment with different display options to suit your style and space. A well-displayed pencil drawing creates a lasting impression.
Conclusion: Embrace Your Creativity in Flower Drawing
In conclusion, mastering easy pencil flower drawing techniques isn’t just about creating pretty pictures; it’s about embracing your creativity and expressing yourself. By practicing the techniques outlined above, you can refine your abilities and create stunning floral art. Remember to focus on shapes, use the right tools, and always practice.
The journey from a beginner to a skilled artist is gradual. So, don’t rush. Enjoy each moment. By staying consistent and passionate about your drawing, you will undoubtedly see improvement over time.
Start your journey into easy pencil flower drawing today. With time and motivation, you will develop your unique artistic voice while creating mesmerizing flower sketches.