Introduction to Microscope Parts
The journey into the microcosm begins with understanding the essential microscope parts and functions. Each part plays a crucial role in allowing us to observe the tiny wonders that are not visible to the naked eye. Let’s delve into the anatomy of a microscope to better appreciate how these intricate instruments work.
The main components include the eyepiece, objectives, stage, illumination system, focusing mechanism, condenser, diaphragm, and the base and arm. These parts work in unison to magnify and illuminate specimens for detailed study. From the eyepiece, which magnifies the image, to the stage, that holds the slides, every component has a specific purpose.
In the following sections, we will explore each part individually. We’ll learn how they contribute to the magnification and clarity of images. As we discuss these microscope parts and functions, it will become clear how vital each is to the overall operation. Whether you are a student, scientist, or hobbyist, grasping the basics of microscope anatomy will enhance your viewing experience and enable you to use this tool to its full potential.

The Eyepiece: Your Window to the Microcosm
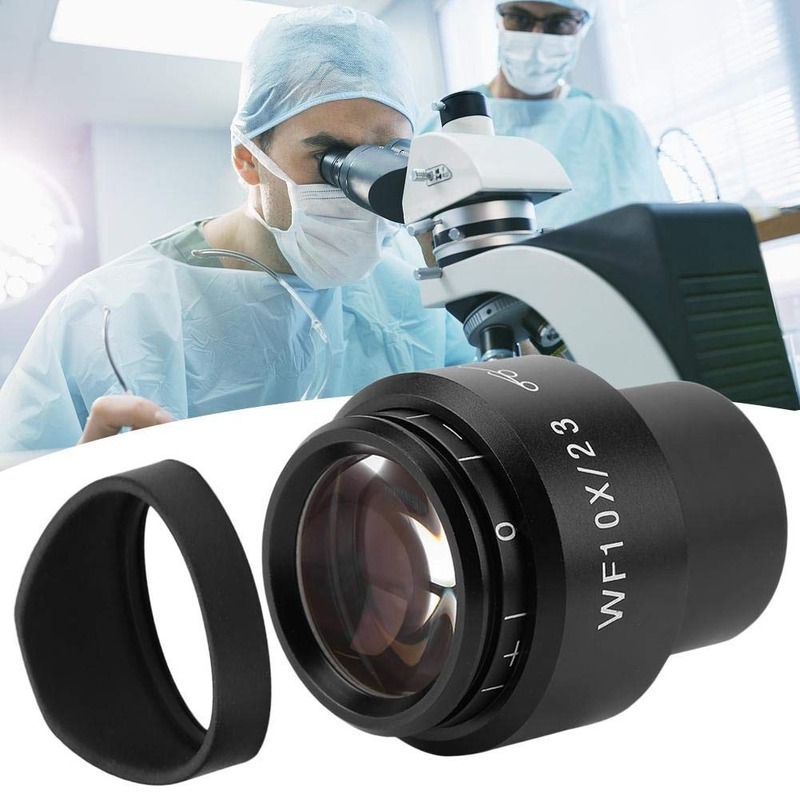
The eyepiece, often called the ocular lens, is where your eye meets the microscope. It’s the portal through which the magnified image of the specimen becomes visible to you. Most eyepieces have a magnification power of 10x, meaning they make the image ten times larger than its actual size.
By peering through the eyepiece, you take the final step in the journey of magnification initiated by the objective lenses below. It’s the uppermost part of the microscope, typically equipped with one or two lenses that further magnify the image formed by the objectives. This dual magnification process is essential for viewing the minute details of your specimen.
Not only does the eyepiece enlarge the image, but it also positions it at a comfortable viewing angle for your eyes. This is achieved through the design of the eyepiece tube, which aligns with the microscope’s optical path. It’s vital to handle the eyepiece with care to prevent smudges or damage that could obscure your view.
Remember, clarity is key when observing through a microscope. A clean, well-adjusted eyepiece can make all the difference in seeing the contrasts and intricacies of the specimen before you. As one of the most significant microscope parts and functions, the eyepiece warrants your full attention to maximize your microscopic explorations.
Objectives Lenses and Magnification Levels
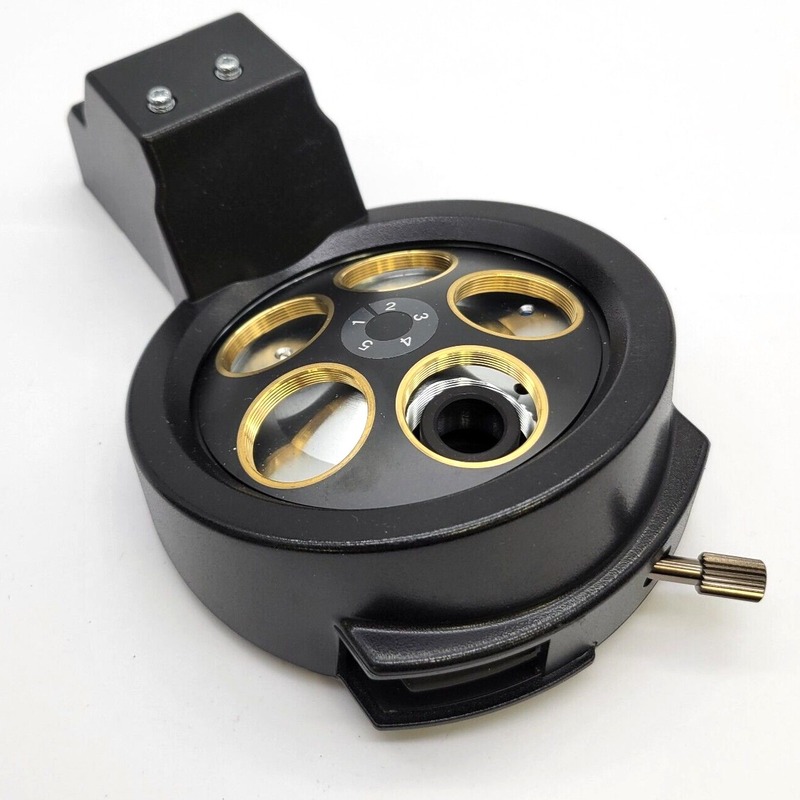
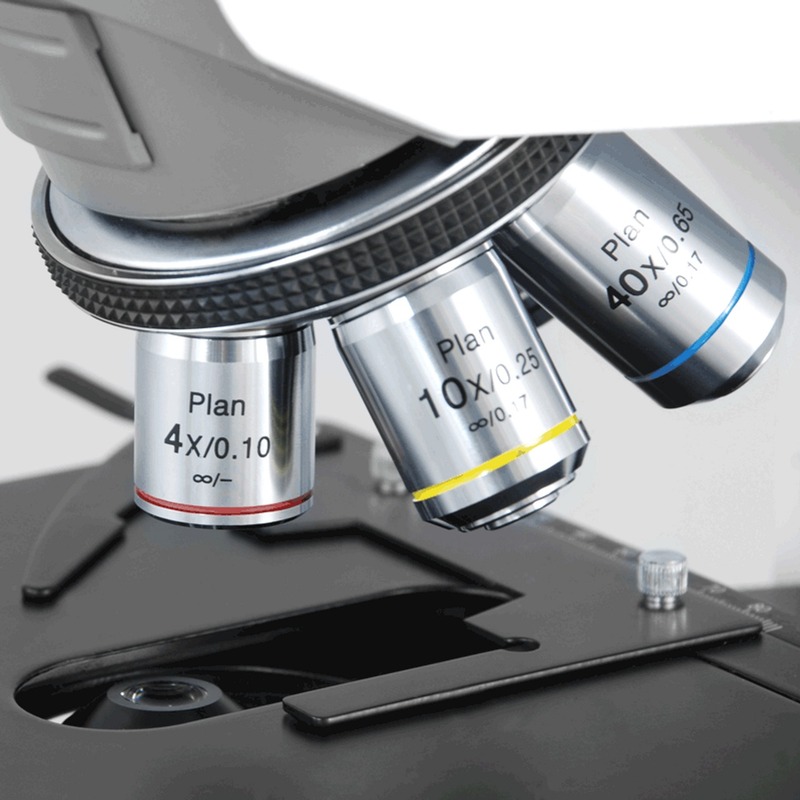
The objective lenses are the microscope’s primary magnifying tool. They sit close to the specimen and work in combination with the eyepiece to enhance the image. The objectives are found on a revolving turret, allowing researchers to switch between different magnification levels quickly.
Most microscopes come with a set of objective lenses, each with a specific magnification power. These typically range from 4x to 100x. When used with an eyepiece of 10x power, this range can offer total magnification from 40x to 1000x. It’s important to note that higher magnification levels require more light and finer focusing to maintain clarity.
For precise observation, the lowest power lens is often used to find the specimen. Once located and centered, you can shift to higher powers for detailed viewing. Remember, as magnification increases, the field of view decreases. So, each lens offers a unique balance between magnification and what you can see.
Here are the common magnification levels for objective lenses:
- 4x lens, often called the scanning objective, for an overview of the specimen.
- 10x lens, also known as the low power objective, provides modest magnification.
- 40x lens, the high power objective, allows for detailed observation.
- 100x oil immersion lens, used with a drop of oil to view at the highest magnifications.
Selecting the right objective lens and understanding the corresponding magnification level is critical. It allows users to adapt to various specimens and achieve optimal resolution. The changing of lenses should be done with precision to maintain the integrity of both the lenses and the slides.
In summary, objective lenses perform the crucial task of magnifying the specimen. With different lenses on the turret, the versatility in observing a range of details becomes possible. Always start with the lowest magnification and work your way up for the best results.
The Stage: Supporting the Slides
The stage is a flat platform that supports the slides holding the specimens. It’s fundamental in keeping the sample stable for observation. Here, you place the glass slide, which contains the tiny world you wish to explore. Precise stage control is vital to achieve a clear focus on the specimen.
Most stages come with clips or mechanical stage controls. Clips are simple holders that keep the slide in place manually. Mechanical stages, however, provide knobs that enable precise movement in horizontal and vertical directions. This allows for meticulous adjustments when aligning and focusing on different parts of the specimen.
For users to engage in thorough examinations, the stage must be made robust and durable. It should withstand frequent adjustments and resist wear from the constant manipulation of slides. Durability ensures longevity and reliability in the repeated use of the microscope.
A stage’s surface is also designed to be straightforward to clean. Regular maintenance of the surface prevents any build-up that could interfere with the examination process. Keeping the stage clean also protects your slides from scratches that could impair visibility.
In summary, the stage is not just a flat area but a critical part of the microscope. It facilitates precise examinations and endures frequent use. Always ensure the stage is well maintained for the clearest view of your microscopic subjects.
Illumination System: Shedding Light on the Subject
The illumination system is like the spotlight for a microscope. It brings light to the specimen, making tiny details visible. This system usually includes a light source and is found beneath the stage. The light source can be a mirror, directing natural light, or an electric bulb providing steady, controllable brightness.
Proper lighting is essential for high-quality image results. The illumination system ensures that the specimen is evenly lit. This reveals the finest details during examination. You want to adjust the light intensity based on the magnification. Too much light can wash out the image, too little can leave it unseen.
Most microscopes have built-in lights, like LED or halogen lamps. LEDs are popular for their longevity and cool temperature. They are energy-efficient and reduce the heat directed at a specimen. This helps to preserve delicate samples.
To maximize the light’s effect, users should clean the light source regularly. Ensure no dust or fingerprints diffuse the light, which could impact image clarity. Be careful to adjust the light intensity slowly. This avoids sudden changes that could strain the eyes.
In conclusion, the illumination system plays a crucial role. It provides the necessary light to see the microscopic world. A well-maintained lighting system ensures a bright and clear view of the specimen. Always check and adjust your lighting to suit your observational needs.

Focusing Mechanism: Fine-tuning Your View
The focusing mechanism is critical for achieving clear, crisp images. It consists of two types of adjustments: coarse and fine focus. These controls allow you to fine-tune the view of your specimen with precision.
The coarse focus knob makes large adjustments, which is useful for getting the specimen into the general field of view. It’s the first knob you’ll use when starting your observations. Turn it slowly and watch as the image begins to appear.
Once you have a rough view, use the fine focus knob for detailed sharpening. This knob adjusts the stage’s height in tiny increments, which helps in bringing the specimen into sharp focus. You’ll want to make these adjustments slowly to avoid overshooting the point of clearest visibility.
Keep in mind the following when using the focusing mechanism:
- Always start with the coarse adjustment before moving to the fine focus.
- When using high magnification, rely more on the fine focus to prevent damage to slides.
- Be mindful to not push the lens into the slide as it may break the glass.
- Periodic checks and maintenance are necessary to keep the knobs moving smoothly.
In essence, the focusing mechanism is essential for viewing details. By mastering the use of both coarse and fine focus knobs, you enhance your ability to see the intricacies of the microscopic world.
Condenser and Diaphragm: Controlling Light Quality
The condenser and diaphragm are key to managing light in microscopy. They refine how light interacts with specimens. Below the stage, the condenser collects and focuses light onto the specimen. This makes sure that light is directed where it is most needed for clear observation.
Most condensers have lenses, much like the objective lenses above. These lenses concentrate the illumination, enhancing the details visible in your view. A well-adjusted condenser can make a significant difference in image quality. To adjust it, use the knobs found near the base of the microscope.
Above the condenser sits the diaphragm. A diaphragm works like the aperture on a camera. It controls the amount of light that passes through the specimen. By adjusting the diaphragm, you can change the contrast and resolution of the image.
There are two types of diaphragms: iris and disk. Iris diaphragms have overlapping plates. These can be adjusted to fine-tune the light’s diameter. Disk diaphragms have different sized holes. You can rotate the disk to select the amount of light you need.
To get the best out of your microscope, learn how to use the condenser and diaphragm together:
- Use the condenser to gather and focus light.
- Adjust the diaphragm to control the light intensity and contrast.
- Experiment to find the right balance for your specimen.
- Always remember to adjust these parts carefully to avoid strain on the eyes.
In essence, the condenser and diaphragm shape the light that brings life to microscopic imagery. They are essential microscope parts and functions that help you see fine details with clarity. By mastering their use, you can significantly improve your observations and learnings.
The Base and Arm: The Microscope’s Framework
The base and arm serve as the skeleton of a microscope. They give the microscope stability and structure. The base is often heavy. This prevents the microscope from toppling over during use. It acts as the foundation, supporting all other microscope parts and functions.
The arm connects the base to the upper parts of the microscope. Usually, it also acts as a handle. With this handle, users can safely carry and move the microscope. It is essential to grip the microscope by the arm when moving it. This prevents damage and maintains alignment of the delicate internal optics.
User comfort is vital during lengthy observations. The arm’s design allows users to rest their hands while making adjustments. This can help to reduce fatigue. The arm’s position is also strategic. It gives access to the focusing knobs and stage controls without stress.
Keep the following in mind:
- Always support the base and arm when carrying the microscope.
- Avoid swinging the microscope by the arm as it may cause damage.
- Regularly check the arm’s screws and tighten them if they become loose.
In conclusion, the base and arm are not just parts of the microscope’s frame. They are crucial for its secure and ergonomic use. Handle with care and ensure their maintenance for the best microscopy experience.
Maintenance and Care for Your Microscope
Maintaining your microscope ensures its accuracy and longevity. Just like any precision instrument, microscopes require regular care. Here’s how you can keep your microscope in top condition:
- Clean Regularly: Remove dust and oil from lenses with lens paper or a soft, lint-free cloth. Avoid touching the glass with your fingers to prevent smudges.
- Handle with Care: When moving your microscope, grasp the arm with one hand and support the base with the other. This prevents accidental drops and misalignment.
- Check Components: Examine the microscope parts and functions periodically. Make sure all components, like the eyepiece and objectives, are tightly screwed in and aligned.
- Store Properly: Cover the microscope with a dust cover when not in use. Store it in a dry, cool place to avoid moisture buildup and overheating.
- Avoid Harsh Chemicals: Use only approved cleaning solvents for your microscope. Harsh chemicals can damage lens coatings and other delicate parts.
- Tighten Loose Parts: If you find any loose screws or parts, tighten them carefully. However, avoid over-tightening which might strip the threads.
Maintaining your microscope is not just about cleaning and tightening. It’s also about being mindful of how you use it. Always make adjustments, like focusing and changing lenses, with gentle precision. This reduces wear and tear and helps retain the microscope’s calibration.
In summary, creating a routine for microscope maintenance will pay off in reliable performance. Take the time to care for your microscope parts and functions properly. This will enhance your overall experience and protect your investment for future exploration.

Conclusion: Maximizing Microscope Utility
As we wrap up our guide on microscope parts and functions, it’s clear that each component plays a vital role in maximizing the usefulness of this powerful tool. From the intricate eyepiece to the sturdy base, knowing how to handle and care for each part will drastically enhance your microscopic studies. Remember these key pointers for maximum utility:
- Start with a low magnification level and gradually increase as needed to observe finer details.
- Regularly check and adjust the illumination to prevent glare and ensure clarity.
- Fine-tune your specimen’s focus with the coarse and fine adjustments for a sharp image.
- Use the condenser and diaphragm in tandem to control light quality and contrast.
- Carefully maintain the microscope’s structural integrity by handling the base and arm properly.
By following these tips, you’ll not only prolong the life of your microscope but also improve the quality of your observations. Whether for education, research, or simply the joy of exploring the microscopic world, the right knowledge of microscope parts and their functions is essential. Keep your instrument well-maintained and it will serve as a reliable window to the unseen wonders of our universe for many years to come.


